
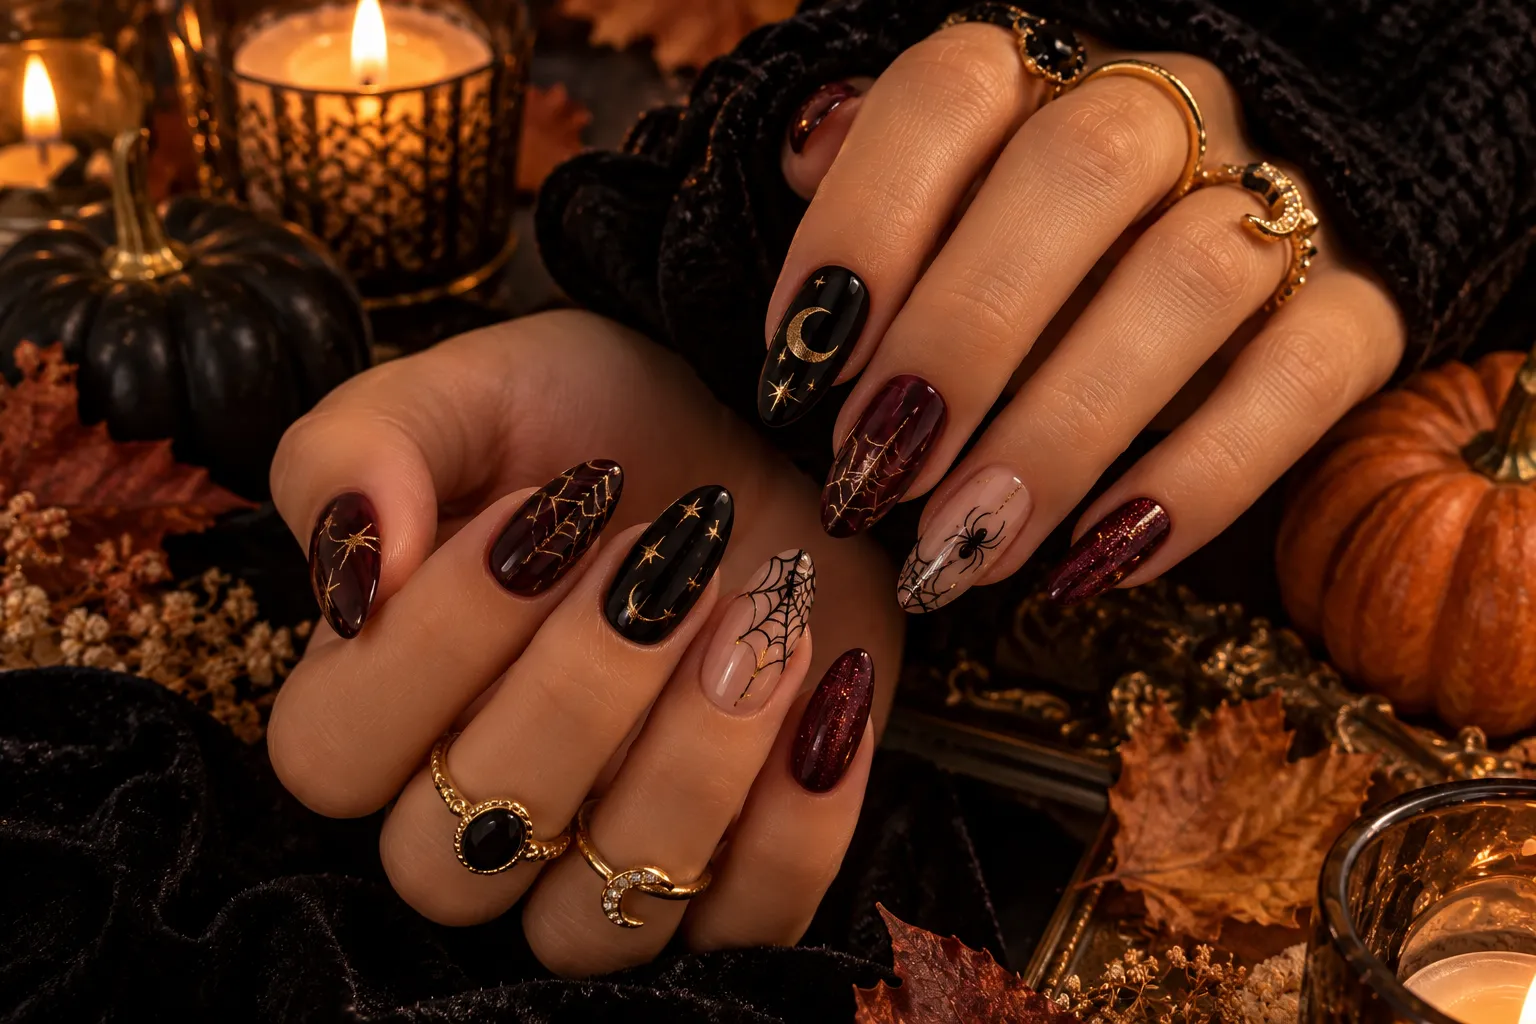
Halloween nails do not have to be overly spooky, dark, or covered in cartoon ghosts. If you love a more sophisticated aesthetic, witchy Halloween nail art is the perfect way to bring a little mystery, magic, and autumn atmosphere to your manicure.
Think deep black, burgundy, plum, espresso brown, smoky gray, metallic gold, celestial details, tiny moons, stars, crystals, spiderwebs, and elegant witch-inspired symbols. These designs can feel mysterious and Halloween-ready while still looking polished enough for everyday wear.
In this guide, you’ll find 25 witchy Halloween nail ideas, along with color combinations, easy DIY techniques, styling tips, nail-shape recommendations, and ways to make your manicure look more elegant and expensive.
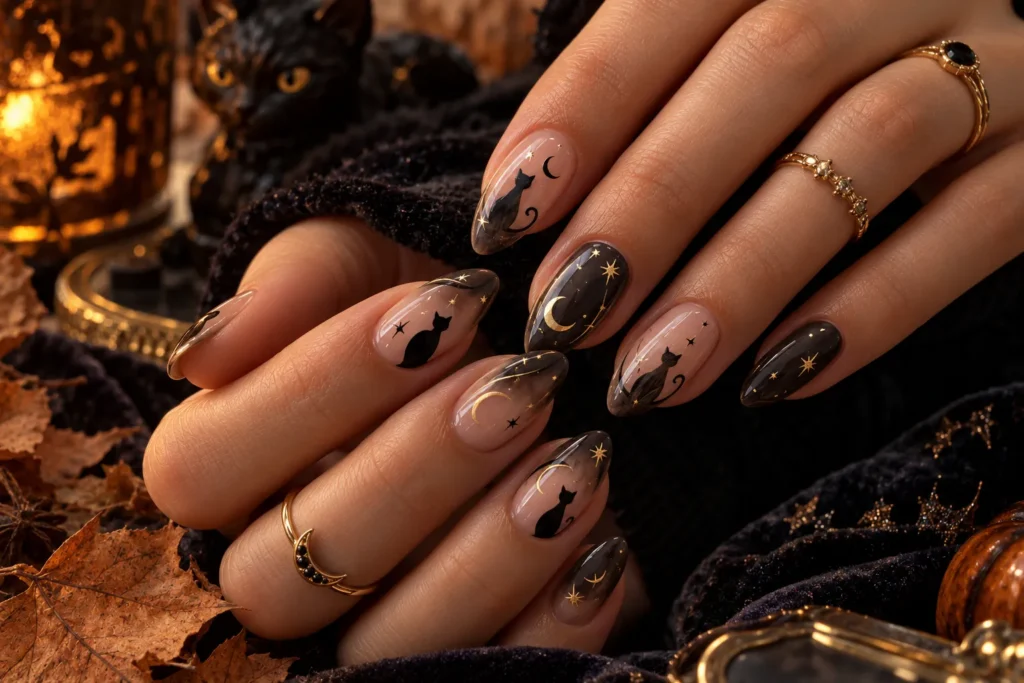
1. Black Cat Witchy Nails
Black cats are one of the easiest ways to create a Halloween manicure without making it look childish.
Start with a sheer nude, milky beige, or smoky gray base. Add tiny black cat silhouettes to one or two accent nails, keeping the rest of the manicure minimalist.
For an elevated look, add a tiny crescent moon or a few gold stars beside the cat.
Best colors:
- Black
- Soft nude
- Charcoal
- Antique gold
Best nail shapes: almond, oval, or short squoval.
2. Midnight Moon Halloween Nails
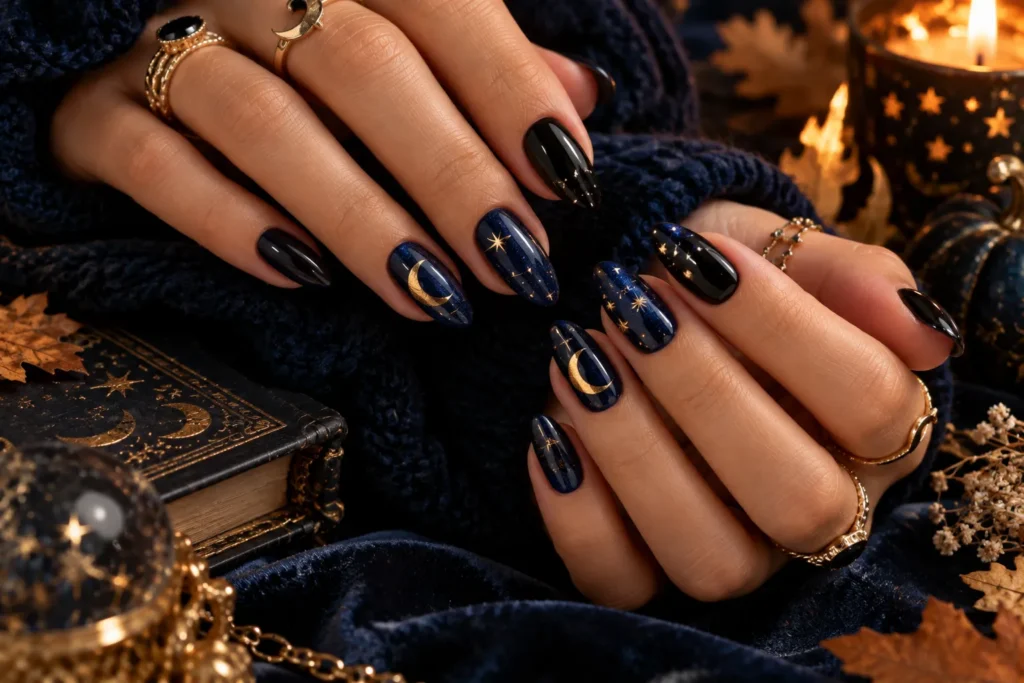
A dark midnight manicure with crescent moons is perfect if you want something genuinely witchy.
Use a deep navy, black, or midnight blue base. Paint thin crescent moons using metallic gold or silver polish.
For extra dimension, add tiny stars and scattered dots around the moons.
The secret is to keep the celestial details delicate rather than filling every nail with artwork.
3. Witchy Black French Tips
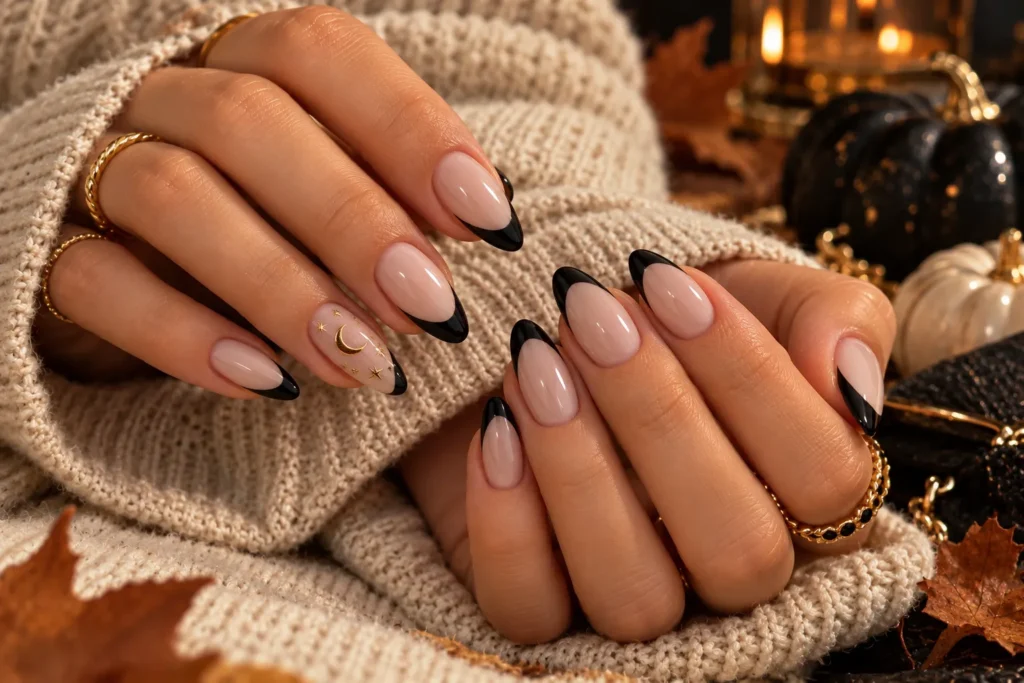
Classic French tips get a Halloween transformation with black instead of white.
Begin with a sheer pink or nude base and create thin black French tips. Add one accent nail with a tiny star, moon, spiderweb, or crystal detail.
This is one of the easiest options for someone who wants witchy nails that still look elegant and wearable.
For a more dramatic version, use a glossy black tip with a subtle chrome finish.
4. Burgundy Witch Nails
Black isn’t the only color that works for a witchy manicure.
Deep burgundy creates a warmer, more luxurious Halloween look. Try a glossy burgundy manicure with one or two nails decorated with black stars, moons, or delicate line art.
You can also combine burgundy with chocolate brown and muted gold.
This palette works particularly well throughout October because it feels both autumnal and mysterious.
5. Celestial Witchy Nails
Create a miniature night sky across your manicure.
Use a deep charcoal, navy, or black background and decorate it with:
- Crescent moons
- Tiny stars
- Planets
- Dots
- Sparkles
- Constellation-inspired lines
You do not need to make every nail identical. A mixed celestial manicure often looks more sophisticated.
6. Black and Gold Witchy Nails
Black and gold instantly create a more luxurious Halloween aesthetic.
Paint most nails glossy black and use metallic gold for tiny moons, stars, lines, or geometric details.
Another option is a nude base with black French tips and tiny gold celestial accents.
Styling tip: Choose antique or champagne gold if you want a softer look rather than bright yellow gold.
7. Spiderweb French Tip Nails
Spiderwebs can look surprisingly elegant when they’re kept small and precise.
Start with a nude or transparent base. Create black French tips, then add a delicate spiderweb pattern to one or two accent nails.
For a glamorous Halloween look, add a tiny rhinestone at the center of the web.
8. Witch Hat Accent Nails
You don’t need a witch hat on every nail.
Instead, use a neutral base and create a miniature black witch hat on one accent nail.
Pair it with:
- Tiny stars
- A crescent moon
- Black French tips
- Burgundy nails
- Gold details
This creates a recognizable Halloween manicure while keeping the overall design sophisticated.
9. Spellbook Inspired Nails
For something different, take inspiration from old spellbooks.
Use a warm brown, espresso, or deep burgundy base. Add tiny gold symbols, decorative borders, or abstract handwritten-style markings.
You can create the appearance of an antique magical book without copying any specific text.
This design works beautifully with a matte top coat.
10. Mystical Eye Halloween Nails
A stylized mystical eye can become the focal point of a witchy manicure.
Try a nude or dark base with one accent nail featuring a simple eye surrounded by tiny stars or curved lines.
For a more luxurious effect, use metallic gold details.
Keep the artwork small and clean so the manicure remains elegant rather than theatrical.
11. Black Moon Nails
Combine black polish with different moon phases.
Paint each nail in a dark shade and add tiny crescent or half-moon shapes using nude, silver, or gold polish.
You can also create a moon-phase sequence across four or five nails.
This design looks especially beautiful on almond-shaped nails.
12. Smoky Purple Witch Nails
Purple is one of the most underrated Halloween colors.
Choose a dark plum, eggplant, or smoky violet shade and pair it with black details.
Add tiny stars, moons, spiderwebs, or glitter to create a magical atmosphere.
For an especially elegant finish, use a glossy plum base with subtle silver accents.
13. Matte Black Witch Nails
A matte finish immediately changes the personality of black polish.
Paint your nails matte black and add glossy black details on top.
For example, create:
- Glossy spiderwebs
- Shiny crescent moons
- Glossy stars
- Subtle swirls
- Minimalist witch symbols
Because the colors are almost identical, the artwork appears only when the light hits the nails.
14. Crystal Ball Inspired Nails
Create a miniature fortune-telling aesthetic with smoky gray, purple, silver, and black.
Use translucent or metallic finishes to imitate the mysterious appearance of a crystal ball.
You can add tiny stars or swirling lines around one accent nail.
This design is especially effective when paired with a glossy top coat.
15. Witchy Green Halloween Nails
Deep forest green and emerald can create a beautiful alternative to traditional black.
Try:
Forest green + black + gold
or
Emerald + nude + antique gold
Add tiny leaves, moons, stars, or mystical symbols.
The result feels witchy while also connecting beautifully with autumn foliage.
16. Poison Potion Nails
Create a miniature potion-inspired manicure using deep green, purple, black, and metallic accents.
You can paint tiny potion bottles on one or two nails while keeping the remaining nails a solid dark shade.
For a more subtle version, use abstract swirls and metallic dots instead of detailed bottles.
17. Gothic Lace Halloween Nails
Lace-inspired nail art creates a romantic witch aesthetic.
Start with a nude, burgundy, or black base. Add delicate black lace patterns using fine nail-art brushes or stamping plates.
This style works especially well for longer almond or coffin nails.
For a dramatic evening manicure, add a small amount of metallic shimmer.
18. Witchy Ombre Nails
Instead of choosing one Halloween shade, blend several together.
Try an ombre combination such as:
Black → Burgundy → Plum
or
Black → Espresso → Caramel
A smoky gradient creates an atmospheric Halloween effect without requiring complicated nail art.
Add a few tiny stars or a crescent moon to finish the look.
19. Haunted Forest Nails
Bring an autumn forest to your manicure.
Use a dark charcoal, brown, or burgundy background and add silhouettes of:
- Bare branches
- Crescent moons
- Tiny bats
- Stars
- Small leaves
You can create the entire scene on one accent nail while keeping the others minimalist.
20. Witchy Spider Nails
A tiny spider can look surprisingly cute and sophisticated.
Use a sheer nude base and paint a small black spider near the cuticle or side of the nail.
Add an ultra-thin web extending toward the tip.
For a glamorous version, replace the spider’s body with a tiny rhinestone.
21. Halloween Stars and Sparkles
Sometimes the simplest manicure is the most wearable.
Use black, burgundy, chocolate brown, or deep plum as the main color and add tiny metallic stars.
Mix different star sizes for a celestial effect.
This is an excellent option if you want a Halloween manicure that can transition easily into November.
22. Witchy Checkerboard Nails
Give the classic checkerboard manicure a Halloween twist.
Instead of traditional black and white, use combinations such as:
- Black + burgundy
- Black + plum
- Chocolate + cream
- Forest green + black
Add one celestial accent nail to make the manicure feel more magical.
23. Dark Floral Witchy Nails
Florals do not have to be limited to spring.
Use black, burgundy, deep purple, and dark green to create a mysterious botanical manicure.
Try tiny roses, vines, dried flowers, or abstract leaves against a nude or dark background.
A matte finish makes the design feel particularly romantic.
24. Gothic Chrome Witch Nails
Chrome details can make Halloween nails look incredibly modern.
Start with a black, charcoal, or deep plum base and add silver chrome details.
Try:
- Chrome moons
- Chrome stars
- Metallic French tips
- Abstract chrome lines
- Silver spiderwebs
This is a great choice if you like Halloween designs but prefer contemporary nail trends.
25. Ultimate Witchy Halloween Nail Collection
If you cannot choose one theme, combine several subtle elements.
For example:
Thumb: glossy black
Index: burgundy French tip
Middle: crescent moon
Ring: delicate spiderweb
Pinky: tiny stars
Keep the color palette consistent so the different designs feel intentional.
A combination of black, burgundy, smoky plum, nude, and antique gold creates an especially sophisticated result.
Witchy Halloween Nail Color Combinations
Choosing the right color palette can completely change the mood of your manicure.
| Color Combination | Overall Mood |
|---|---|
| Black + Gold | Luxurious and mysterious |
| Burgundy + Black | Romantic and dramatic |
| Plum + Silver | Magical and elegant |
| Forest Green + Black | Enchanted forest |
| Chocolate + Cream | Warm and autumnal |
| Navy + Gold | Celestial |
| Charcoal + Silver | Moody and modern |
| Black + Nude | Minimalist and sophisticated |
| Emerald + Burgundy | Rich and dramatic |
| Espresso + Caramel | Cozy witchy autumn |
How to Create Witchy Halloween Nails at Home
You don’t need professional nail-art equipment to recreate many of these looks.
Step 1: Prepare Your Nails
Remove old polish and gently shape your nails.
Push back the cuticles carefully and lightly buff the surface if needed.
Apply a base coat before your color.
Step 2: Choose Your Main Palette
Limit yourself to approximately three or four main colors.
For example:
- Black
- Burgundy
- Nude
- Gold
Using too many unrelated colors can make an intricate manicure look less cohesive.
Step 3: Apply Thin Layers
Apply two thin layers of your primary polish rather than one thick coat.
Allow each layer to dry properly before adding artwork.
Step 4: Add the Witchy Details
Use a fine nail-art brush or dotting tool for:
- Stars
- Moons
- Spiderwebs
- Tiny dots
- Branches
- Swirls
For beginners, start with simple shapes rather than detailed illustrations.
Step 5: Seal Everything
Once the artwork is completely dry, apply a high-quality top coat.
This protects the design and gives your manicure a professional finish.
Easy Witchy Nail Art Tutorials for Beginners
Easy Crescent Moon
- Apply your base color.
- Let it dry.
- Use a small dotting tool to create a gold or silver circle.
- Slightly overlap the circle with your background polish.
- The remaining shape becomes a crescent.
- Add two or three tiny stars beside it.
Simple Spiderweb
- Start with a nude or black base.
- Draw three or four thin lines radiating from one point.
- Connect the lines using small curved strokes.
- Keep the lines thin.
- Finish with a glossy top coat.
Minimalist Witch Hat
- Use a fine brush and black polish.
- Draw a small triangle.
- Add a curved brim underneath.
- Add a tiny gold buckle if desired.
- Place the design on one accent nail.
Best Nail Shapes for Witchy Halloween Designs
Almond Nails
Almond nails provide plenty of space for celestial and botanical details while maintaining an elegant silhouette.
They’re particularly beautiful with:
- Moon phases
- Fine-line artwork
- Gothic florals
- Black French tips
Coffin Nails
Long coffin nails create a dramatic canvas for detailed Halloween art.
They work well for:
- Spiderwebs
- Spellbook designs
- Gothic lace
- Chrome
- Full Halloween scenes
Short Squoval Nails
If you prefer practical nails, short squoval nails can still look incredibly witchy.
Choose minimalist designs such as:
- Tiny moons
- Black French tips
- Small stars
- Burgundy polish
- Tiny spiders
Oval Nails
Oval nails are perfect for a softer witchy aesthetic.
Pair them with muted colors and delicate celestial artwork for a romantic result.
How to Make Halloween Nails Look More Elegant
The difference between a sophisticated Halloween manicure and an overly busy one often comes down to restraint.
Keep the Color Palette Limited
Choose two or three main shades and one metallic accent.
Use Negative Space
A nude or transparent background gives detailed artwork room to breathe.
Mix Finishes
Try combining:
- Matte black
- Glossy black
- Metallic gold
- Chrome
- Shimmer
Different finishes can make a simple manicure look much more interesting.
Use Accent Nails
You don’t need Halloween art on every finger.
One or two detailed accent nails can be more sophisticated than ten highly decorated nails.
Choose Fine Lines
Thin spiderwebs, tiny stars, and delicate moons generally create a more polished appearance than thick artwork.
Witchy Halloween Nails for Short Nails
Short nails are ideal for minimalist Halloween designs.
Try:
- Black micro-French tips
- Burgundy solid nails
- Tiny gold stars
- Mini crescent moons
- One small spiderweb
- Chocolate brown polish
- Black and nude color blocking
- Tiny witch hats
Keep the artwork toward the center or upper portion of the nail so the design does not become visually crowded.
Witchy Halloween Nails for Long Nails
Long nails give you more room for detailed artwork.
Consider:
- Gothic lace
- Celestial scenes
- Haunted forests
- Spellbook-inspired artwork
- Full spiderweb designs
- Chrome moons
- Dark floral compositions
Long almond and coffin shapes are particularly effective for dramatic Halloween manicures.
What to Wear With Witchy Halloween Nails
Your outfit can either emphasize or soften your manicure.
For a sophisticated Halloween look, pair dark nails with:
- Black knitwear
- Burgundy sweaters
- Chocolate brown coats
- Dark denim
- Black dresses
- Leather accessories
- Gold jewelry
- Ankle boots
For a softer aesthetic, combine witchy nails with cream, beige, camel, or dusty rose clothing.
The contrast between soft clothing and dark nails can look especially elegant.
Witchy Halloween Nail Accessories
Small accessories can enhance the overall Halloween aesthetic.
Consider:
- Gold rings
- Moon-shaped jewelry
- Crystal-inspired earrings
- Dark gemstone rings
- Vintage-style jewelry
- Black hair accessories
- Burgundy handbags
The goal is coordination rather than matching every accessory exactly.
How to Make Your Halloween Manicure Last Longer
Proper preparation can make a significant difference.
Clean the nail plate: Remove oils before applying polish.
Use a base coat: This improves adhesion and can help prevent staining.
Seal the tips: Run your top coat across the free edge of each nail.
Avoid excessive water exposure: Prolonged soaking can weaken polish adhesion.
Wear gloves: Use gloves when cleaning or washing dishes.
Moisturize regularly: Cuticle oil can help keep the surrounding skin looking healthy.
Frequently Asked Questions
What colors are best for witchy Halloween nails?
Black, burgundy, plum, deep green, chocolate brown, charcoal, navy, metallic gold, and silver are excellent choices for witchy Halloween nails.
Can witchy nails be elegant?
Absolutely. Minimalist moons, fine-line spiderwebs, black French tips, subtle celestial details, and dark floral designs can create a sophisticated Halloween manicure.
What are the easiest witchy nail designs for beginners?
Black French tips, tiny stars, crescent moons, dots, simple spiderwebs, and solid burgundy nails are among the easiest options.
Are witchy Halloween nails suitable for short nails?
Yes. Short nails look beautiful with minimalist celestial details, dark French tips, tiny spiders, burgundy polish, and small gold accents.
What nail shape works best for Halloween nail art?
Almond, coffin, oval, and squoval shapes can all work. The best choice depends on your preferred length and lifestyle.
Can I create witchy nail art without nail-art tools?
Yes. A toothpick, small dotting tool, or fine makeup brush can work for simple designs, although dedicated nail-art brushes provide better control.
How can I make Halloween nails less spooky?
Use nude backgrounds, burgundy, chocolate brown, muted plum, delicate gold details, and minimalist celestial designs. Avoid large graphic images if you want a softer look.
Final Thoughts
Witchy Halloween nails are all about creating a mood. You can go dramatic with black chrome, gothic lace, and detailed spiderwebs, or keep things subtle with a nude base, tiny crescent moons, and delicate gold stars.
The most versatile combinations tend to use black, burgundy, plum, chocolate brown, deep green, nude, and metallic accents. From short minimalist nails to long dramatic almond designs, there is plenty of room to personalize the look.
Whether you’re heading to a Halloween party or simply want an autumn manicure with a little extra mystery, these 25 witchy Halloween nail ideas give you plenty of inspiration to create a magical October look.