
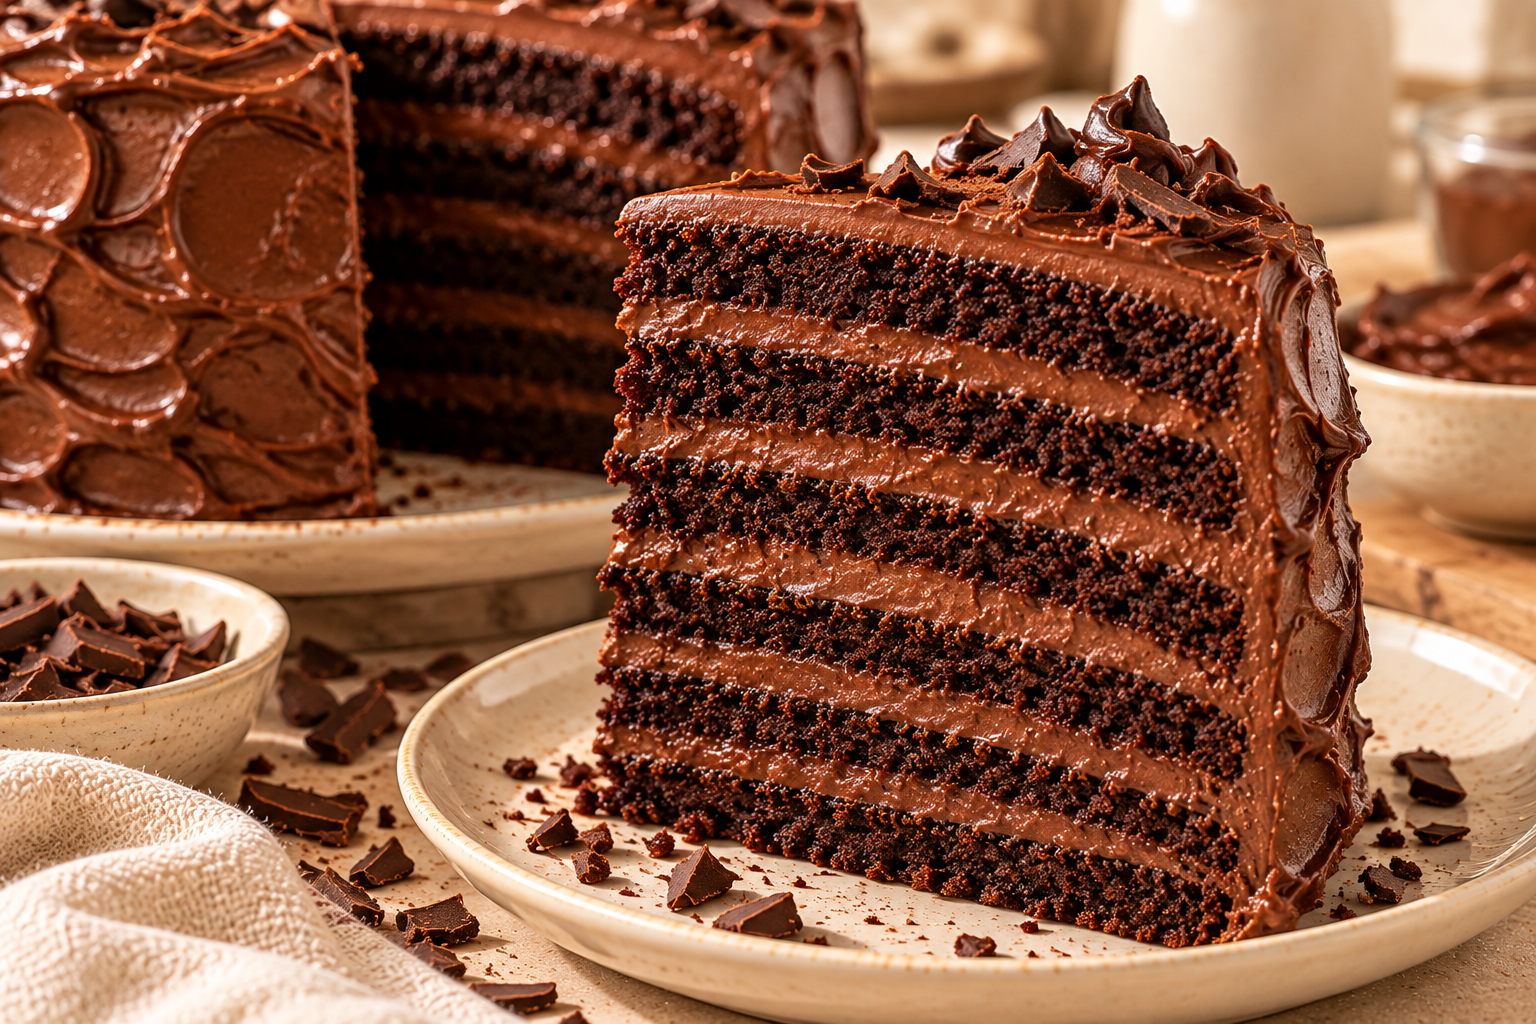
If you are a true chocolate lover, this 6-Layer Chocolate Fudge Cake is the ultimate homemade dessert. With six rich chocolate cake layers and a thick, fudgy chocolate icing, every slice delivers an indulgent combination of moist cake, deep cocoa flavor, and smooth chocolate frosting.
This impressive layer cake is perfect for birthdays, celebrations, holidays, or any occasion that calls for a spectacular chocolate dessert. Although it looks like something from a professional bakery, you can make it at home using everyday baking ingredients, a few mixing bowls, and a little patience.
The secret to this cake is the combination of buttermilk, vegetable oil, and hot water or coffee. These ingredients help create a tender chocolate crumb with plenty of moisture. Between the layers, a rich cocoa icing adds a fudgy texture and an intense chocolate flavor that makes this cake especially satisfying.
If you are looking for a homemade chocolate cake that looks impressive and tastes even better, this six-layer version is worth trying.
Why You’ll Love This 6-Layer Chocolate Fudge Cake
- Six beautiful layers: A tall, impressive cake that makes a stunning centerpiece for celebrations.
- Deep chocolate flavor: Unsweetened cocoa powder creates a rich, classic chocolate taste.
- Moist cake texture: Buttermilk and vegetable oil help keep the sponge soft and tender.
- Rich fudge icing: The chocolate icing provides a thick, smooth filling and coating.
- Perfect for special occasions: Serve it at birthdays, dinner parties, holidays, and family gatherings.
- Make-ahead friendly: Bake the cake layers in advance and assemble the cake when you are ready.
Ingredients for 6-Layer Chocolate Fudge Cake
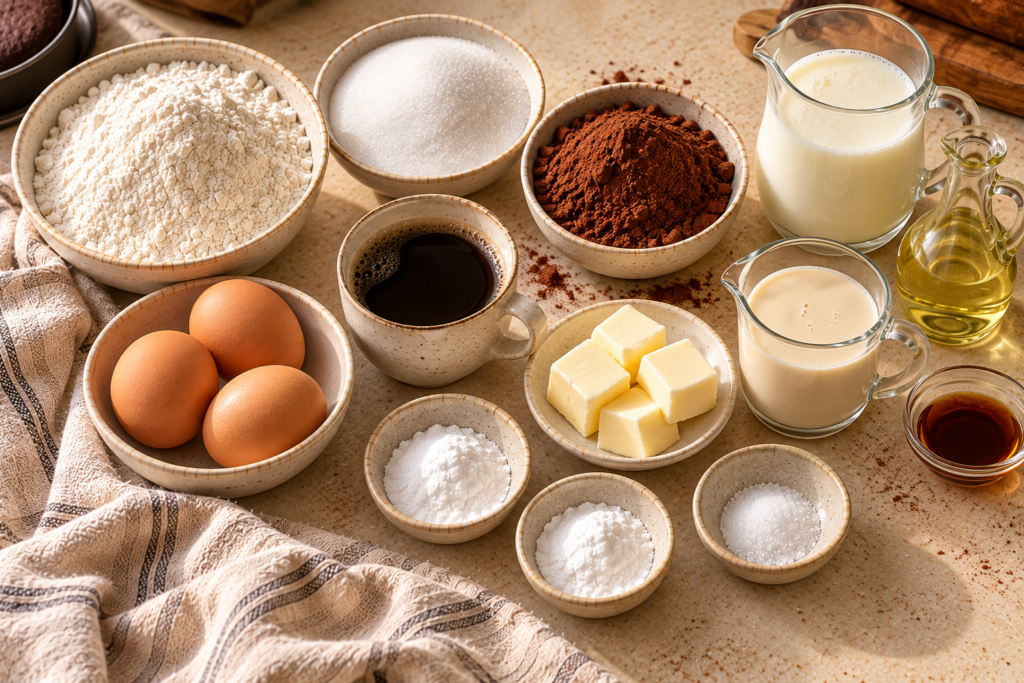
The ingredients below make one tall layer cake. The exact number of layers and final height will depend on your pan sizes and how you divide the baked cake.
For the Chocolate Cake
- 3 cups all-purpose flour (375 g)
- 2½ cups granulated sugar (500 g)
- 1 cup unsweetened cocoa powder (85–100 g)
- 2 teaspoons baking soda
- 1 teaspoon baking powder
- 1 teaspoon salt
- 3 large eggs, at room temperature
- 1½ cups buttermilk (360 ml)
- 1½ cups hot water or hot coffee (360 ml)
- ¾ cup vegetable oil (180 ml)
- 2 teaspoons vanilla extract
For the Fudgy Chocolate Icing
- 2 cups granulated sugar (400 g)
- 1 cup unsweetened cocoa powder (85–100 g)
- 1 cup evaporated milk (240 ml)
- ½ cup unsalted butter (113 g)
- 1 teaspoon vanilla extract
- ¼ teaspoon salt
Ingredient Notes
Unsweetened cocoa powder: Use unsweetened cocoa rather than sweetened drinking chocolate. Natural cocoa powder works well with baking soda, while Dutch-process cocoa may behave differently depending on its acidity.
Buttermilk: Buttermilk adds moisture and acidity, which helps the baking soda work effectively. If you cannot find buttermilk, you can make a substitute by adding 1 tablespoon of lemon juice or white vinegar to a measuring cup, filling it with milk to 360 ml, and letting it stand for about 5–10 minutes.
Hot water or coffee: Hot liquid helps disperse the cocoa powder and intensify the chocolate flavor. Coffee can deepen the chocolate taste without necessarily making the cake taste strongly of coffee.
Vegetable oil: Oil helps the cake remain moist even after refrigeration. Use a neutral-flavored oil such as sunflower or canola oil.
Evaporated milk: This ingredient gives the fudge icing a creamy consistency. It is different from sweetened condensed milk, which contains added sugar and would change the sweetness and texture.
How to Make 6-Layer Chocolate Fudge Cake
Step 1: Prepare the Cake Pans
Preheat your oven to 175°C (350°F).
Grease and line six small round cake pans if you have them. Alternatively, prepare two or three round pans and bake the batter in batches, then divide the cooled cakes horizontally to create six layers.
For a tall cake, use pans with enough depth and avoid filling them excessively. The batter expands as it bakes, so leave room for the cake to rise.
Step 2: Mix the Dry Ingredients
In a large mixing bowl, whisk together the flour, granulated sugar, cocoa powder, baking soda, baking powder, and salt.
Break up any cocoa lumps before continuing. Evenly distributed dry ingredients help the cake bake consistently and reduce the risk of pockets of baking soda or cocoa in the finished crumb.
Step 3: Combine the Wet Ingredients
In a separate bowl, whisk the eggs, buttermilk, vegetable oil, and vanilla extract until smooth.
Make sure the eggs are at room temperature if possible. This helps them combine more easily with the other ingredients.
Step 4: Make the Chocolate Batter
Add the wet mixture to the dry ingredients and stir until the flour is mostly incorporated.
Gradually pour in the hot water or hot coffee while mixing carefully. The batter will become quite thin, which is normal for this style of moist chocolate cake.
Avoid vigorous or prolonged mixing once the flour has been added. Mix only until the ingredients are evenly combined.
Step 5: Divide the Batter
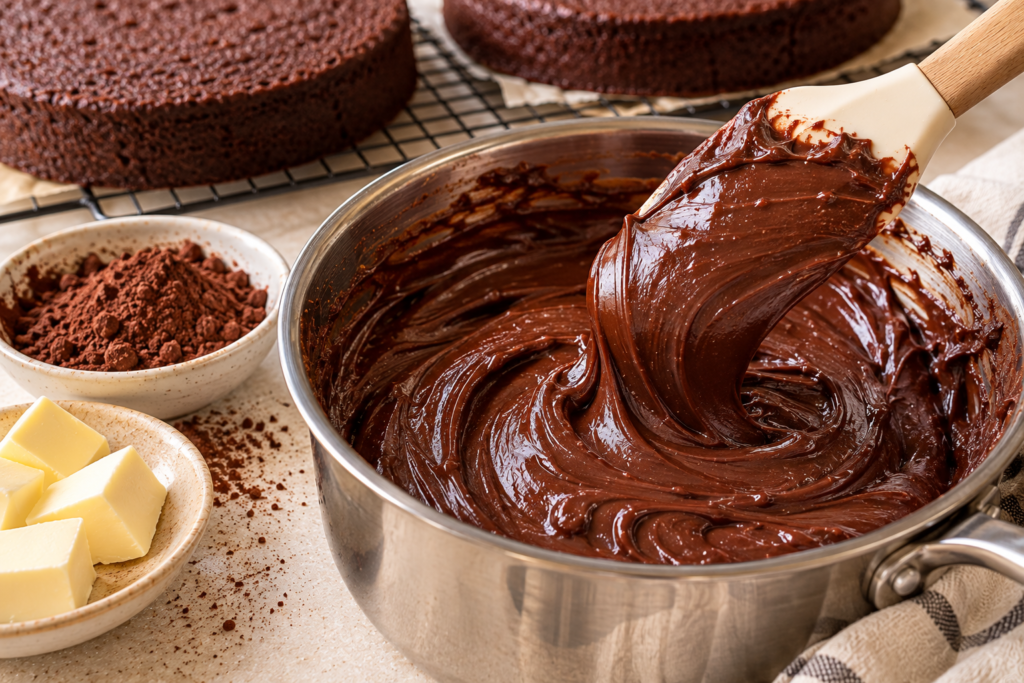
Divide the batter evenly among the prepared pans. If you are baking in batches, keep the remaining batter covered at room temperature and bake it promptly.
For the most consistent layers, use a kitchen scale to divide the batter by weight. Even layers will bake at similar rates and make the final cake easier to assemble.
Step 6: Bake the Cake Layers
Bake the layers at 175°C (350°F). Thin layers may take approximately 15–22 minutes, while thicker layers may need around 25–35 minutes. Actual baking time depends on the pan size and the depth of the batter.
Begin checking early. Insert a toothpick into the center of a layer; it should come out without wet batter, although a few moist crumbs are fine.
Do not rely on the baking time alone. Remove each layer once the center is set to help preserve the cake’s moisture.
Step 7: Cool the Cake
Let the cakes rest in their pans for about 10–15 minutes before carefully turning them out onto wire racks.
Allow them to cool completely before adding the icing. Warm cake can melt the frosting and cause the layers to slide.
If necessary, level the tops with a serrated knife once the cakes are cool. If you baked fewer, thicker cakes, slice them horizontally into six even layers using a long serrated knife and a gentle sawing motion.
How to Make the Fudgy Chocolate Icing
Step 8: Combine the Cocoa and Sugar
In a medium saucepan, combine the granulated sugar and cocoa powder. Whisk them together until no large cocoa lumps remain.
This helps the cocoa distribute evenly throughout the icing and creates a smoother final texture.
Step 9: Add the Evaporated Milk and Butter
Pour in the evaporated milk and add the unsalted butter and salt.
Place the saucepan over medium heat and stir gently until the butter melts and the mixture becomes smooth.
Keep stirring around the bottom and corners of the saucepan to prevent the sugar and cocoa from sticking.
Step 10: Cook Until Thick and Glossy
Bring the mixture to a gentle simmer, stirring frequently. Continue cooking until it thickens into a smooth, glossy chocolate icing.
The exact cooking time will depend on the saucepan and heat level. Avoid using excessively high heat, which can scorch the cocoa or cause the mixture to thicken unevenly.
The icing will become thicker as it cools. If you have a thermometer, a controlled cooking process can help produce a more consistent result, but visual consistency is also important.
Step 11: Add the Vanilla
Remove the saucepan from the heat and stir in the vanilla extract.
Allow the icing to cool, stirring occasionally. It should become thick enough to spread while remaining soft and fudgy.
If it becomes too firm, warm it gently and stir until spreadable. If it is too runny, allow more cooling time before using it.
How to Assemble the Six Layers
Step 12: Prepare the First Layer
Place one completely cooled cake layer on a cake board or serving plate.
Spread a thin, even layer of chocolate icing over the top. Keep the icing level so the finished cake does not lean.
Step 13: Stack the Remaining Layers
Place the second cake layer on top and press gently to secure it.
Repeat the process with the remaining layers, spreading icing between each one. Check the cake from the side as you build it to ensure the layers remain aligned.
If the cake begins to slide, stop assembling and refrigerate the stacked layers briefly to help them firm up.
Step 14: Cover the Cake
Spread the remaining chocolate icing over the top and sides of the cake.
For a homemade, rustic appearance, create gentle swirls with an offset spatula or the back of a spoon. For a cleaner finish, use a bench scraper or straight spatula to smooth the sides.
A generous coating of fudge icing makes the cake look rich and gives every slice plenty of chocolate flavor.
Step 15: Let the Cake Set
Allow the cake to rest until the icing is firm enough to hold its shape.
If your kitchen is warm or the layers feel unstable, refrigerate the cake briefly before slicing. For the best eating texture, allow refrigerated portions to soften slightly before serving.
Tips for the Best Chocolate Fudge Cake
1. Measure the Ingredients Accurately
Weighing the flour, sugar, and cocoa powder produces more consistent results than relying on cup measurements alone. Too much flour can make the cake heavy, while too much cocoa can change its moisture and flavor.
2. Use Room-Temperature Eggs and Buttermilk
Room-temperature ingredients generally combine more smoothly, helping create a uniform batter.
3. Do Not Worry if the Batter Looks Thin
This chocolate cake batter is naturally thinner than many conventional cake batters because it contains hot water or coffee. That liquid helps create a moist crumb.
4. Avoid Overbaking
A dry cake is often the result of excessive baking. Check the layers early and remove them once the centers are set.
5. Cool Every Layer Completely
This is especially important for a six-layer cake. Warm layers can soften the icing and make the cake unstable.
6. Let the Icing Cool Before Assembly
Hot icing may run off the sides and slide between the layers. Allow it to thicken until it spreads easily without flowing like a liquid.
7. Keep the Layers Even
Consistent layers make the cake easier to stack and help prevent it from leaning. A kitchen scale and a serrated knife can be useful tools.
8. Use a Stable Serving Plate
A flat cake board or sturdy serving plate supports the weight of the six layers and makes the cake easier to move.
Common Mistakes to Avoid
Using sweetened condensed milk instead of evaporated milk: These products have different sugar concentrations. Substituting one for the other can make the icing much sweeter and change its consistency.
Adding icing to warm cake: Warm cake can melt the icing and destabilize the stack. Always cool the layers completely.
Cooking the icing over high heat: Excessive heat can scorch the cocoa and cause the icing to become grainy. Use medium heat and stir frequently.
Stacking uneven layers: Uneven layers can cause the cake to tilt. Level the cakes before assembling them if necessary.
Cutting the cake before the icing sets: The layers may shift and the filling may smear. Allow the cake to firm up before slicing.
Delicious Variations
Chocolate Ganache Finish
If you prefer a glossy finish, you can use a chocolate ganache made from chocolate and cream instead of the cooked cocoa icing. The flavor and texture will differ, so choose the finish that best suits your preference.
Coffee Chocolate Fudge Cake
Use hot coffee instead of hot water in the cake batter. It adds depth to the chocolate flavor while keeping the cake suitable for people who prefer chocolate over a strong coffee taste.
Chocolate Cake with Fresh Berries
Serve slices with fresh strawberries or raspberries. Their slight tartness contrasts nicely with the rich chocolate icing.
Extra Chocolate Topping
Decorate the finished cake with chocolate shavings or curls. Add them once the icing has cooled enough to hold the decoration.
Smaller Celebration Cake
For a smaller cake, reduce the ingredient quantities proportionally and use smaller pans. Avoid simply putting the full recipe into a smaller pan, as the batter may overflow or bake unevenly.
How to Serve 6-Layer Chocolate Fudge Cake
This cake is rich enough to serve in modest slices. Pair it with:
- Fresh strawberries or raspberries.
- A small scoop of vanilla ice cream.
- Lightly sweetened whipped cream.
- Coffee, espresso, or tea.
- A glass of cold milk.
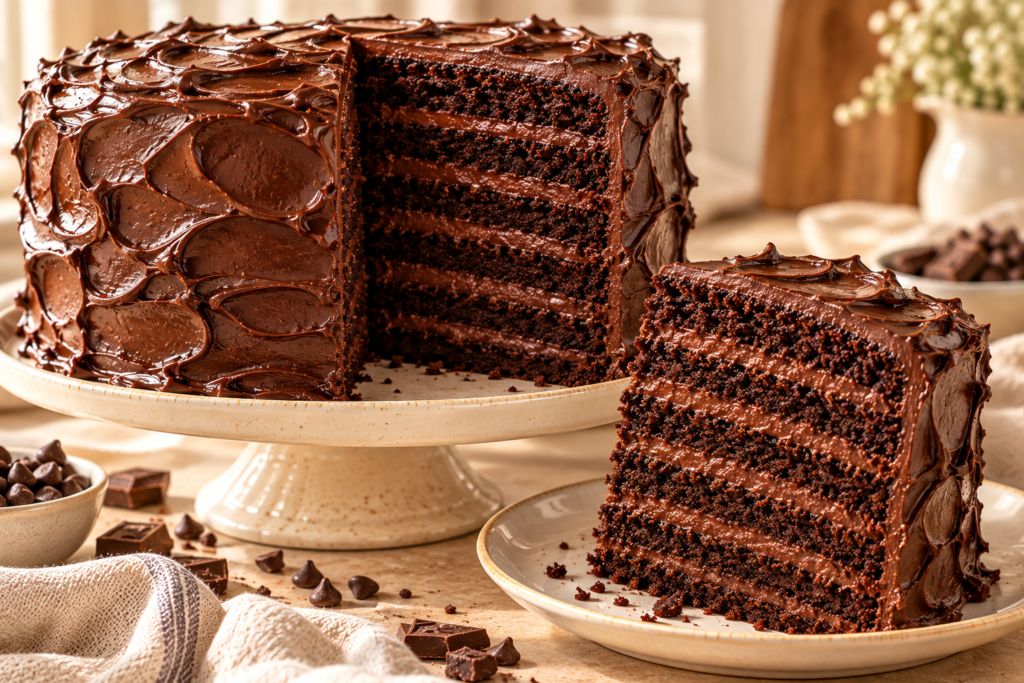
For a special occasion, place the cake on a simple cake stand and slice it with a long, sharp knife. Wipe the knife between cuts to show off the six layers more clearly.
How to Store Chocolate Fudge Cake
At Room Temperature
Because the cake contains a cooked icing made with evaporated milk and butter, storage safety depends on the icing’s final composition and handling. Refrigeration is the more conservative choice, especially in a warm kitchen.
In the Refrigerator
Place the cake in an airtight cake container or cover it well and refrigerate it. For best quality, enjoy it within approximately 3–4 days.
The cake may become firmer when cold because the butter in the icing solidifies. Let individual slices stand at room temperature for around 20–30 minutes before serving.
In the Freezer
You can freeze individual slices or unfrosted cake layers. Wrap them tightly and place them in a freezer-safe container for approximately 2 months for best quality.
Thaw frozen cake in the refrigerator, then allow it to soften slightly before serving. The texture of the icing may change a little after freezing and thawing.
Frequently Asked Questions
How do I get six layers from this recipe?
You can bake six thin layers in separate pans or bake thicker cakes in batches and slice them horizontally after they have cooled. The final height depends on the pan size and how evenly the batter is divided.
Can I make this cake without coffee?
Yes. Use hot water instead. Coffee is optional and mainly helps deepen the chocolate flavor.
Why is my chocolate cake dry?
Overbaking and inaccurate flour measurements are common causes. Check the layers early and weigh the dry ingredients whenever possible.
Why is my chocolate icing too runny?
It may not have cooked long enough or may still be too warm. Let it cool and thicken before spreading. If it remains too thin, it may need additional controlled cooking, depending on its consistency.
Why did my icing become grainy?
The sugar may not have dissolved properly, or the mixture may have overheated. Stir gently while cooking and avoid high heat. Make sure the cocoa is mixed smoothly with the sugar before adding the liquid.
Can I bake the cake layers ahead of time?
Yes. Bake and cool the layers completely, then wrap them well and refrigerate them briefly or freeze them for longer storage. Allow frozen layers to thaw before assembly.
Can I use regular milk instead of buttermilk?
Buttermilk is preferable because its acidity helps the baking soda work. If needed, make a substitute by adding 1 tablespoon of lemon juice or white vinegar to milk and letting it stand for 5–10 minutes.
How do I cut clean slices?
Allow the icing to set, use a long sharp knife, and wipe the blade between cuts. Slightly warming and drying the knife can also help create cleaner slices.
Final Thoughts
This 6-Layer Chocolate Fudge Cake is a wonderful choice when you want a truly impressive homemade chocolate dessert. Its moist cocoa layers, deep chocolate flavor, and rich fudgy icing create a decadent cake that looks beautiful on any celebration table.
Take your time with the cooling and assembly process, keep the layers even, and allow the icing to reach a spreadable consistency before stacking the cake. These small details make a big difference in the finished result.
Serve each slice with fresh berries, vanilla ice cream, or a simple cup of coffee for a memorable dessert that chocolate lovers will appreciate.
Recipe Card
Recipe Name: 6-Layer Chocolate Fudge Cake
Preparation Time: 35 minutes
Baking Time: Approximately 30–60 minutes, depending on pan size and batches
Cooling and Assembly: 60–90 minutes
Total Time: Approximately 2 hours 30 minutes to 3 hours
Servings: 12–16 slices
Oven Temperature: 175°C (350°F)
Ingredients
Chocolate cake
- 375 g all-purpose flour
- 500 g granulated sugar
- 85–100 g unsweetened cocoa powder
- 2 teaspoons baking soda
- 1 teaspoon baking powder
- 1 teaspoon salt
- 3 large eggs, at room temperature
- 360 ml buttermilk
- 360 ml hot water or hot coffee
- 180 ml vegetable oil
- 2 teaspoons vanilla extract
Fudgy chocolate icing
- 400 g granulated sugar
- 85–100 g unsweetened cocoa powder
- 240 ml evaporated milk
- 113 g unsalted butter
- 1 teaspoon vanilla extract
- ¼ teaspoon salt
Instructions
- Preheat the oven to 175°C (350°F). Grease and line your cake pans.
- Whisk together the flour, sugar, cocoa powder, baking soda, baking powder, and salt.
- In another bowl, whisk the eggs, buttermilk, vegetable oil, and vanilla.
- Combine the wet and dry ingredients, then gradually add the hot water or coffee. Mix until smooth.
- Divide the batter evenly among six small pans, or bake in batches using fewer pans.
- Bake until the centers are set and a toothpick comes out without wet batter. Thin layers may take 15–22 minutes; thicker layers may take longer.
- Cool the cakes in their pans for 10–15 minutes, then transfer them to wire racks and cool completely.
- Combine the sugar and cocoa powder for the icing in a saucepan.
- Add the evaporated milk, butter, and salt. Heat over medium heat, stirring until smooth.
- Simmer gently until the icing thickens, then remove from the heat and stir in the vanilla.
- Cool the icing until it is thick enough to spread.
- Stack the six cake layers, spreading icing between each layer.
- Cover the top and sides with the remaining icing.
- Let the cake set before slicing and serving.