

These Red Velvet Chocolate Chip Muffins are soft, moist, and packed with delicious chocolate chips in every bite. With their beautiful red color, subtle cocoa flavor, and sweet white chocolate chunks on top, they look just as tempting as muffins from your favorite bakery.
Made with simple ingredients such as eggs, sugar, milk, vegetable oil, and all-purpose flour, these homemade muffins are easy to prepare without complicated baking techniques. The combination of red velvet flavor and melted chocolate chips makes them perfect for breakfast, an afternoon snack, Valentine’s Day, or a special dessert.
If you love red velvet cake but want something quicker and easier to serve, these chocolate chip muffins are a wonderful choice. Enjoy them slightly warm when the chocolate is still soft, or let them cool completely for a convenient homemade treat.
Why You’ll Love These Red Velvet Muffins
- Soft and moist texture: Vegetable oil and milk help keep the muffins tender.
- Rich chocolate flavor: Cocoa powder adds a subtle chocolate taste without overpowering the classic red velvet flavor.
- Chocolate in every bite: Chocolate chips are distributed throughout the muffin batter.
- Beautiful red color: Red food coloring gives the muffins their signature appearance.
- Bakery-style topping: White chocolate chunks create an attractive finish and extra sweetness.
- Easy to make: You only need basic baking ingredients and a muffin pan.
Ingredients for Red Velvet Chocolate Chip Muffins
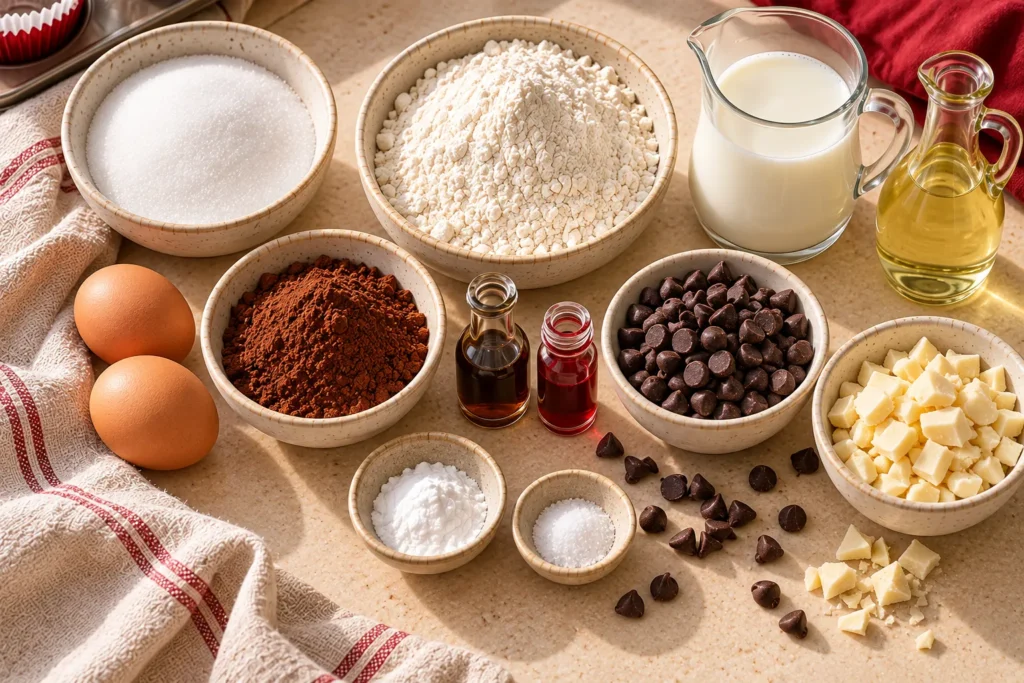
This recipe makes approximately 12 standard muffins, depending on the size of your muffin cups.
Wet Ingredients
- 2 large eggs
- 1 cup (200 g) white granulated sugar
- ¾ cup (180 ml) vegetable oil
- 1 cup (240 ml) fresh milk
- 1 teaspoon (5 ml) vanilla extract
- 1 tablespoon (15 ml) red food coloring
Dry Ingredients
- 2 tablespoons (15 g) unsweetened cocoa powder
- 1 teaspoon (5 g) baking soda
- ¼ teaspoon (1 g) salt
- 2 cups (250 g) all-purpose flour
Chocolate Additions
- 1 cup (150 g) chocolate chips
- 100 g white chocolate, cut into chunks, for topping
Ingredient Tips
Red food coloring: Gel food coloring often produces a vibrant red shade without adding much liquid. If you use liquid coloring, the final color may vary depending on the brand and cocoa powder.
Cocoa powder: Use unsweetened cocoa powder. Too much cocoa can make the muffins darker and more chocolate-forward, so measure it carefully.
Chocolate chips: Semi-sweet chocolate chips provide a balanced flavor, while milk chocolate chips create sweeter muffins.
White chocolate: Chop a white chocolate bar into irregular chunks for a homemade bakery-style appearance.
How to Make Red Velvet Chocolate Chip Muffins
Step 1: Prepare the Oven and Muffin Pan
Preheat your oven to 180°C (350°F). Line a standard 12-cup muffin pan with paper liners.
If you do not have paper liners, lightly grease the muffin cups with oil or nonstick baking spray.
Prepare the pan before mixing the batter so the muffins can go into the oven promptly.
Step 2: Whisk the Eggs and Sugar
In a large mixing bowl, add the eggs and granulated sugar.
Whisk for approximately 1–2 minutes, until the mixture looks smooth and slightly lighter in color. You do not need to whip it to the consistency of cake batter, but the sugar should be evenly distributed.
Step 3: Add the Oil, Milk, and Vanilla
Pour the vegetable oil into the egg mixture and whisk until combined.
Add the milk and vanilla extract, then mix again until the liquid ingredients are smooth.
The oil helps create a moist crumb, while the milk adds moisture and contributes to the muffins’ soft texture.
Step 4: Add the Red Food Coloring
Stir the red food coloring into the wet mixture until the color is evenly distributed.
The batter should have a strong red shade at this stage. Keep in mind that cocoa powder will darken the color slightly once the dry ingredients are added.
Step 5: Combine the Dry Ingredients
In a separate bowl, whisk together the all-purpose flour, cocoa powder, baking soda, and salt.
Mixing the dry ingredients separately helps distribute the cocoa and baking soda evenly, reducing the risk of concentrated pockets in the finished muffins.
Step 6: Make the Muffin Batter
Gradually add the dry ingredients to the wet mixture.
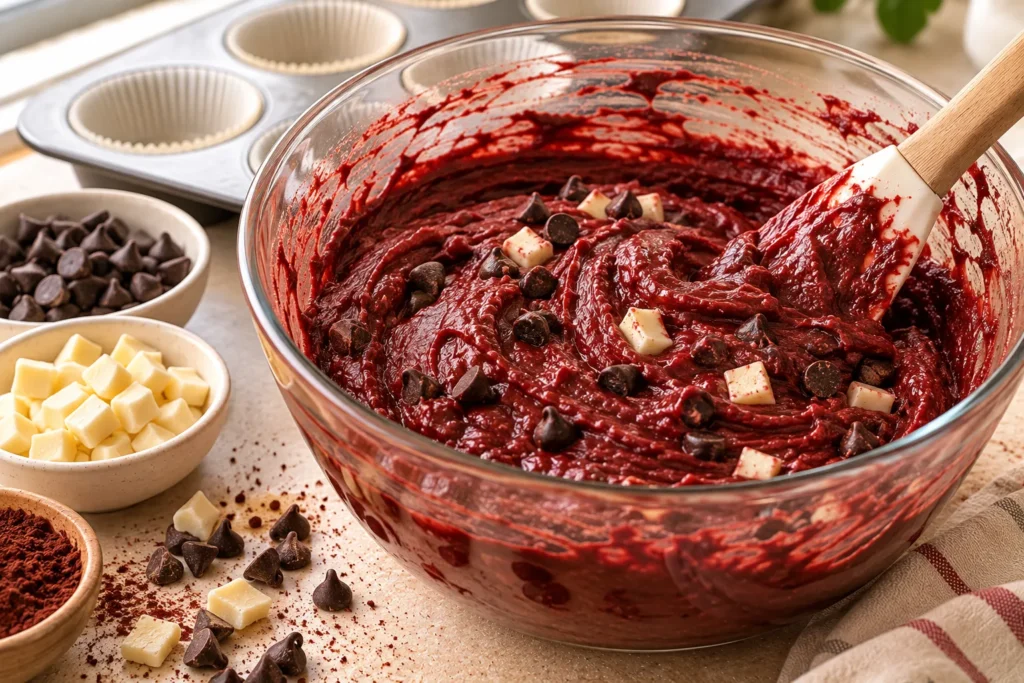
Use a whisk or spatula to combine them gently, stopping as soon as the flour disappears. A few small lumps are acceptable.
Avoid overmixing the batter. Excessive mixing can develop gluten and make the muffins tough or dense instead of soft and tender.
Step 7: Fold in the Chocolate Chips
Add the chocolate chips to the batter and gently fold them in with a spatula.
Distribute the chips evenly without stirring too vigorously. If you want a more attractive bakery-style appearance, reserve a small handful of chocolate chips to place on top before baking.
Step 8: Fill the Muffin Cups
Divide the batter evenly among the prepared muffin cups, filling each approximately two-thirds to three-quarters full.
Scatter the white chocolate chunks over the tops. Add a few reserved chocolate chips if desired.
Avoid filling the cups all the way to the rim, as the muffins need room to rise.
Step 9: Bake the Muffins
Bake at 180°C (350°F) for approximately 18–23 minutes.
Start checking near the 18-minute mark. Insert a toothpick into the center of a muffin, avoiding a large chocolate chip if possible. It should come out without wet batter, although a few moist crumbs are fine.
The tops should look set, and the muffins should spring back gently when touched.
Avoid overbaking, as this can dry out the crumb.
Step 10: Cool and Serve
Remove the muffin pan from the oven and allow the muffins to rest for about 5 minutes.
Transfer them carefully to a wire rack and let them cool further. The chocolate chips and white chocolate chunks will remain hot immediately after baking, so allow a few minutes before eating.
Serve them slightly warm for soft chocolate pockets, or enjoy them at room temperature as a sweet snack.
Tips for Perfect Red Velvet Chocolate Chip Muffins
1. Measure the Flour Correctly
Too much flour can make muffins dry and heavy. For the most accurate results, weigh the flour using a kitchen scale. If measuring by cups, spoon the flour into the measuring cup and level the top rather than packing it down.
2. Avoid Overmixing
Once the flour is added, mix only until the ingredients are combined. This is one of the most important steps for achieving a tender muffin texture.
3. Use Room-Temperature Ingredients
Eggs and milk at room temperature generally combine more easily with the other ingredients. If the ingredients are cold, the batter may be less uniform.
4. Choose the Right Food Coloring
A concentrated red gel coloring can provide a bright color with a relatively small amount. Follow the product’s instructions, since different brands vary in strength.
5. Add Chocolate to the Tops
A few extra chocolate chips and white chocolate chunks on top make the muffins look more attractive. Add them before baking so they become part of the finished surface.
6. Do Not Overfill the Muffin Cups
Fill each cup about two-thirds to three-quarters full. This leaves room for the muffins to rise without spilling over the edges.
7. Check for Doneness Early
Ovens can vary, so the suggested baking time is a guide. Check the muffins toward the beginning of the range and bake longer only if the centers still contain wet batter.
Common Mistakes to Avoid
Overmixing the batter: This can produce dense, chewy muffins. Fold the dry ingredients in gently.
Using too much cocoa powder: Extra cocoa can make the muffins darker and alter the intended red velvet flavor.
Adding too much food coloring: Excess coloring can affect the taste or texture depending on the product. Start with the specified amount and follow the manufacturer’s guidance.
Baking for too long: Dry muffins lose the soft texture that makes this recipe appealing. Remove them once the centers are set.
Adding white chocolate too late: Place the topping on the batter before baking so the chunks remain visible and create a bakery-style finish.
Delicious Variations

Red Velvet Muffins with Cream Cheese
For a cream-cheese variation, place a small spoonful of sweetened cream cheese in the center of each muffin before baking. Cover it with a little more batter so the filling stays enclosed.
Because this variation includes a dairy filling, store the cooled muffins in the refrigerator.
Double Chocolate Red Velvet Muffins
Use semi-sweet chocolate chips in the batter and add extra chocolate chunks on top. This version is ideal for anyone who prefers a stronger chocolate flavor.
White Chocolate Red Velvet Muffins
Replace some or all of the regular chocolate chips with white chocolate chips. Their sweetness contrasts nicely with the subtle cocoa flavor and red color.
Mini Red Velvet Muffins
Divide the batter among mini muffin cups and begin checking for doneness after approximately 10–12 minutes. The exact baking time depends on the size of the cups and your oven.
Valentine’s Day Red Velvet Muffins
Use red paper liners and finish the muffins with white chocolate chunks. Arrange them on a cream-colored serving plate for an easy Valentine’s Day dessert.
What to Serve with Red Velvet Muffins
These muffins pair well with several simple drinks and accompaniments:
- Coffee or a latte for breakfast or an afternoon treat.
- Hot chocolate for a rich chocolate-themed dessert.
- A glass of cold milk for a classic combination.
- Fresh strawberries or raspberries for a fruity contrast.
- A light dusting of powdered sugar if you want a simple decorative finish.
The muffins are flavorful on their own, so additional frosting is optional.
How to Store Red Velvet Chocolate Chip Muffins
At Room Temperature
Allow the muffins to cool completely before storing them in an airtight container. They generally keep well for about 2–3 days in a cool, dry place.
Do not seal them while they are still warm, as trapped steam can make the tops damp.
In the Refrigerator
Refrigeration is not necessary for the basic recipe, but it is appropriate if you add a perishable cream-cheese filling. Store filled muffins in an airtight container and follow safe food-storage practices.
In the Freezer
For longer storage, freeze completely cooled muffins in a freezer-safe container or bag for up to approximately 2–3 months for best quality.
Thaw them at room temperature or warm them briefly in the microwave. Heating times vary, so use short intervals to avoid making them tough.
Frequently Asked Questions
What makes red velvet muffins different from chocolate muffins?
Red velvet muffins typically contain a modest amount of cocoa powder, red food coloring, and vanilla. They have a mild chocolate flavor rather than the stronger cocoa taste of many traditional chocolate muffins.
Can I make these muffins without red food coloring?
Yes. You can omit the food coloring, although the muffins will no longer have their signature red appearance. The cocoa powder will give them a natural brown color.
Why are my muffins dense?
Dense muffins may result from overmixing, too much flour, or incorrect measurements of the leavening ingredients. Measure carefully and mix the batter only until combined.
Can I use butter instead of vegetable oil?
You can experiment with melted butter, but the texture may be different. Vegetable oil helps keep these muffins moist, including after they have cooled.
Can I prepare the batter ahead of time?
For the best rise, bake the muffins soon after mixing the batter. Baking soda begins reacting once it is combined with moisture and acidic ingredients, so prolonged storage may affect the texture.
How do I know when the muffins are done?
The tops should look set, and a toothpick inserted into the center should come out without wet batter. A few moist crumbs are normal. Avoid testing directly through a large chocolate chip, which can leave melted chocolate on the toothpick.
Can I use milk chocolate chips?
Yes. Milk chocolate chips work well but make the muffins sweeter. Semi-sweet chocolate chips offer a more balanced contrast with the sweet white chocolate topping.
Can I make these muffins without a stand mixer?
Absolutely. A mixing bowl, whisk, spatula, measuring tools, and muffin pan are enough. No electric mixer is required.
Final Thoughts
These Red Velvet Chocolate Chip Muffins combine the familiar flavor of red velvet with plenty of chocolate chips and a delicious white chocolate topping. The vegetable oil and milk help create a soft crumb, while the cocoa powder adds a subtle chocolate note.
They are easy enough for everyday baking and attractive enough for birthdays, holidays, Valentine’s Day, or a homemade dessert table.
For the best results, measure the ingredients carefully, avoid overmixing, and check the muffins early so they stay moist. Serve them slightly warm for melted chocolate pockets, or let them cool completely before storing.
Recipe Card
Recipe Name: Red Velvet Chocolate Chip Muffins
Prep Time: 15 minutes
Cook Time: 18–23 minutes
Cooling Time: 5–10 minutes
Total Time: Approximately 40–50 minutes
Yield: Approximately 12 standard muffins
Oven Temperature: 180°C (350°F)
Ingredients
- 2 large eggs
- 200 g white granulated sugar
- 180 ml vegetable oil
- 240 ml fresh milk
- 1 teaspoon vanilla extract
- 1 tablespoon red food coloring
- 15 g unsweetened cocoa powder
- 1 teaspoon baking soda
- ¼ teaspoon salt
- 250 g all-purpose flour
- 150 g chocolate chips
- 100 g white chocolate, cut into chunks, for topping
Instructions
- Preheat the oven to 180°C (350°F) and line a 12-cup muffin pan.
- Whisk the eggs and sugar in a large bowl until smooth.
- Add the vegetable oil, milk, vanilla extract, and red food coloring. Mix well.
- In another bowl, combine the flour, cocoa powder, baking soda, and salt.
- Add the dry ingredients to the wet ingredients and mix gently until just combined.
- Fold in the chocolate chips.
- Divide the batter among the muffin cups, filling each two-thirds to three-quarters full.
- Top with the white chocolate chunks and any reserved chocolate chips.
- Bake for 18–23 minutes, or until the centers are set and a toothpick comes out without wet batter.
- Cool in the pan for 5 minutes, then transfer to a wire rack.