
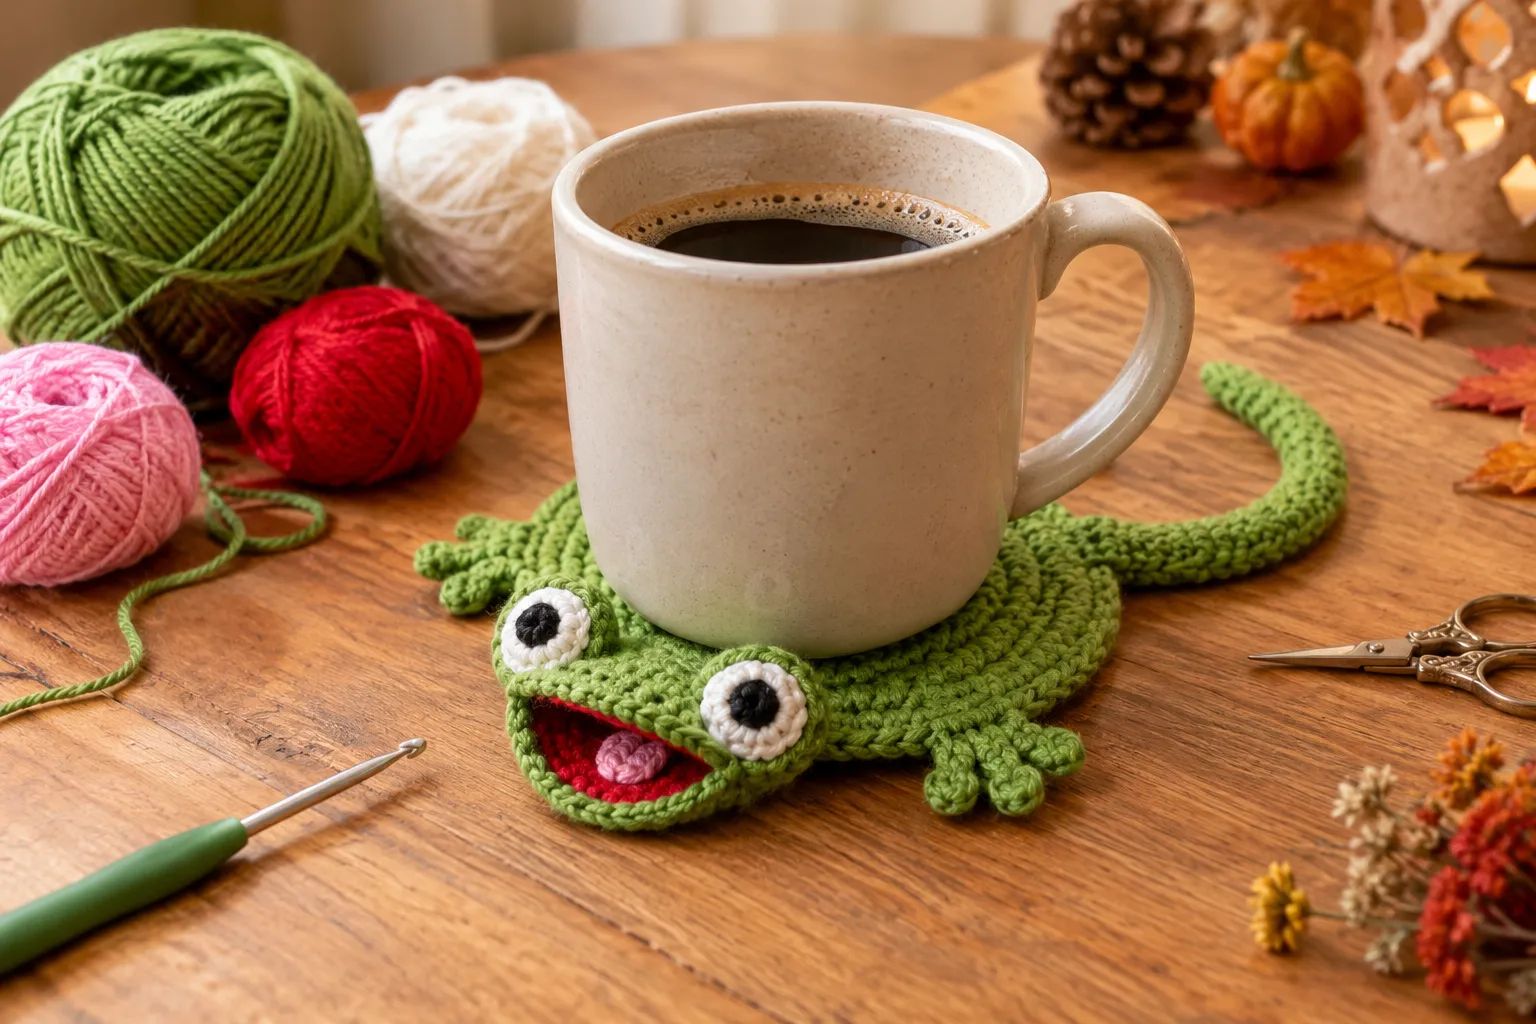
A popping lizard crochet coaster is a playful way to add personality to your coffee table, desk, or kitchen. With its bright green body, funny face, little legs, long tail, and tiny pink tongue, this unusual crochet project transforms an everyday coaster into an adorable handmade decoration.
Whether you’re looking for a creative scrap-yarn project, a unique gift for a reptile lover, or a fun addition to your crochet collection, this lizard coaster is worth trying. Its combination of a flat coaster base and dimensional details makes it more interesting than a traditional round crochet coaster.
In this guide, you’ll discover the materials to prepare, the crochet techniques involved, assembly tips, color variations, and creative ways to use your finished lizard coaster.
What Is a Popping Lizard Coaster?
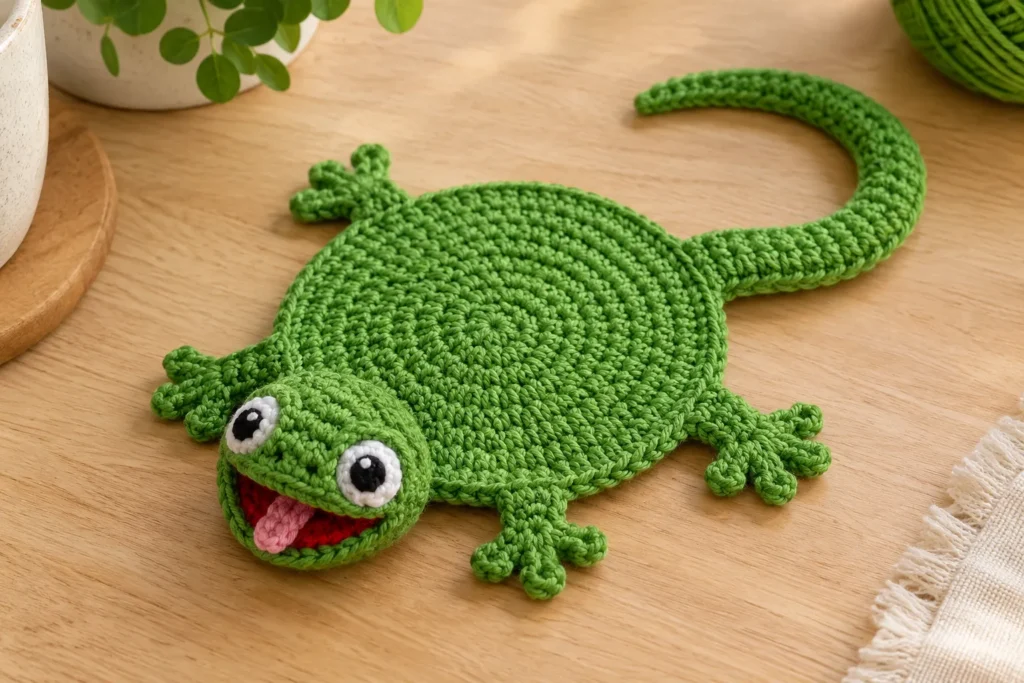
A popping lizard coaster is a novelty crochet coaster designed to resemble a little lizard with an expressive face. The body provides a surface for a mug, while the head, legs, tail, and tongue give the design its distinctive character.
Unlike a simple circular coaster, this project combines basic crochet techniques with small decorative pieces that are attached during assembly.
The traditional green version is especially eye-catching, but you can experiment with other colors to create a collection of colorful lizards.
Why you’ll love this project:
- It uses relatively small amounts of yarn.
- It’s a creative way to use leftover yarn from other projects.
- It combines practical home decor with a playful animal design.
- It makes a thoughtful handmade gift.
- You can personalize the colors and facial details.
- It can be completed as a small weekend or evening crochet project.
Materials You’ll Need
Before starting, gather your yarn, crochet hook, and basic crochet tools.
| Material | Purpose |
|---|---|
| Green cotton yarn | Main body, head, legs, and tail |
| Red yarn | Inner mouth |
| Pink yarn | Tongue |
| White yarn | Eyes |
| Black embroidery thread | Pupils and facial details |
| Crochet hook | Appropriate for your yarn |
| Yarn needle | Sewing pieces together |
| Scissors | Cutting yarn |
| Stitch markers | Tracking stitches |
| Optional fiberfill | Lightly shaping the head, if required |
Choosing the Right Yarn
Cotton yarn is a good option for a coaster because it creates a relatively firm fabric and is suitable for everyday home accessories.
Choose a yarn that holds its shape well without becoming too thick. If the stitches are too loose, the coaster may stretch or become uneven when you place a mug on it.
For the most practical result, keep the main body relatively flat and reserve any stuffing for decorative areas that genuinely need additional shape.
Choosing a Crochet Hook
Use the hook size recommended for your yarn, then adjust if necessary.
A slightly smaller hook can help create a firm coaster fabric, but it shouldn’t make the yarn uncomfortable to work with. Test a small sample before beginning the main piece.
Crochet Skills You’ll Need
This project is suitable for crocheters who know the basic stitches and want to practise shaping and assembly.
The techniques may include:
- Chain stitch (ch): Used to create a foundation or starting chain.
- Slip stitch (sl st): Used to join rounds or move across stitches.
- Single crochet (sc): Creates a compact fabric and is useful for smaller details.
- Half double crochet (hdc): Provides a stitch height between single and double crochet.
- Double crochet (dc): Helps create a flat, circular coaster body.
- Increase (inc): Adds stitches to expand a piece.
- Decrease (dec): Reduces stitches to shape narrower sections.
- Magic ring: Creates a closed center for circular crochet pieces.
If you’re unfamiliar with any of these stitches, practise them before starting the project.
How the Popping Lizard Coaster Is Constructed
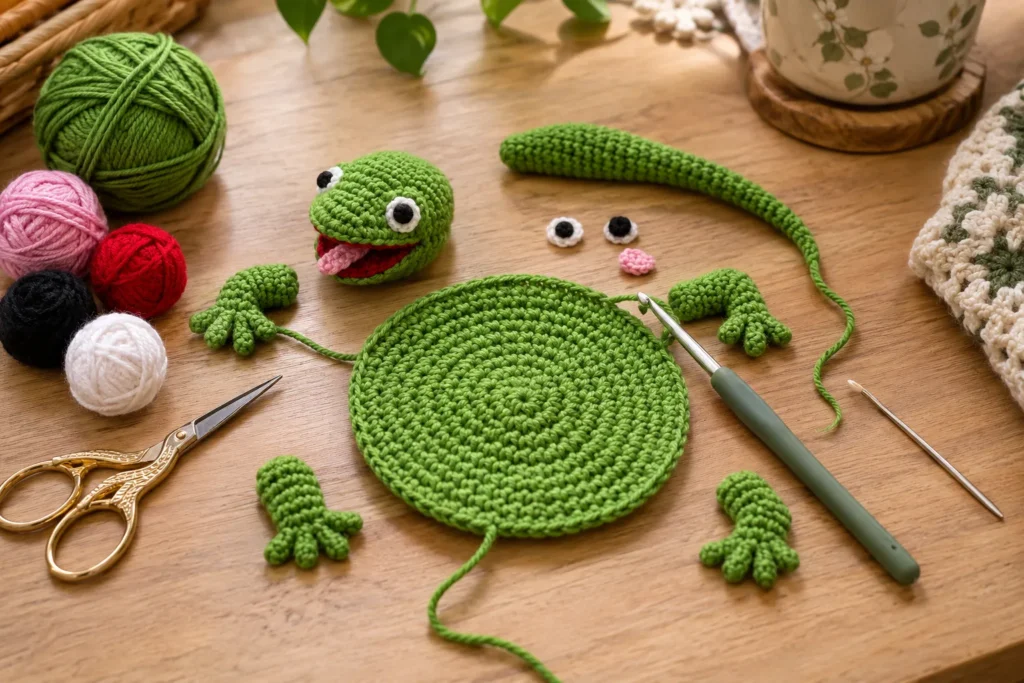
The lizard is made from several crocheted components that are assembled into one finished design. Understanding the construction before you begin makes the project easier to organize.
1. Crochet the Round Coaster Body
The body begins as a circular crochet piece. Increases are distributed around the rounds to expand the circle evenly.
Keep your tension consistent and check that the piece lies flat as it grows. If the edges curl, your tension may be too tight or you may need to review the increase pattern.
The final round can be finished with an edging that creates a neat outline.
For a smaller coaster, you can make a smaller circular base. For a larger version, additional rounds may be needed.
2. Shape the Lizard’s Tail
The tail gives the design its recognizable reptile silhouette.
Crochet the tail as a narrow, tapered piece, making it wider near the body and gradually slimmer toward the tip. Once finished, arrange it in a gentle curve before attaching it.
A curved tail often looks more natural than a completely straight one.
3. Create the Head and Open Mouth
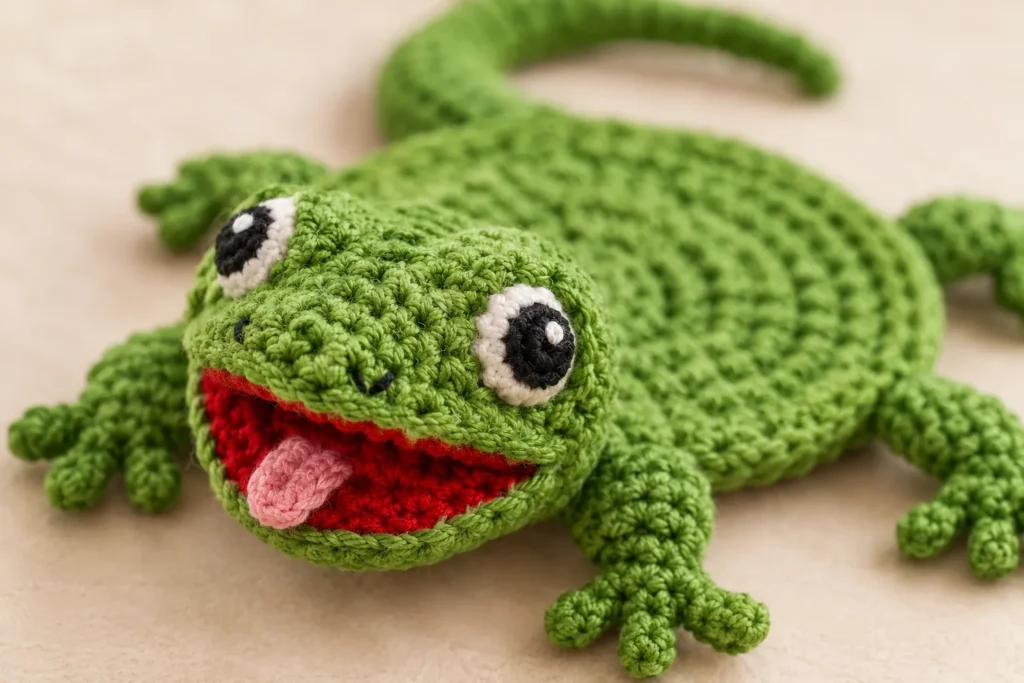
The head is the main decorative feature of the popping lizard coaster.
It may involve shaping a rounded head and constructing the mouth area separately so the inside can be finished in a contrasting color.
Use red yarn for the inner mouth and pink yarn for the tongue to create a bright, cartoon-like expression.
Take time to arrange the mouth before sewing the pieces together. Even small changes in placement can make the finished lizard look more cheerful, surprised, or mischievous.
4. Add the Eyes
The eyes bring the character to life.
White yarn can be used for the eye details, while black embroidery thread creates the pupils. Position both eyes carefully so they look balanced.
If you choose safety eyes, remember that small plastic components can present a choking hazard. For items used around young children, embroidered eyes are generally the safer option.
5. Crochet the Legs and Toes
Small legs help distinguish the coaster from a simple animal-shaped mug rug.
Make the legs short enough to complement the body without overwhelming it. Small toe details can be added to create a more recognizable lizard appearance.
Before sewing them permanently, place all four legs around the body and check that the arrangement looks balanced.
6. Assemble the Finished Coaster
Lay out the body, head, tail, and legs on a flat surface before attaching anything.
Check the following:
- The head is securely attached.
- The tail follows a natural curve.
- The legs are evenly positioned.
- The mouth and tongue are clearly visible.
- The main coaster area remains flat enough for a mug.
Weave in loose ends and trim excess yarn carefully. If you add stuffing to the head, use only a small amount so the decorative section doesn’t become unnecessarily bulky.
For a detailed free pattern with stitch counts and construction instructions, see the original Popping Lizard Coaster crochet pattern on CraftBits.
Color Ideas for Your Crochet Lizard
Green is the classic choice, but this project is easy to personalize.
| Color combination | Overall look |
|---|---|
| Bright green, red, and pink | Classic playful lizard |
| Sage green, cream, and coral | Soft and modern |
| Mint green, white, and pink | Cute pastel design |
| Teal, white, and hot pink | Bright and contemporary |
| Orange, cream, and pink | Warm and cheerful |
| Purple, white, and pink | Whimsical fantasy lizard |
For a coordinated set, make several lizards in different colors while keeping the same eye and mouth design.
Tips for a Neat, Professional Finish
Small crochet projects often depend on the finishing details. These tips can help your coaster look more polished.
Keep the body flat. Check the circular base after every round. Uneven increases can create ripples, while excessive tension can cause curling.
Use consistent stitches. Try to maintain the same stitch size throughout the project so the body and decorative parts look coordinated.
Secure small pieces carefully. The legs, tongue, and eyes should remain firmly attached during normal use.
Plan the assembly first. Arrange all the pieces before sewing them together. This helps you avoid attaching the head or tail in an awkward position.
Weave in ends neatly. Hide loose yarn tails inside the stitches, keeping the underside tidy.
Test the finished coaster. Place a mug on the central area to check whether the body is stable and flat enough for its intended use.
How to Use Your Popping Lizard Coaster
This playful crochet project can be used in several ways around the home.
On Your Coffee Table
Place it beneath your favorite mug to introduce a little humor into your everyday coffee routine.
On Your Desk
A colorful lizard coaster can brighten a home office or study space. It also makes a fun handmade gift for someone who enjoys reptiles or unusual crochet accessories.
In a Handmade Gift Set
Pair the coaster with a mug, specialty tea, coffee, or a small handmade gift tag. A set of two or three coasters in coordinating colors makes a thoughtful present.
As a Gift for Reptile Lovers
If you know someone who loves geckos, lizards, or unusual animal designs, personalize the coaster using their favorite colors.
For Craft Fairs
A small collection of colorful animal coasters can make an attractive display at a craft fair. If you intend to sell finished items, check the applicable pattern terms and any restrictions set by the designer.
How to Care for Your Crochet Coaster
Proper care helps your coaster maintain its shape and appearance.
- Check the yarn label for washing instructions.
- Use gentle washing methods appropriate for the fiber.
- Avoid excessive heat, which may distort the crochet fabric.
- Reshape the coaster while damp if necessary.
- Allow it to dry completely before using it again.
- Keep the coaster flat when storing it.
If the lizard includes stuffing or attached plastic eyes, follow the care requirements for those components as well.
Frequently Asked Questions
Is the popping lizard coaster suitable for beginners?
It’s a reasonable project for adventurous beginners who already know basic crochet stitches. The circular body is relatively straightforward, but shaping the head and attaching the smaller details may require patience.
What yarn is best for a crochet coaster?
Cotton yarn is a practical choice because it creates a firm fabric suitable for a coaster. Choose a yarn weight and hook combination that produces a stable surface.
Can I make the lizard in different colors?
Yes. You can change the body, mouth, tongue, and eye colors to create different styles. Just keep the contrast strong enough for the facial details to remain visible.
Can I use leftover yarn?
Absolutely. This project is particularly suitable for small yarn remnants because the decorative details require only modest amounts of contrasting colors.
How do I keep the coaster from curling?
Check your tension and increase placement. The circular base should expand evenly. If the fabric curls despite correct stitch counts, try a different hook size and make a small test piece.
Is the coaster washable?
That depends on the yarn and additional materials you use. Cotton yarn is often washable, but you should follow the yarn manufacturer’s care instructions and consider any stuffing or plastic components.
Final Thoughts
The Popping Lizard Coaster is a fun crochet project that combines everyday usefulness with a playful animal design. Its round body, expressive face, little legs, curved tail, and colorful tongue make it stand out from ordinary coasters.
With a few basic crochet skills, some leftover yarn, and careful assembly, you can create a personalized piece for your home or a quirky handmade gift.
Ready to start crocheting? Follow the stitch-by-stitch instructions in the original CraftBits free Popping Lizard Coaster pattern to work through the construction details.