
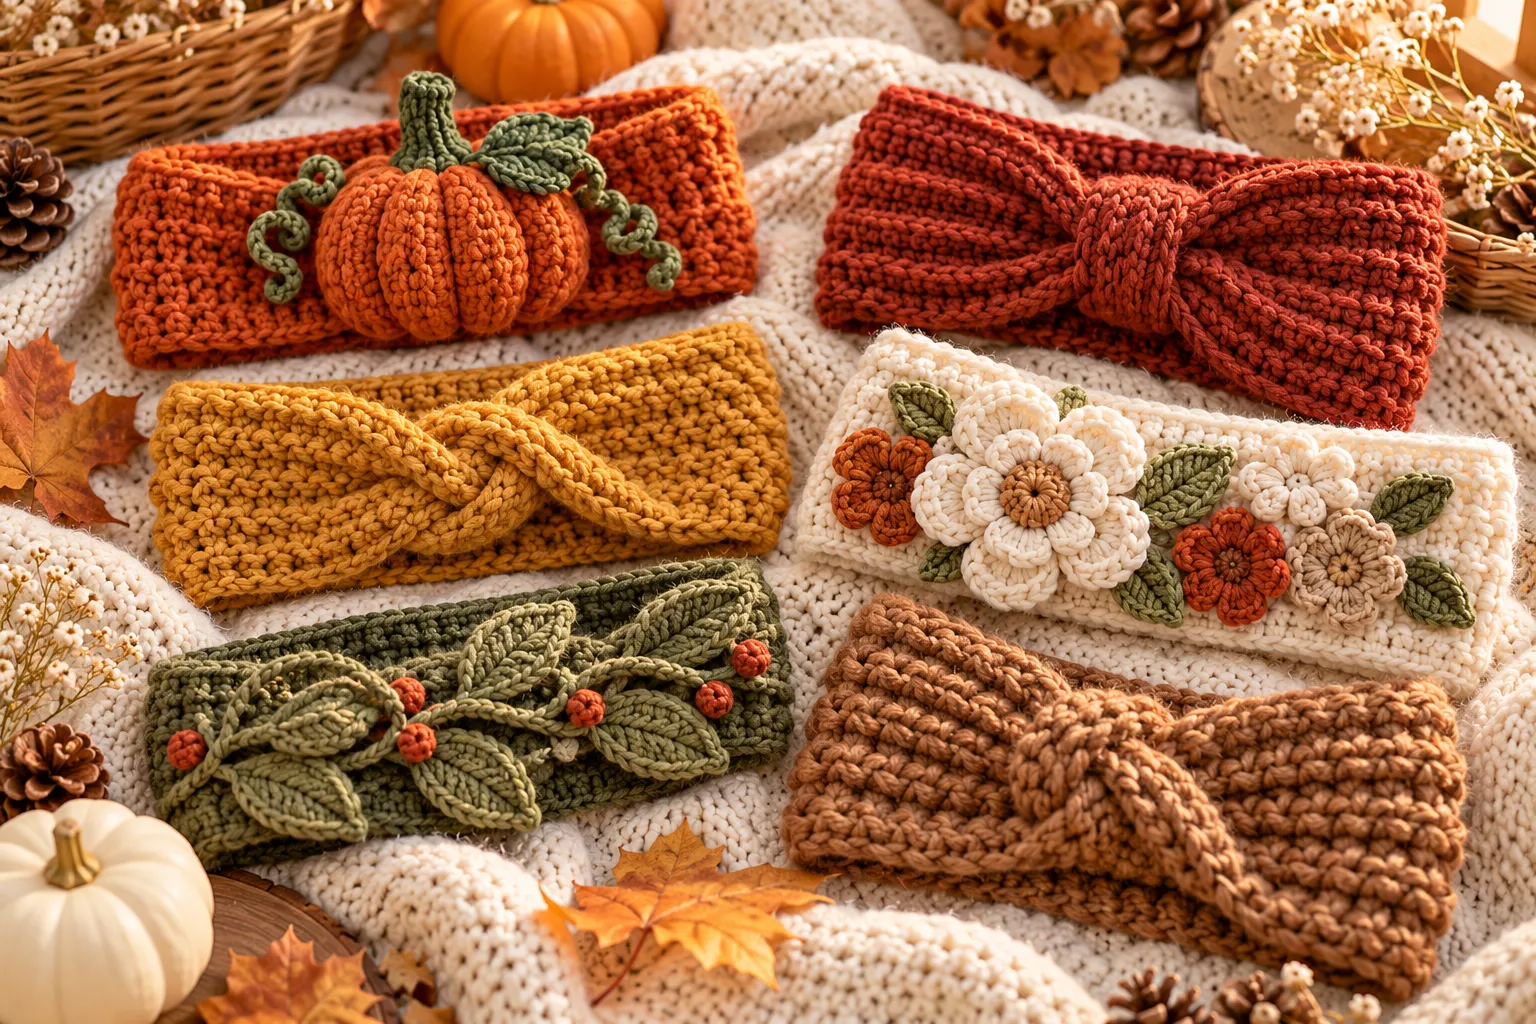
As soon as the weather starts to cool, cozy crochet accessories become some of the most enjoyable projects to make. A handmade fall crochet headband is quick, practical, and perfect for adding a warm seasonal touch to an everyday outfit.
From chunky pumpkin-inspired designs to simple twisted ear warmers, crochet headbands are also excellent projects for using autumn-colored yarn. Rust, burnt orange, mustard, cream, chocolate brown, olive, and burgundy can instantly give even a simple stitch pattern a beautiful fall aesthetic.
This guide explores several cozy fall crochet headband ideas, including pumpkin-inspired designs, textured ear warmers, twisted headbands, ribbed styles, and decorative options. You’ll also find a detailed basic pattern, sizing guidance, yarn recommendations, stitch tutorials, customization ideas, and finishing tips.
Why Crochet Headbands Are Perfect for Fall
Crochet headbands are one of the easiest ways to create a seasonal accessory without committing to a large project.
They are:
- Quick to crochet
- Beginner-friendly
- Easy to customize
- Comfortable to wear
- Excellent handmade gifts
- Perfect for scrap yarn
- Easy to coordinate with fall outfits
- Useful for keeping ears warm
- Great for craft fairs and handmade shops
Unlike a large crochet sweater or blanket, a headband can often be completed in one sitting.
The small size also makes it an ideal project for experimenting with new stitches.
Best Yarn for Fall Crochet Headbands
Choosing the right yarn makes a significant difference.
For a cozy autumn headband, look for yarn that is soft against the skin and provides enough warmth without becoming excessively bulky.
Recommended Yarn Types
Worsted-weight yarn is one of the most versatile choices.
It provides:
- Good stitch definition
- Moderate warmth
- Easy handling
- A comfortable structure
Chunky yarn is excellent when you want a thick winter-style headband.
Super bulky yarn creates a dramatic oversized texture and works particularly well with simple stitches.
Cotton blends are useful for lighter fall headbands when you want something breathable.
Autumn Color Palette
Some of the most beautiful fall crochet colors include:
| Color | Fall Effect |
|---|---|
| Burnt Orange | Pumpkin-inspired |
| Rust | Warm and earthy |
| Mustard | Golden autumn look |
| Cream | Soft neutral |
| Camel | Minimalist |
| Chocolate Brown | Cozy and rich |
| Burgundy | Deep seasonal accent |
| Olive Green | Natural and earthy |
| Terracotta | Modern autumn |
| Dusty Rose | Soft feminine option |
For a sophisticated look, combine one strong autumn shade with a neutral.
For example:
Burnt orange + cream
or
Rust + oatmeal
Crochet Stitches for Headbands
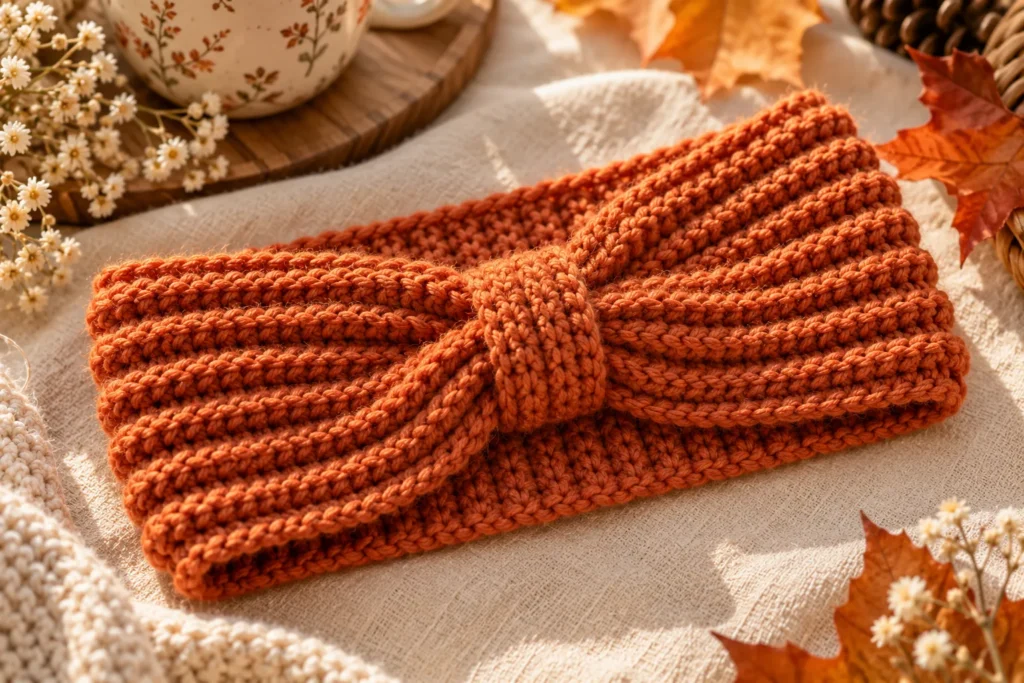
You don’t need complicated stitches to make a beautiful headband.
Single Crochet
Single crochet produces a dense, warm fabric.
It is particularly useful for:
- Winter headbands
- Pumpkin stems
- Structured bands
- Beginner projects
Half Double Crochet
Half double crochet creates a soft fabric with a little more height.
It is a great all-purpose choice.
Double Crochet
Double crochet creates a lighter and faster fabric.
It works especially well when you want a slightly more flexible headband.
Back-Loop-Only Crochet
Working stitches through the back loop creates visible horizontal ridges.
This is one of the best techniques for creating a ribbed crochet headband.
Front-Post and Back-Post Stitches
These stitches create raised vertical texture.
They can transform a simple headband into a more structured, boutique-style accessory.
Basic Fall Crochet Headband Pattern
Let’s begin with a simple rectangular headband.
This construction is extremely versatile and can be adapted to almost any size.
Materials
You will need:
- Worsted-weight yarn
- 4–5 mm crochet hook
- Yarn needle
- Scissors
- Measuring tape
- Stitch marker
Abbreviations
- ch — chain
- sc — single crochet
- hdc — half double crochet
- sl st — slip stitch
- BLO — back loop only
- st — stitch
Step 1: Measure the Head
Before crocheting, measure around the head where the headband will sit.
For a comfortable fit, the finished headband should generally be slightly smaller than the actual head circumference because crochet stretches.
Approximate adult measurements:
| Size | Head Circumference | Suggested Band Length |
|---|---|---|
| Child | 48–52 cm | 44–48 cm |
| Teen | 52–55 cm | 48–52 cm |
| Small Adult | 54–56 cm | 50–53 cm |
| Adult | 56–59 cm | 52–56 cm |
| Large Adult | 59–62 cm | 55–59 cm |
These are starting measurements rather than strict rules.
Your yarn, stitch pattern, and tension will affect the final fit.
Step 2: Create the Foundation Chain
Chain enough stitches to create your desired headband width.
For example, for a medium-width headband:
ch 14–18
The number of chains determines the height of the finished band.
If you want a narrow ear warmer, use fewer chains.
For a wide cozy headband, increase the number.
Step 3: Crochet the First Row
Work half double crochet into the second chain from the hook.
Continue across the foundation chain.
Chain 1 and turn.
Step 4: Create the Ribbed Texture
For the next row, work half double crochet through the back loop only.
Continue this pattern:
hdc BLO across
Chain 1 and turn.
Repeat until your rectangle reaches the desired circumference.
The back-loop-only technique creates beautiful horizontal ridges.
Step 5: Join the Ends
Once the band reaches the correct length, bring both ends together.
You can join them using:
- Slip stitches
- Single crochet
- A yarn needle and mattress stitch
For a clean seam, mattress stitch is an excellent option.
Turn the headband inside out before weaving in the final ends.
Pumpkin Crochet Headband Pattern
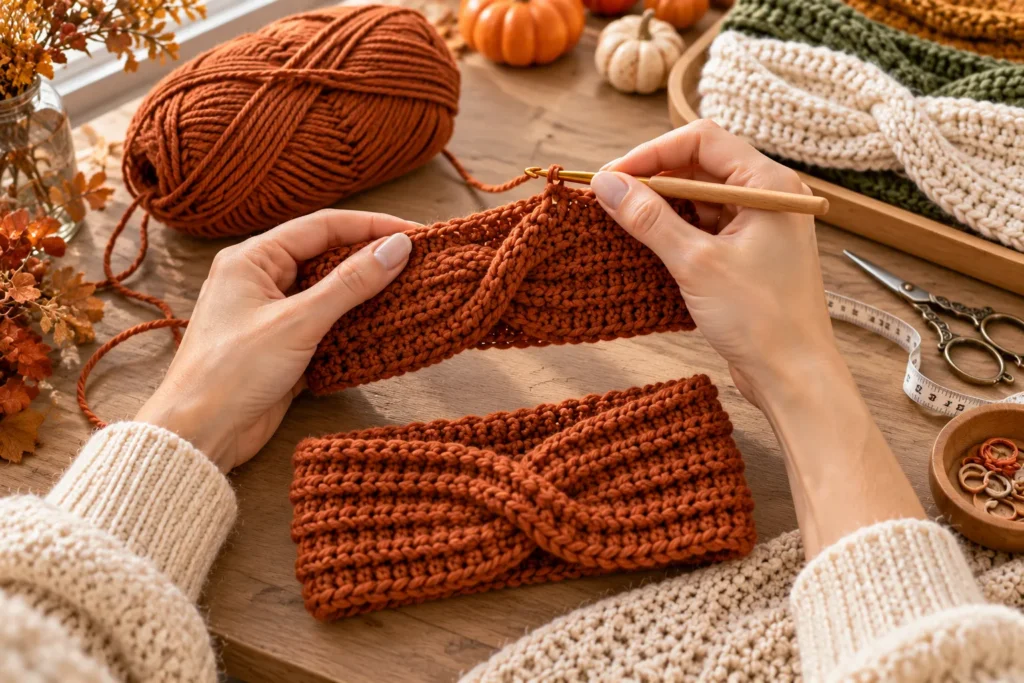
Pumpkins are one of the easiest ways to transform a basic fall headband into a seasonal accessory.
The simplest version uses a pumpkin-colored ribbed band with a small crochet pumpkin decoration.
Materials
Use:
- Burnt orange yarn
- Small amount of brown or green yarn
- Crochet hook
- Yarn needle
- Scissors
Step 1: Crochet the Headband
Make the basic ribbed headband described above.
Burnt orange creates the strongest pumpkin-inspired effect.
However, you can also use:
- Terracotta
- Rust
- Mustard
- Cream
Step 2: Crochet the Pumpkin
Create a small oval or rounded crochet pumpkin.
A simple version can be made using single crochet.
Start with a small chain.
Work around the chain to create an oval shape.
Continue with several rounds until the pumpkin reaches your preferred size.
Add slight decreases toward the top.
Stuff very lightly if you want a raised 3D pumpkin.
Step 3: Add Pumpkin Ridges
Use a yarn needle and matching yarn to create subtle vertical sections.
Pass the needle from the bottom to the top of the pumpkin and gently pull.
Repeat several times around the pumpkin.
This creates the characteristic pumpkin shape.
Step 4: Add the Stem
Using brown yarn, crochet a tiny stem.
Alternatively, wrap brown yarn around the top section and secure it firmly.
Step 5: Attach the Pumpkin
Sew the pumpkin securely to the headband.
Place it slightly off-center for a modern handmade look.
You can also attach three miniature pumpkins across the front.
Pumpkin Headband Variations
Try these combinations:
Rust band + cream pumpkin
Cream band + burnt orange pumpkin
Mustard band + terracotta pumpkin
Chocolate band + pumpkin-orange decoration
Twisted Crochet Fall Headband
The twisted headband is one of the most stylish variations.
Its defining feature is a knot-like twist at the front.
How It Works
Instead of simply joining the two ends together, the finished rectangle is folded and sewn in a particular arrangement to create a central twist.
The result looks more complicated than it actually is.
Construction
- Crochet a rectangular ribbed band.
- Finish the final row.
- Fold both ends inward.
- Arrange the ends into an interlocking S-shaped configuration.
- Sew the layers securely together.
- Turn the seam toward the inside.
The center creates a beautiful gathered effect.
Best Colors
Twisted headbands look especially elegant in:
- Camel
- Cream
- Rust
- Chocolate
- Olive
- Burgundy
Chunky Crochet Fall Headband
For a colder autumn climate, choose chunky yarn.
Use a simple stitch because bulky yarn already creates substantial texture.
A chunky half-double-crochet headband can be completed very quickly.
Basic Construction
Chain according to the desired width.
Work rows of half double crochet until the band reaches the appropriate circumference.
Join the ends.
Finish with a neat border if desired.
A chunky yarn in warm caramel or burnt orange creates a beautiful fall accessory.
Ribbed Crochet Ear Warmer
A ribbed ear warmer is one of the most practical fall designs.
Its stretchy texture allows it to fit comfortably around the ears.
Use:
hdc BLO
throughout the project.
The resulting ridges resemble knitted ribbing.
For an even more pronounced effect, try alternating front-loop and back-loop stitches.
Crochet Leaf Headband
Pumpkins aren’t the only fall decoration.
A small crochet leaf can create a more subtle seasonal design.
Simple Leaf
Use green, mustard, rust, or brown yarn.
Start with a short foundation chain.
Work single crochet, half double crochet, and double crochet stitches along the chain to create a pointed leaf shape.
Finish with a slip stitch.
Leaf Colors
Try:
- Olive
- Mustard
- Rust
- Burgundy
- Golden yellow
- Brown
Attach one or three leaves to the front of a neutral headband.
Crochet Acorn Headband
For a woodland-inspired accessory, make a tiny acorn.
Use:
- Beige or tan for the nut
- Brown for the cap
Attach the acorn to a cream or chocolate-brown headband.
This design is especially cute for children.
Fall Flower Crochet Headband
A small crochet flower can create a softer autumn look.
Choose a warm color such as:
- Mustard
- Terracotta
- Rust
- Dusty rose
Add a cream center.
For a sophisticated adult accessory, use a single flower rather than covering the entire band.
Beginner-Friendly Headband With a Bow
A crochet bow is another easy decoration.
Make a small rectangle.
Fold it in the middle.
Wrap yarn around the center several times.
Secure the yarn.
Attach the bow to one side of the headband.
This works beautifully with:
cream + rust
or
beige + burgundy.
How to Make Your Headband More Comfortable
A beautiful headband isn’t useful if it is uncomfortable.
Don’t Crochet Too Tightly
Tight tension creates a stiff fabric.
Allow the stitches to move naturally.
Check the Stretch
Before finishing the seam, gently stretch the headband.
It should comfortably fit around the intended head circumference without excessive pressure.
Keep the Seam Flat
A bulky seam can become uncomfortable behind the head.
Use a neat joining technique and weave the ends securely.
Choose Soft Yarn
Because the headband touches the forehead and ears, soft yarn is especially important.
Avoid fibers that feel scratchy against the skin.
How to Adjust the Size
One of the advantages of a rectangular crochet headband is how easy it is to resize.
To Make It Wider
Increase the number of foundation chains.
To Make It Narrower
Reduce the number of foundation chains.
To Make It Longer
Add more rows.
To Make It Shorter
Work fewer rows.
Always measure the actual piece rather than relying only on stitch counts.
Crochet Headband Size Formula
A useful approach is:
Finished band length ≈ head circumference minus 5–10%
The exact reduction depends on the elasticity of your stitch pattern.
A highly stretchy ribbed design can require a greater reduction than a dense single-crochet design.
Fall Headband Color Combinations
If you want your project to look modern rather than overly seasonal, choose sophisticated autumn combinations.
Warm Minimalist
Oatmeal + caramel
Pumpkin Spice
Burnt orange + cream
Woodland
Olive + chocolate
Romantic Fall
Dusty rose + burgundy
Golden Autumn
Mustard + camel
Neutral Autumn
Beige + ivory
Dark Academia
Chocolate + rust
Adding Texture to Your Headband
Texture can make a simple design look much more expensive.
Try:
- Front-post double crochet
- Back-post double crochet
- Alpine stitch
- Seed stitch
- Moss stitch
- Bobble stitch
- Half-double-crochet ribbing
For beginners, ribbing and moss stitch are excellent choices.
For more advanced crocheters, the Alpine stitch can create dramatic vertical texture.
Adding a Button Detail
A decorative button can add a polished finish.
Place a wooden or fabric-covered button at the center of a twisted headband.
Alternatively, add two small buttons near the side.
Make sure any button is securely attached and appropriate for the intended wearer.
For babies and very young children, avoid detachable embellishments.
Fall Crochet Headband Styling Ideas
A handmade headband can work with much more than a sweater.
With a Knit Sweater
Pair a rust headband with a cream oversized sweater and jeans.
With a Denim Jacket
Try a mustard or olive headband with denim.
With a Fall Dress
A cream headband with a small crochet flower creates a romantic look.
With a Scarf
Coordinate the headband with one color from your scarf.
Avoid making every accessory exactly the same color.
With a Wool Coat
Choose a minimalist ribbed headband in camel, chocolate, or burgundy.
Matching Crochet Accessories
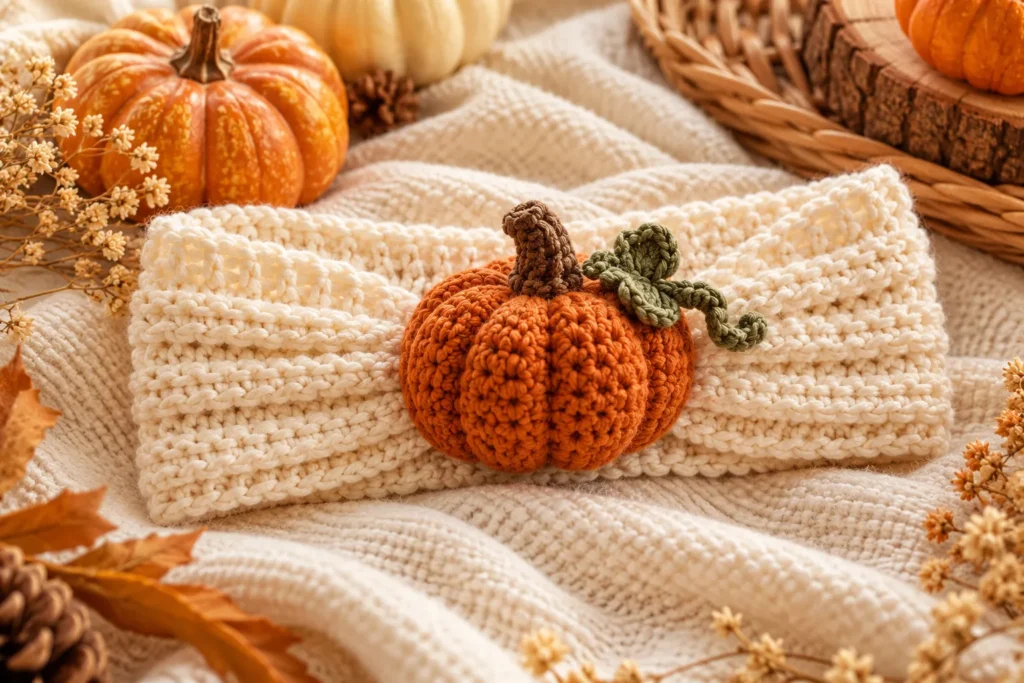
Once you’ve made your headband, you can expand the project into a complete fall accessory collection.
Try making:
- Crochet scarf
- Fingerless gloves
- Leg warmers
- Pumpkin bag
- Crochet beanie
- Fall crochet scrunchie
- Crochet shawl
- Pumpkin brooch
Using the same yarn color across several accessories creates a cohesive handmade collection.
Turning a Headband Into a Gift
Crochet headbands are excellent handmade gifts because they are relatively quick to make.
For a beautiful presentation, fold the headband neatly and wrap it in:
- Kraft paper
- Cream tissue paper
- Fabric
- A small gift box
Add a simple handmade tag.
You can create several headbands in different autumn colors and give them as a coordinated gift set.
Crochet Headbands for Craft Fairs
If you’re making these for a craft market, consider offering several variations.
Create a small collection:
Classic Ribbed
Twisted
Pumpkin
Leaf
Flower
Chunky
Use a consistent color palette across the collection.
This makes your display look more professional.
Pricing Handmade Headbands
When pricing your work, consider:
- Yarn cost
- Accessories
- Time
- Packaging
- Marketplace fees
- Your skill level
Avoid pricing handmade work solely according to the cost of yarn.
Your time and craftsmanship also have value.
Common Crochet Headband Problems
The Headband Is Too Tight
Add additional rows or use a stretchier stitch pattern.
You can also remake it using a larger hook.
The Headband Is Too Loose
Remove several rows from the length.
For very stretchy stitches, reduce the finished circumference slightly.
The Edges Are Curling
Check your tension.
A border of single crochet can also help stabilize the edges.
The Headband Looks Uneven
Count your stitches at the end of each row.
Make sure you are working into the correct loop.
The Pumpkin Decoration Looks Flat
Add a small amount of stuffing and use yarn to create vertical pumpkin sections.
The Twist Doesn’t Look Right
Make sure the two ends are folded in the correct overlapping arrangement before sewing.
Take your time with this step.
Care Instructions
Always check the yarn label before washing.
For most washable crochet headbands:
- Wash gently.
- Use mild detergent.
- Avoid excessive heat.
- Reshape while damp.
- Lay flat to dry when recommended.
Avoid hanging wet crochet because the weight of the water can stretch the fabric.
Frequently Asked Questions
How long does it take to crochet a fall headband?
A simple headband can often be completed in a few hours, depending on your experience, yarn weight, stitch pattern, and size.
What crochet stitch is best for a headband?
Half double crochet worked through the back loop is an excellent choice because it creates a soft, stretchy ribbed texture.
What yarn should beginners use?
Worsted-weight yarn is easy to handle and works well for most fall headband patterns.
Can I make a crochet headband without a pattern?
Yes. The basic rectangular construction is very simple. Measure the desired width and circumference, crochet the rectangle, then join the ends.
How do I make a pumpkin crochet headband?
Start with a basic orange or neutral headband and attach one or more small crochet pumpkins. Add a tiny brown or green stem for extra detail.
Can I make these headbands for children?
Absolutely. Simply adjust the finished circumference and choose soft, comfortable yarn.
How do I make a twisted crochet headband?
Crochet a rectangular band, then arrange and sew the two ends together in an overlapping configuration to create the central twist.
Final Thoughts
Fall crochet headbands are the perfect combination of practical accessory and seasonal craft project. They are quick enough for beginners, versatile enough for experienced crocheters, and customizable enough to create an entire collection.
Start with a simple ribbed ear warmer if you’re new to crochet. Once you’re comfortable with the construction, experiment with pumpkins, leaves, flowers, bows, twisted centers, chunky yarn, and textured stitches.
The most beautiful designs don’t necessarily require complicated patterns. A well-chosen yarn color, soft texture, neat finishing, and one thoughtful seasonal detail can turn a simple crochet headband into a stylish autumn accessory.As soon as the weather starts to cool, cozy crochet accessories become some of the most enjoyable projects to make. A handmade fall crochet headband is quick, practical, and perfect for adding a warm seasonal touch to an everyday outfit.
From chunky pumpkin-inspired designs to simple twisted ear warmers, crochet headbands are also excellent projects for using autumn-colored yarn. Rust, burnt orange, mustard, cream, chocolate brown, olive, and burgundy can instantly give even a simple stitch pattern a beautiful fall aesthetic.
This guide explores several cozy fall crochet headband ideas, including pumpkin-inspired designs, textured ear warmers, twisted headbands, ribbed styles, and decorative options. You’ll also find a detailed basic pattern, sizing guidance, yarn recommendations, stitch tutorials, customization ideas, and finishing tips.
Why Crochet Headbands Are Perfect for Fall
Crochet headbands are one of the easiest ways to create a seasonal accessory without committing to a large project.
They are:
- Quick to crochet
- Beginner-friendly
- Easy to customize
- Comfortable to wear
- Excellent handmade gifts
- Perfect for scrap yarn
- Easy to coordinate with fall outfits
- Useful for keeping ears warm
- Great for craft fairs and handmade shops
Unlike a large crochet sweater or blanket, a headband can often be completed in one sitting.
The small size also makes it an ideal project for experimenting with new stitches.
Best Yarn for Fall Crochet Headbands
Choosing the right yarn makes a significant difference.
For a cozy autumn headband, look for yarn that is soft against the skin and provides enough warmth without becoming excessively bulky.
Recommended Yarn Types
Worsted-weight yarn is one of the most versatile choices.
It provides:
- Good stitch definition
- Moderate warmth
- Easy handling
- A comfortable structure
Chunky yarn is excellent when you want a thick winter-style headband.
Super bulky yarn creates a dramatic oversized texture and works particularly well with simple stitches.
Cotton blends are useful for lighter fall headbands when you want something breathable.
Autumn Color Palette
Some of the most beautiful fall crochet colors include:
| Color | Fall Effect |
|---|---|
| Burnt Orange | Pumpkin-inspired |
| Rust | Warm and earthy |
| Mustard | Golden autumn look |
| Cream | Soft neutral |
| Camel | Minimalist |
| Chocolate Brown | Cozy and rich |
| Burgundy | Deep seasonal accent |
| Olive Green | Natural and earthy |
| Terracotta | Modern autumn |
| Dusty Rose | Soft feminine option |
For a sophisticated look, combine one strong autumn shade with a neutral.
For example:
Burnt orange + cream
or
Rust + oatmeal
Crochet Stitches for Headbands
You don’t need complicated stitches to make a beautiful headband.
Single Crochet
Single crochet produces a dense, warm fabric.
It is particularly useful for:
- Winter headbands
- Pumpkin stems
- Structured bands
- Beginner projects
Half Double Crochet
Half double crochet creates a soft fabric with a little more height.
It is a great all-purpose choice.
Double Crochet
Double crochet creates a lighter and faster fabric.
It works especially well when you want a slightly more flexible headband.
Back-Loop-Only Crochet
Working stitches through the back loop creates visible horizontal ridges.
This is one of the best techniques for creating a ribbed crochet headband.
Front-Post and Back-Post Stitches
These stitches create raised vertical texture.
They can transform a simple headband into a more structured, boutique-style accessory.
Basic Fall Crochet Headband Pattern
Let’s begin with a simple rectangular headband.
This construction is extremely versatile and can be adapted to almost any size.
Materials
You will need:
- Worsted-weight yarn
- 4–5 mm crochet hook
- Yarn needle
- Scissors
- Measuring tape
- Stitch marker
Abbreviations
- ch — chain
- sc — single crochet
- hdc — half double crochet
- sl st — slip stitch
- BLO — back loop only
- st — stitch
Step 1: Measure the Head
Before crocheting, measure around the head where the headband will sit.
For a comfortable fit, the finished headband should generally be slightly smaller than the actual head circumference because crochet stretches.
Approximate adult measurements:
| Size | Head Circumference | Suggested Band Length |
|---|---|---|
| Child | 48–52 cm | 44–48 cm |
| Teen | 52–55 cm | 48–52 cm |
| Small Adult | 54–56 cm | 50–53 cm |
| Adult | 56–59 cm | 52–56 cm |
| Large Adult | 59–62 cm | 55–59 cm |
These are starting measurements rather than strict rules.
Your yarn, stitch pattern, and tension will affect the final fit.
Step 2: Create the Foundation Chain
Chain enough stitches to create your desired headband width.
For example, for a medium-width headband:
ch 14–18
The number of chains determines the height of the finished band.
If you want a narrow ear warmer, use fewer chains.
For a wide cozy headband, increase the number.
Step 3: Crochet the First Row
Work half double crochet into the second chain from the hook.
Continue across the foundation chain.
Chain 1 and turn.
Step 4: Create the Ribbed Texture
For the next row, work half double crochet through the back loop only.
Continue this pattern:
hdc BLO across
Chain 1 and turn.
Repeat until your rectangle reaches the desired circumference.
The back-loop-only technique creates beautiful horizontal ridges.
Step 5: Join the Ends
Once the band reaches the correct length, bring both ends together.
You can join them using:
- Slip stitches
- Single crochet
- A yarn needle and mattress stitch
For a clean seam, mattress stitch is an excellent option.
Turn the headband inside out before weaving in the final ends.
Pumpkin Crochet Headband Pattern
Pumpkins are one of the easiest ways to transform a basic fall headband into a seasonal accessory.
The simplest version uses a pumpkin-colored ribbed band with a small crochet pumpkin decoration.
Materials
Use:
- Burnt orange yarn
- Small amount of brown or green yarn
- Crochet hook
- Yarn needle
- Scissors
Step 1: Crochet the Headband
Make the basic ribbed headband described above.
Burnt orange creates the strongest pumpkin-inspired effect.
However, you can also use:
- Terracotta
- Rust
- Mustard
- Cream
Step 2: Crochet the Pumpkin
Create a small oval or rounded crochet pumpkin.
A simple version can be made using single crochet.
Start with a small chain.
Work around the chain to create an oval shape.
Continue with several rounds until the pumpkin reaches your preferred size.
Add slight decreases toward the top.
Stuff very lightly if you want a raised 3D pumpkin.
Step 3: Add Pumpkin Ridges
Use a yarn needle and matching yarn to create subtle vertical sections.
Pass the needle from the bottom to the top of the pumpkin and gently pull.
Repeat several times around the pumpkin.
This creates the characteristic pumpkin shape.
Step 4: Add the Stem
Using brown yarn, crochet a tiny stem.
Alternatively, wrap brown yarn around the top section and secure it firmly.
Step 5: Attach the Pumpkin
Sew the pumpkin securely to the headband.
Place it slightly off-center for a modern handmade look.
You can also attach three miniature pumpkins across the front.
Pumpkin Headband Variations
Try these combinations:
Rust band + cream pumpkin
Cream band + burnt orange pumpkin
Mustard band + terracotta pumpkin
Chocolate band + pumpkin-orange decoration
Twisted Crochet Fall Headband
The twisted headband is one of the most stylish variations.
Its defining feature is a knot-like twist at the front.
How It Works
Instead of simply joining the two ends together, the finished rectangle is folded and sewn in a particular arrangement to create a central twist.
The result looks more complicated than it actually is.
Construction
- Crochet a rectangular ribbed band.
- Finish the final row.
- Fold both ends inward.
- Arrange the ends into an interlocking S-shaped configuration.
- Sew the layers securely together.
- Turn the seam toward the inside.
The center creates a beautiful gathered effect.
Best Colors
Twisted headbands look especially elegant in:
- Camel
- Cream
- Rust
- Chocolate
- Olive
- Burgundy
Chunky Crochet Fall Headband
For a colder autumn climate, choose chunky yarn.
Use a simple stitch because bulky yarn already creates substantial texture.
A chunky half-double-crochet headband can be completed very quickly.
Basic Construction
Chain according to the desired width.
Work rows of half double crochet until the band reaches the appropriate circumference.
Join the ends.
Finish with a neat border if desired.
A chunky yarn in warm caramel or burnt orange creates a beautiful fall accessory.
Ribbed Crochet Ear Warmer
A ribbed ear warmer is one of the most practical fall designs.
Its stretchy texture allows it to fit comfortably around the ears.
Use:
hdc BLO
throughout the project.
The resulting ridges resemble knitted ribbing.
For an even more pronounced effect, try alternating front-loop and back-loop stitches.
Crochet Leaf Headband
Pumpkins aren’t the only fall decoration.
A small crochet leaf can create a more subtle seasonal design.
Simple Leaf
Use green, mustard, rust, or brown yarn.
Start with a short foundation chain.
Work single crochet, half double crochet, and double crochet stitches along the chain to create a pointed leaf shape.
Finish with a slip stitch.
Leaf Colors
Try:
- Olive
- Mustard
- Rust
- Burgundy
- Golden yellow
- Brown
Attach one or three leaves to the front of a neutral headband.
Crochet Acorn Headband
For a woodland-inspired accessory, make a tiny acorn.
Use:
- Beige or tan for the nut
- Brown for the cap
Attach the acorn to a cream or chocolate-brown headband.
This design is especially cute for children.
Fall Flower Crochet Headband
A small crochet flower can create a softer autumn look.
Choose a warm color such as:
- Mustard
- Terracotta
- Rust
- Dusty rose
Add a cream center.
For a sophisticated adult accessory, use a single flower rather than covering the entire band.
Beginner-Friendly Headband With a Bow
A crochet bow is another easy decoration.
Make a small rectangle.
Fold it in the middle.
Wrap yarn around the center several times.
Secure the yarn.
Attach the bow to one side of the headband.
This works beautifully with:
cream + rust
or
beige + burgundy.
How to Make Your Headband More Comfortable
A beautiful headband isn’t useful if it is uncomfortable.
Don’t Crochet Too Tightly
Tight tension creates a stiff fabric.
Allow the stitches to move naturally.
Check the Stretch
Before finishing the seam, gently stretch the headband.
It should comfortably fit around the intended head circumference without excessive pressure.
Keep the Seam Flat
A bulky seam can become uncomfortable behind the head.
Use a neat joining technique and weave the ends securely.
Choose Soft Yarn
Because the headband touches the forehead and ears, soft yarn is especially important.
Avoid fibers that feel scratchy against the skin.
How to Adjust the Size
One of the advantages of a rectangular crochet headband is how easy it is to resize.
To Make It Wider
Increase the number of foundation chains.
To Make It Narrower
Reduce the number of foundation chains.
To Make It Longer
Add more rows.
To Make It Shorter
Work fewer rows.
Always measure the actual piece rather than relying only on stitch counts.
Crochet Headband Size Formula
A useful approach is:
Finished band length ≈ head circumference minus 5–10%
The exact reduction depends on the elasticity of your stitch pattern.
A highly stretchy ribbed design can require a greater reduction than a dense single-crochet design.
Fall Headband Color Combinations
If you want your project to look modern rather than overly seasonal, choose sophisticated autumn combinations.
Warm Minimalist
Oatmeal + caramel
Pumpkin Spice
Burnt orange + cream
Woodland
Olive + chocolate
Romantic Fall
Dusty rose + burgundy
Golden Autumn
Mustard + camel
Neutral Autumn
Beige + ivory
Dark Academia
Chocolate + rust
Adding Texture to Your Headband
Texture can make a simple design look much more expensive.
Try:
- Front-post double crochet
- Back-post double crochet
- Alpine stitch
- Seed stitch
- Moss stitch
- Bobble stitch
- Half-double-crochet ribbing
For beginners, ribbing and moss stitch are excellent choices.
For more advanced crocheters, the Alpine stitch can create dramatic vertical texture.
Adding a Button Detail
A decorative button can add a polished finish.
Place a wooden or fabric-covered button at the center of a twisted headband.
Alternatively, add two small buttons near the side.
Make sure any button is securely attached and appropriate for the intended wearer.
For babies and very young children, avoid detachable embellishments.
Fall Crochet Headband Styling Ideas
A handmade headband can work with much more than a sweater.
With a Knit Sweater
Pair a rust headband with a cream oversized sweater and jeans.
With a Denim Jacket
Try a mustard or olive headband with denim.
With a Fall Dress
A cream headband with a small crochet flower creates a romantic look.
With a Scarf
Coordinate the headband with one color from your scarf.
Avoid making every accessory exactly the same color.
With a Wool Coat
Choose a minimalist ribbed headband in camel, chocolate, or burgundy.
Matching Crochet Accessories
Once you’ve made your headband, you can expand the project into a complete fall accessory collection.
Try making:
- Crochet scarf
- Fingerless gloves
- Leg warmers
- Pumpkin bag
- Crochet beanie
- Fall crochet scrunchie
- Crochet shawl
- Pumpkin brooch
Using the same yarn color across several accessories creates a cohesive handmade collection.
Turning a Headband Into a Gift
Crochet headbands are excellent handmade gifts because they are relatively quick to make.
For a beautiful presentation, fold the headband neatly and wrap it in:
- Kraft paper
- Cream tissue paper
- Fabric
- A small gift box
Add a simple handmade tag.
You can create several headbands in different autumn colors and give them as a coordinated gift set.
Crochet Headbands for Craft Fairs
If you’re making these for a craft market, consider offering several variations.
Create a small collection:
Classic Ribbed
Twisted
Pumpkin
Leaf
Flower
Chunky
Use a consistent color palette across the collection.
This makes your display look more professional.
Pricing Handmade Headbands
When pricing your work, consider:
- Yarn cost
- Accessories
- Time
- Packaging
- Marketplace fees
- Your skill level
Avoid pricing handmade work solely according to the cost of yarn.
Your time and craftsmanship also have value.
Common Crochet Headband Problems
The Headband Is Too Tight
Add additional rows or use a stretchier stitch pattern.
You can also remake it using a larger hook.
The Headband Is Too Loose
Remove several rows from the length.
For very stretchy stitches, reduce the finished circumference slightly.
The Edges Are Curling
Check your tension.
A border of single crochet can also help stabilize the edges.
The Headband Looks Uneven
Count your stitches at the end of each row.
Make sure you are working into the correct loop.
The Pumpkin Decoration Looks Flat
Add a small amount of stuffing and use yarn to create vertical pumpkin sections.
The Twist Doesn’t Look Right
Make sure the two ends are folded in the correct overlapping arrangement before sewing.
Take your time with this step.
Care Instructions
Always check the yarn label before washing.
For most washable crochet headbands:
- Wash gently.
- Use mild detergent.
- Avoid excessive heat.
- Reshape while damp.
- Lay flat to dry when recommended.
Avoid hanging wet crochet because the weight of the water can stretch the fabric.
Frequently Asked Questions
How long does it take to crochet a fall headband?
A simple headband can often be completed in a few hours, depending on your experience, yarn weight, stitch pattern, and size.
What crochet stitch is best for a headband?
Half double crochet worked through the back loop is an excellent choice because it creates a soft, stretchy ribbed texture.
What yarn should beginners use?
Worsted-weight yarn is easy to handle and works well for most fall headband patterns.
Can I make a crochet headband without a pattern?
Yes. The basic rectangular construction is very simple. Measure the desired width and circumference, crochet the rectangle, then join the ends.
How do I make a pumpkin crochet headband?
Start with a basic orange or neutral headband and attach one or more small crochet pumpkins. Add a tiny brown or green stem for extra detail.
Can I make these headbands for children?
Absolutely. Simply adjust the finished circumference and choose soft, comfortable yarn.
How do I make a twisted crochet headband?
Crochet a rectangular band, then arrange and sew the two ends together in an overlapping configuration to create the central twist.
Final Thoughts
Fall crochet headbands are the perfect combination of practical accessory and seasonal craft project. They are quick enough for beginners, versatile enough for experienced crocheters, and customizable enough to create an entire collection.
Start with a simple ribbed ear warmer if you’re new to crochet. Once you’re comfortable with the construction, experiment with pumpkins, leaves, flowers, bows, twisted centers, chunky yarn, and textured stitches.
The most beautiful designs don’t necessarily require complicated patterns. A well-chosen yarn color, soft texture, neat finishing, and one thoughtful seasonal detail can turn a simple crochet headband into a stylish autumn accessory.