
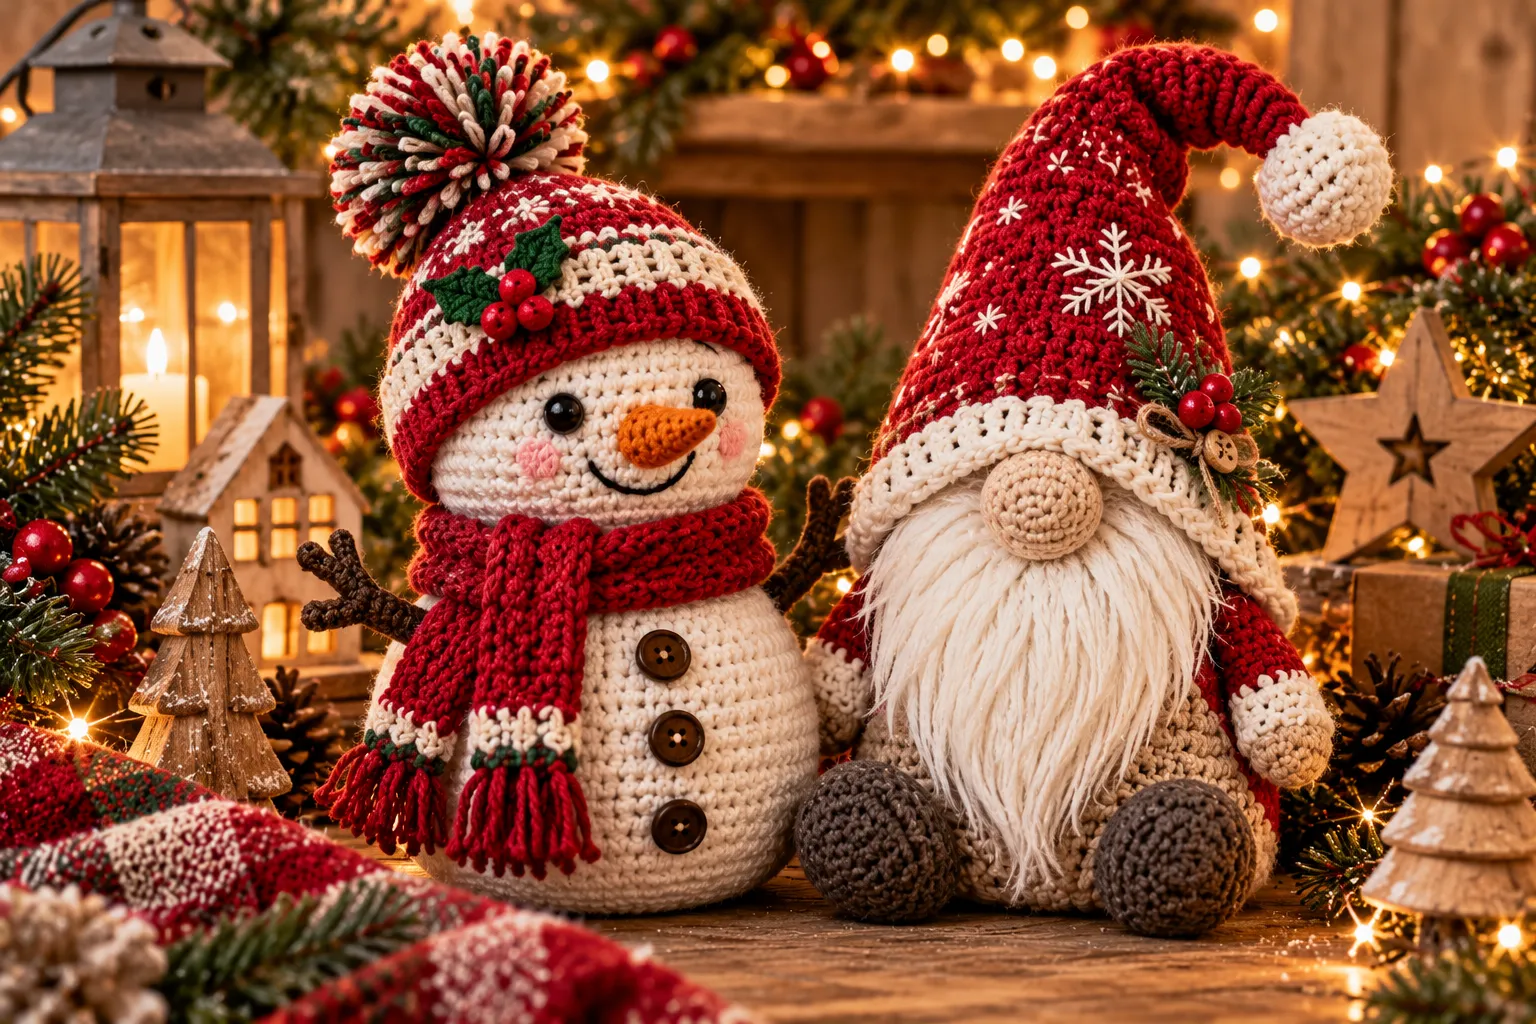
Bring a little handmade magic to your holiday decorating with this crochet snowman and Christmas gnome pattern. These adorable winter amigurumi decorations are perfect for Christmas trees, shelves, mantels, tiered trays, gift baskets, and festive displays.
The snowman and gnome combination gives you two complementary characters that can be made in traditional Christmas colors or customized to match your holiday decor. Their small size also makes them excellent projects for using leftover yarn.
Whether you are an experienced amigurumi crocheter or looking for a fun seasonal project, these winter characters are a charming way to add handmade personality to your Christmas home.
Why Make Crochet Snowmen and Christmas Gnomes?
Crochet Christmas characters are popular because they combine simple shapes with playful details.
A basic crocheted body can quickly become a snowman once you add:
- A carrot-style nose
- Embroidered eyes
- Buttons
- A winter hat
- A scarf
Likewise, a simple stuffed crochet figure can become a Christmas gnome with:
- A long pointed hat
- A fluffy beard
- A round nose
- Festive colors
- Decorative trim
These projects are also versatile enough to use beyond Christmas.
The snowman can become winter decor, while the gnome can remain on display throughout the holiday season.
Materials You Will Need
The exact yarn quantities depend on the finished size of your figures, but a basic winter amigurumi collection can be made with a small selection of yarn.
Yarn
Choose a smooth yarn that makes your stitches easy to see.
Recommended colors include:
- White
- Cream
- Red
- Green
- Black
- Orange
- Brown
- Grey
- Beige
White or cream yarn works beautifully for the snowman, while red, green, and neutral shades create a classic Christmas gnome.
Crochet Hook
Use a crochet hook appropriate for your yarn.
For stuffed amigurumi, many crocheters prefer a slightly smaller hook than the yarn label recommends. A tighter fabric helps prevent the stuffing from showing through.
Stuffing
Use soft polyester toy stuffing to give the snowman and gnome their three-dimensional shape.
Add the stuffing gradually rather than filling the entire piece at once.
Additional Supplies
You may also need:
- Yarn needle
- Scissors
- Stitch marker
- Black embroidery thread
- Orange yarn
- Red or green yarn
- Optional buttons
- Optional ribbon
- Optional faux-fur yarn for the gnome beard
Crochet Abbreviations
| Abbreviation | Meaning |
|---|---|
| ch | Chain |
| sc | Single crochet |
| hdc | Half double crochet |
| dc | Double crochet |
| sl st | Slip stitch |
| st | Stitch |
| sts | Stitches |
| inc | Increase |
| dec | Decrease |
| rep | Repeat |
| FO | Fasten off |
If you crochet using UK terminology, remember that US single crochet is called UK double crochet.
Understanding Amigurumi Construction
Both characters can be created using familiar amigurumi techniques.
Most pieces are worked in continuous rounds.
The basic principle is:
Increase → work straight → decrease → stuff → close
Increasing creates a wider shape, while decreasing gradually closes the piece.
This construction method is useful for creating:
- Heads
- Bodies
- Hats
- Arms
- Small accessories
Using a stitch marker at the beginning of each round makes counting much easier.
Crochet Snowman Body
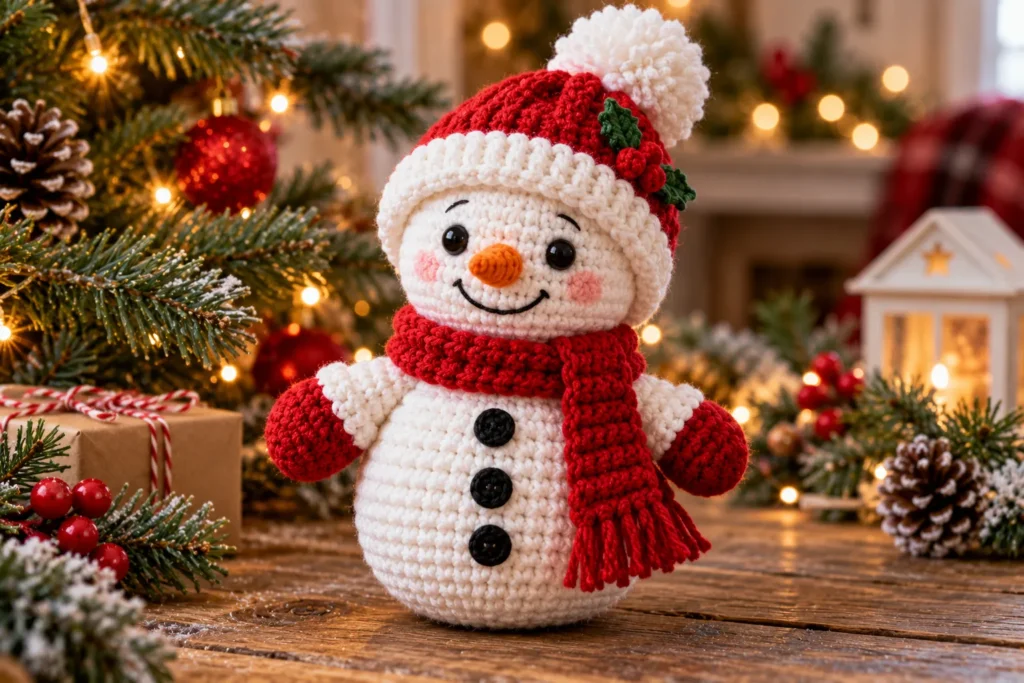
The snowman is built around a rounded stuffed body.
Start at the bottom and work upward in continuous rounds.
Begin with a small magic ring or adjustable starting loop.
Work single crochet stitches into the ring and gradually increase the number of stitches in subsequent rounds.
As the body becomes wider, continue working rounds without increases to create the rounded middle.
Then begin decreasing.
Basic Body Construction
The general sequence is:
- Create the starting ring.
- Work the first round of single crochet.
- Increase evenly.
- Continue increasing until the desired width is reached.
- Crochet several rounds without increases.
- Begin decreasing.
- Add stuffing gradually.
- Continue decreasing.
- Close the opening securely.
The finished body should have a rounded snowman shape rather than a completely cylindrical shape.
Creating the Snowman Head
The head can be crocheted separately or formed as part of the main body, depending on the design you prefer.
For a separate head, begin with a small circular base and increase evenly.
Continue working rounds until the head reaches the desired diameter.
Then decrease gradually.
Before closing the head completely, add stuffing.
Use your fingers to distribute the stuffing evenly and create a smooth rounded shape.
Avoid overstuffing because excessive filling can distort the stitches.
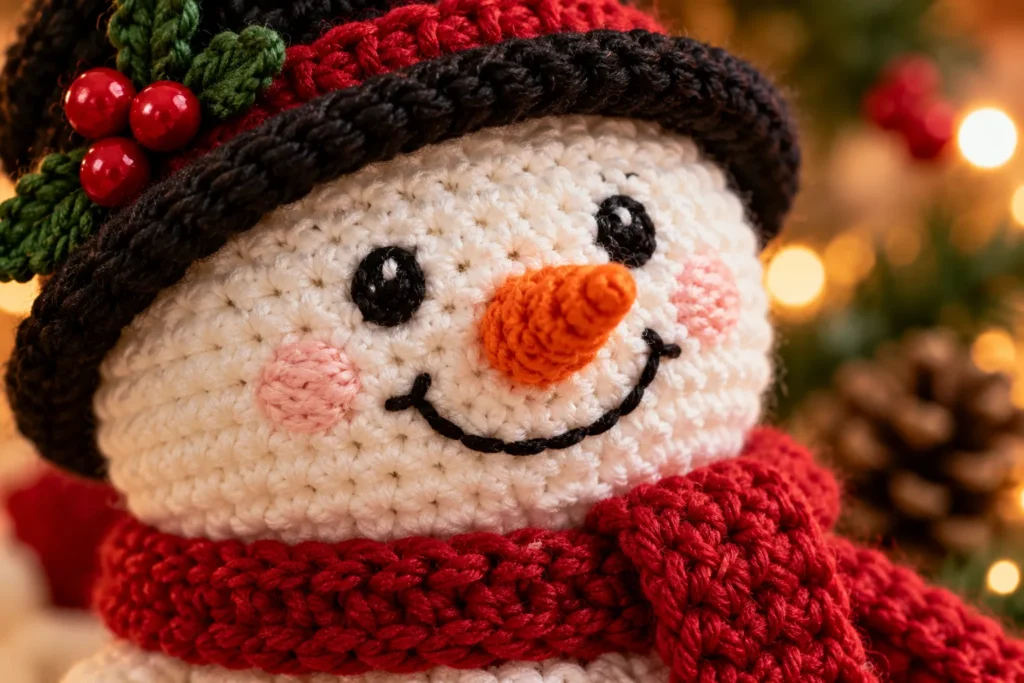
Snowman Face
The face is what gives your snowman its personality.
Eyes
Use black yarn or embroidery floss to create two small eyes.
For a classic snowman, simple black dots are enough.
Carrot Nose
Use orange yarn to crochet or embroider a small triangular carrot-shaped nose.
A few simple stitches can create the appearance of a carrot without requiring a separate three-dimensional piece.
Smile
A small curved embroidered line creates a friendly smile.
You can make the expression subtle or playful depending on your preferred style.
Cheeks
Optional pink or blush-colored yarn can be lightly embroidered onto the cheeks.
This gives the snowman a warm winter appearance.
Snowman Buttons
Traditional snowmen often have buttons down the front.
You can use:
- Black embroidery
- Small crocheted circles
- Tiny wooden buttons
- Yarn knots
If the snowman will be handled by young children, embroidered details are preferable to loose buttons.
Crochet Snowman Hat
A small winter hat completes the character.
The hat can be made in:
- Red
- Green
- Burgundy
- Grey
- Cream
A simple pointed or rounded hat can be crocheted in continuous rounds.
Start with a narrow opening and gradually increase if necessary.
Continue until the hat reaches the desired height.
Add a contrasting trim around the bottom for a festive finish.
A small pom-pom on top makes the hat especially cute.
Snowman Scarf
A miniature scarf is one of the easiest accessories to crochet.
Work a narrow strip using chains and rows of single crochet or half double crochet.
Choose a contrasting color.
For example:
White snowman + red scarf
or
White snowman + green scarf
Add small fringe to the ends if desired.
Wrap the scarf gently around the snowman’s neck and secure it discreetly.
Crochet Christmas Gnome Body
The Christmas gnome can be constructed from a simple rounded body.
Choose a neutral color such as:
- Cream
- Beige
- Grey
- White
Alternatively, use red or green for a more traditional Christmas appearance.
Work the body in continuous rounds, increasing to create the widest section and then maintaining the width before gradually decreasing.
Stuff the body as you work.
The bottom should remain stable enough for the gnome to sit upright.
Gnome Head and Nose
Many crochet gnome designs use a large round nose beneath the hat.
A simple crocheted sphere can be made with beige, peach, or light brown yarn.
Create the sphere with increases, several rounds without increases, and decreases.
Add a small amount of stuffing before closing.
Attach the nose securely to the front of the gnome.
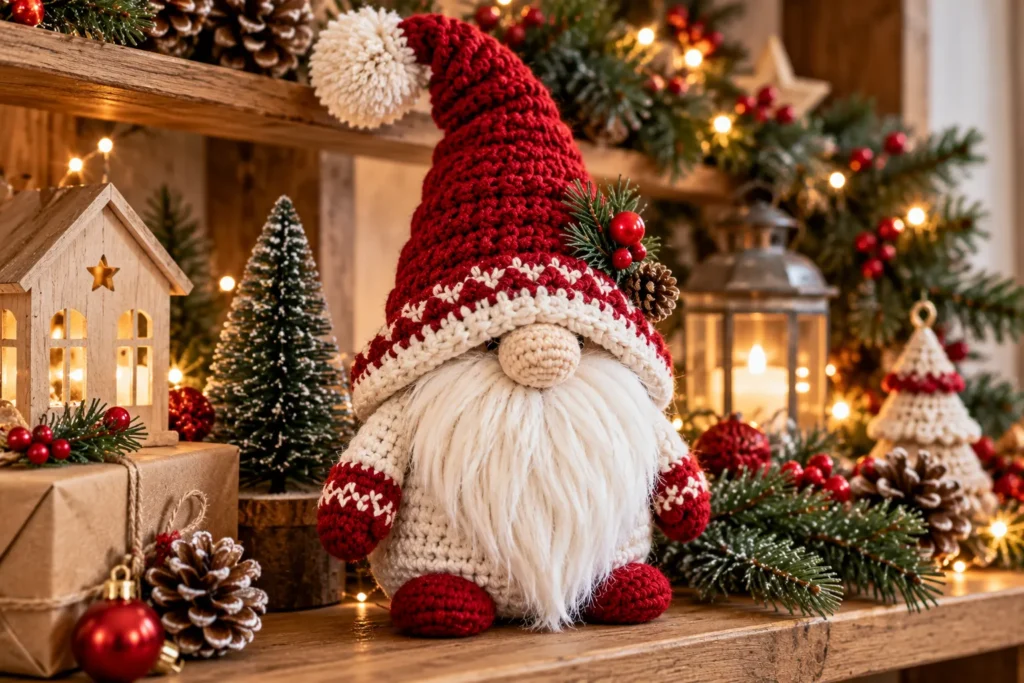
The Signature Gnome Hat
The pointed hat is the most recognizable feature of a Christmas gnome.
For a traditional holiday look, use:
- Red
- Forest green
- Burgundy
- Cream
- White
Start with a narrow point and gradually increase as you work downward.
This produces the characteristic cone shape.
The hat can be worn loosely so that the tip bends naturally to one side.
Adding Hat Trim
A contrasting band at the bottom of the hat adds definition.
White or cream trim works especially well with red and green hats.
For a fluffy winter effect, use textured yarn for the trim.
Gnome Beard
The beard can be made in several ways.
Crochet Beard
Create a small crocheted beard using white or cream yarn.
Fringe Beard
Attach strands of yarn to create a fluffy beard.
Textured Yarn
Bouclé or faux-fur-style yarn can produce a particularly soft beard.
When attaching yarn strands, keep them secure and trim them evenly.
Making a Fluffy Gnome
If you want a more luxurious Christmas gnome, combine smooth yarn for the body with textured yarn for the beard and hat trim.
This contrast makes the character visually interesting.
A soft cream beard against a deep red hat creates a classic Christmas appearance.
Snowman and Gnome Color Combinations
Using a coordinated palette makes the two characters look like part of the same collection.
Traditional Christmas
- White
- Red
- Forest green
- Cream
- Black
Scandinavian Winter
- White
- Cream
- Beige
- Soft grey
- Dusty red
Cozy Neutral
- Ivory
- Taupe
- Beige
- Brown
- Soft green
Pink Christmas
- White
- Blush pink
- Dusty rose
- Burgundy
- Cream
Rustic Christmas
- Cream
- Brown
- Forest green
- Burgundy
- Natural beige
Adding Christmas Accessories
Small accessories can transform simple amigurumi into festive decorations.
Consider adding:
- Tiny bows
- Miniature scarves
- Pom-poms
- Crochet stars
- Small bells
- Embroidered snowflakes
- Tiny Christmas trees
- Wooden beads
Keep decorative elements proportional to the figure.
Making the Figures Stand Upright
If you want your snowman or gnome to sit securely on a shelf, make sure the base is relatively flat.
Before closing the body:
- Check the stuffing distribution.
- Push the stuffing toward the sides.
- Shape the bottom with your fingers.
- Avoid leaving an excessively rounded base.
A properly shaped bottom helps the finished character stand or sit more naturally.
Creating a Matching Set
Instead of making only one character, create a small winter family.
For example:
- One snowman
- One Christmas gnome
- One smaller snowman
- Two mini trees
Use the same color palette throughout.
This makes the collection look cohesive when displayed together.
Crochet Snowman and Gnome as Tree Decorations
If your finished figures are small enough, you can turn them into Christmas tree ornaments.
Attach a sturdy loop of yarn to the top.
For heavier figures, reinforce the attachment point with several stitches.
This creates a charming handmade alternative to traditional plastic or glass ornaments.
Christmas Mantel Styling
Place the snowman and gnome on a mantel alongside:
- Evergreen branches
- Warm fairy lights
- Candles
- Wooden houses
- Pinecones
- Christmas stockings
Use different heights to create visual interest.
A taller gnome can be positioned behind a smaller snowman to create depth.
Tiered Tray Decor
Miniature crochet figures are particularly attractive on tiered trays.
Combine them with:
- Mini trees
- Wooden signs
- Small mugs
- Pinecones
- Artificial greenery
- Red berries
Because crochet has a soft texture, it balances harder materials such as wood and ceramic.
Christmas Table Display
A small crochet snowman can also become part of a holiday table arrangement.
Place one beside each setting or group several in the center of the table.
For a sophisticated look, keep the color palette limited to two or three main shades.
Handmade Christmas Gift Idea
Crochet snowmen and gnomes make wonderful small handmade gifts.
Create a pair and package them together in a small gift box.
You could include:
- One snowman
- One Christmas gnome
- A handmade Christmas card
- A small packet of treats
They can also be added to larger holiday gift baskets.
Beginner Tips for Amigurumi
If this is your first amigurumi project, take your time with stitch counting.
Use a Stitch Marker
Place a stitch marker in the first stitch of every round.
Count Regularly
Do not wait until the end to discover that you have accidentally added or skipped stitches.
Keep Your Stitches Tight
A tight fabric helps keep the stuffing contained.
Stuff Gradually
Add small amounts of stuffing as you work rather than waiting until the final few rounds.
Shape as You Go
Use your fingers to smooth the stuffing and check the silhouette regularly.
Common Crochet Mistakes
The Stuffing Is Visible
Your stitches may be too loose.
Try using a smaller hook or tightening your tension slightly.
The Figure Looks Lumpy
The stuffing may not be distributed evenly.
Remove or add small amounts until the shape becomes smooth.
The Head Is Tilting
Make sure the head is attached securely and centered over the body.
The Hat Is Too Loose
Check the circumference of the hat opening before finishing it.
You can reduce the size or add a snug trim.
The Gnome Does Not Stand Properly
Check the bottom of the body and make sure it has enough structure and a relatively flat base.
Blocking and Finishing
Amigurumi generally does not require traditional blocking in the same way as flat crochet projects.
Instead, focus on shaping.
After stuffing:
- Smooth the surface.
- Adjust the stuffing.
- Shape the body.
- Position the head.
- Arrange the hat.
- Secure accessories.
Weave in all loose ends securely.
Safety Considerations
If these crochet figures are intended as toys rather than decorations, pay particular attention to small parts.
For babies and very young children, avoid unsecured:
- Buttons
- Beads
- Bells
- Plastic eyes
- Small decorative pieces
Embroidered eyes, noses, and buttons are safer alternatives.
Always make sure every attachment is secure.
Caring for Crochet Christmas Amigurumi
Keep your handmade decorations looking beautiful by storing them carefully after the holidays.
Dusting
Use a soft brush or gentle air to remove surface dust.
Washing
Only wash the figures if the yarn and attached decorations are suitable for washing.
Storage
Store them in a clean, dry container away from moisture and direct sunlight.
Avoid placing heavy objects on top of the figures.
For gnomes with tall hats or fluffy beards, use tissue paper to help preserve their shape.
Frequently Asked Questions
Are crochet snowmen and gnomes beginner-friendly?
Yes. The basic shapes rely on common amigurumi techniques such as single crochet, increases, decreases, stuffing, and sewing pieces together.
What yarn is best?
Smooth cotton or acrylic yarn is generally easy to work with and provides clear stitch definition.
Do I need safety eyes?
No. You can embroider the eyes using black yarn or embroidery floss.
How do I make the gnome beard fluffy?
Use strands of cream or white yarn, textured yarn, or faux-fur-style yarn to create a fuller beard.
Can I change the colors?
Absolutely. These characters work beautifully in traditional red and green as well as neutral, Scandinavian, pink, burgundy, and rustic palettes.
Can these figures be used as Christmas ornaments?
Yes. Add a securely attached hanging loop to turn smaller versions into tree decorations.
Can I sell handmade snowmen and gnomes?
Handmade seasonal decorations can be suitable for craft fairs and handmade shops. Before selling, make sure your design and pattern use comply with any applicable pattern licensing terms.
Final Thoughts
A crochet snowman and Christmas gnome make a delightful handmade winter decoration set. Their simple shapes provide plenty of opportunities to experiment with colors, textures, accessories, and facial expressions.
The snowman can be dressed with a tiny scarf and winter hat, while the gnome can feature a long pointed Christmas hat and fluffy beard. Together, they create a charming seasonal display for a Christmas tree, mantel, shelf, tiered tray, or holiday table.
Choose a traditional red-and-green palette for a classic Christmas look, or experiment with cream, beige, dusty pink, burgundy, and sage green for a softer modern style.
Most importantly, have fun personalizing the characters. Small details such as embroidered faces, tiny buttons, miniature scarves, pom-poms, and decorative trims can turn basic crochet shapes into unique holiday keepsakes that you can bring out and enjoy every Christmas.