
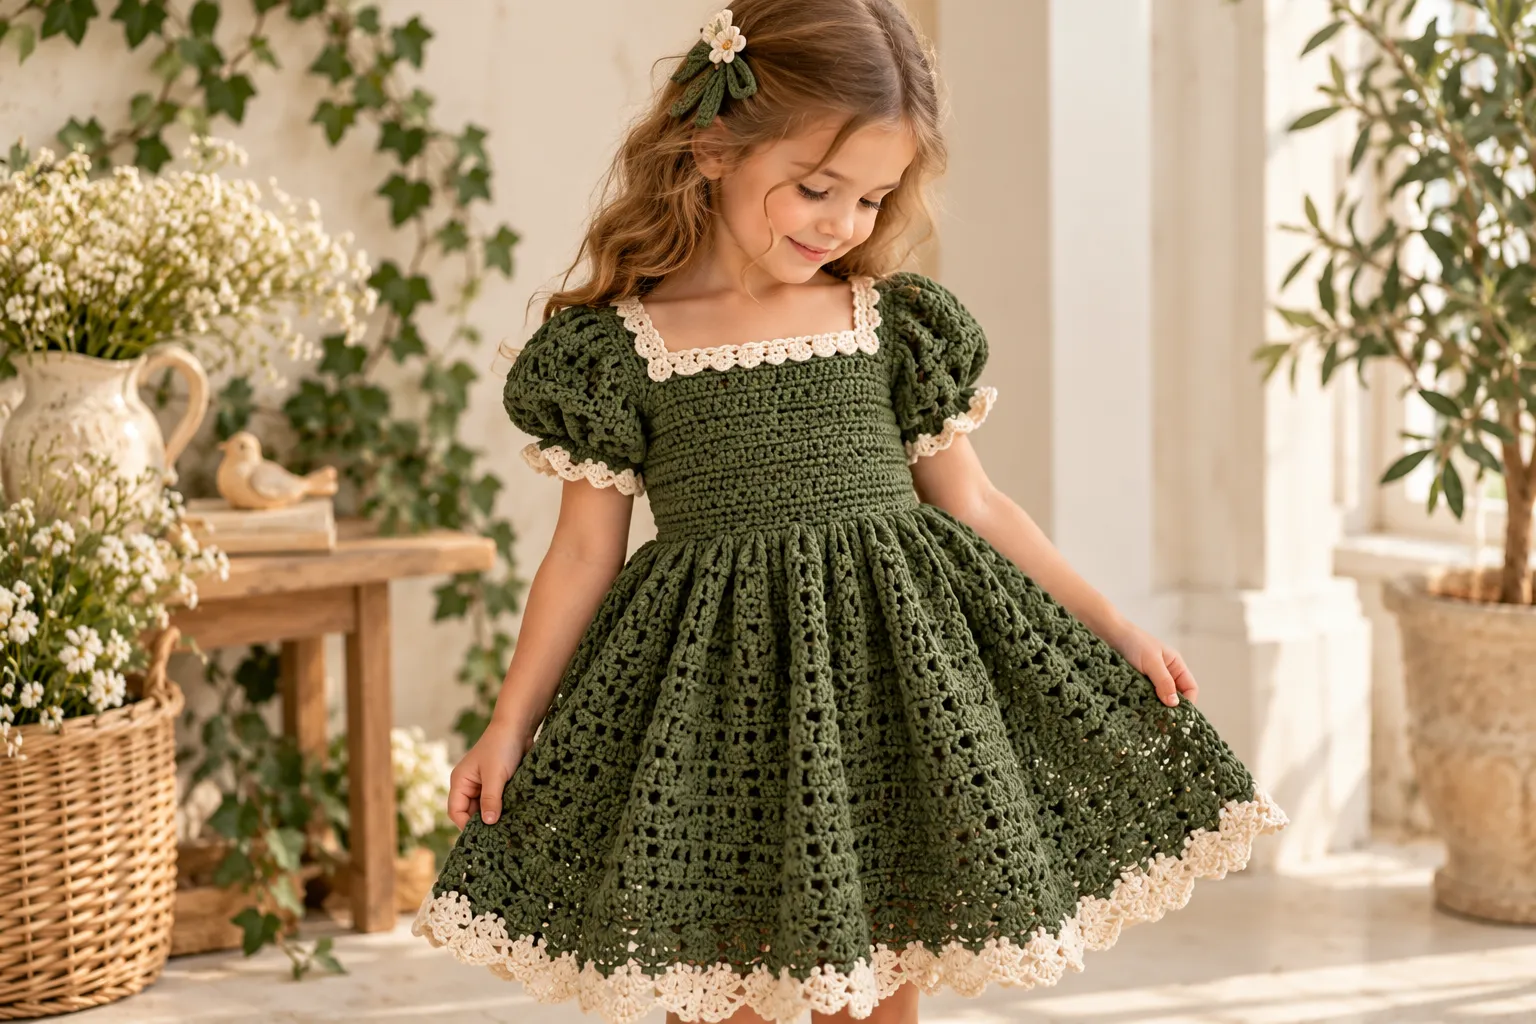
A handmade crochet dress can turn a simple yarn project into a truly special little outfit. This green crochet girl dress combines a fitted crochet bodice, a softly gathered skirt, and delicate puff sleeves for a charming design that works beautifully for birthdays, family photographs, holidays, parties, and everyday wear.
The rich green color gives the dress a timeless botanical feel, while the puff sleeves add a romantic detail without making the construction unnecessarily complicated.
This guide walks through the complete construction, from choosing yarn and measuring the child to crocheting the bodice, shaping the waist, creating the skirt, adding puff sleeves, finishing the neckline, and customizing the dress for different ages.
Safety note: Crochet children’s clothing should be comfortable and free from loose decorative components. Secure all buttons and embellishments firmly, avoid long cords around the neck, and check the finished garment regularly for loose parts.
Why Make a Crochet Puff-Sleeve Dress?
A crochet dress is a wonderful project because it allows you to customize nearly every element.
You can change:
- Color
- Sleeve length
- Skirt length
- Bodice texture
- Waist shape
- Border
- Buttons
- Decorative motifs
- Overall fullness
The puff sleeve is particularly effective because it gives a handmade dress a boutique-inspired silhouette.
Finished Dress Design
The basic construction consists of:
- Crochet bodice
- Neckline
- Armholes
- Waist section
- Full skirt
- Puff sleeves
- Sleeve cuffs
- Skirt border
- Optional decorative details
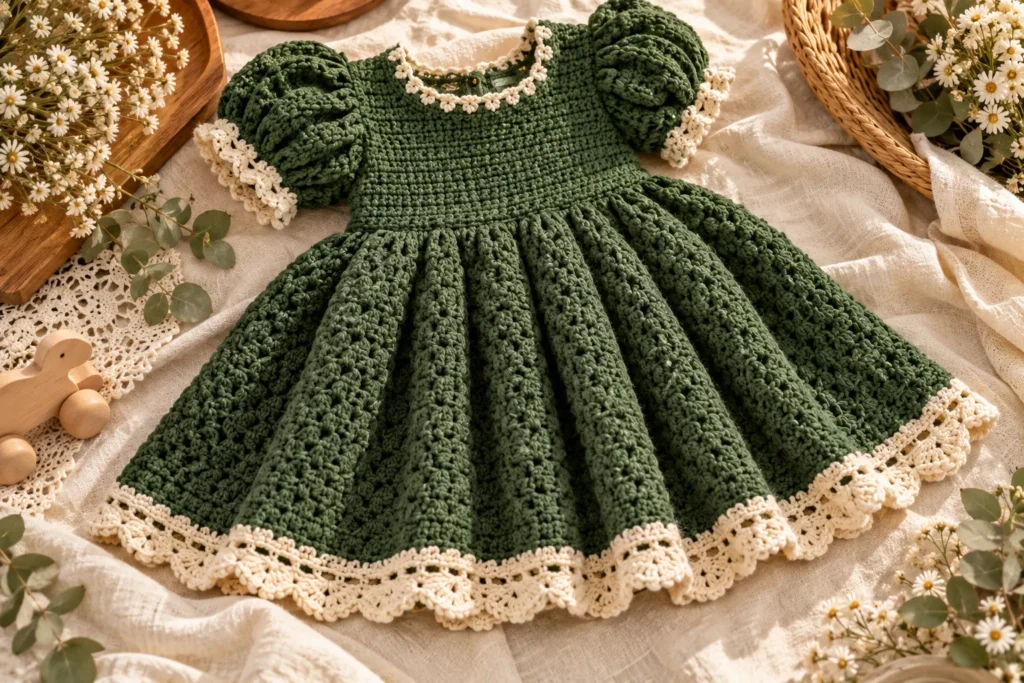
The dress can be made as a single-color design or customized with contrasting trim.
A beautiful classic combination is:
Deep green + cream edging
For a softer appearance, try:
Sage green + ivory
Materials You’ll Need
Yarn
Choose a soft yarn suitable for children’s clothing.
Good choices include:
- Cotton
- Cotton-acrylic blend
- Soft acrylic
- Bamboo blend
- Lightweight washable yarn
Cotton is especially useful for warmer weather because it creates a breathable fabric and usually provides excellent stitch definition.
For a fuller winter dress, a soft acrylic blend can provide additional warmth.
Suggested Yarn Weight
A lightweight or medium-light yarn works well for a girl’s crochet dress.
Using extremely thick yarn can make the skirt heavy and the sleeves bulky.
Crochet Hook
Start around:
3.0–4.0 mm
and adjust according to your yarn and gauge.
The bodice generally benefits from a slightly firmer fabric, while the skirt can use the same hook or a slightly larger one if additional drape is desired.
Additional Supplies
Prepare:
- Yarn needle
- Scissors
- Measuring tape
- Stitch markers
- Buttons if desired
- Blocking mat or clean towel
Crochet Abbreviations
| Abbreviation | Meaning |
|---|---|
| ch | Chain |
| sc | Single crochet |
| hdc | Half double crochet |
| dc | Double crochet |
| sl st | Slip stitch |
| BLO | Back loop only |
| FLO | Front loop only |
| st | Stitch |
| sk | Skip |
| inc | Increase |
| dec | Decrease |
| rep | Repeat |
Choosing the Right Size
Children grow quickly, so measurements are more reliable than age alone.
| Approx. Age | Chest | Waist | Suggested Dress Length |
|---|---|---|---|
| 2–3 years | 52–54 cm | 50–52 cm | 48–52 cm |
| 4–5 years | 55–57 cm | 51–53 cm | 55–60 cm |
| 6–7 years | 58–61 cm | 53–55 cm | 62–68 cm |
| 8–9 years | 62–65 cm | 55–57 cm | 70–76 cm |
| 10–12 years | 66–70 cm | 57–60 cm | 78–85 cm |
These measurements are general starting points.
Always measure the child whenever possible.
Important Measurements
Before beginning, record:
- Chest circumference
- Waist circumference
- Shoulder width
- Armhole depth
- Bodice length
- Desired skirt length
- Upper-arm circumference
- Sleeve length
Write these measurements down before starting.
Gauge Swatch
Gauge is especially important for a fitted crochet bodice.
Create a small swatch using your chosen stitch.
For example, you might aim for approximately:
18–20 stitches × 12–14 rows = 10 × 10 cm
Your actual gauge will depend on your yarn and hook.
If your fabric is too loose, use a smaller hook.
If it is too dense, use a larger hook.
The final fabric should have enough structure to support the skirt without feeling stiff.
Crochet Dress Construction
The easiest approach is to create the dress in sections.
The bodice is worked first.
The skirt is then attached around the waist.
Finally, the puff sleeves and finishing details are added.
This construction makes sizing and customization easier.
Part 1: Crochet the Bodice
Step 1: Create the Foundation
Begin with a foundation chain based on the child’s chest measurement.
The chain should fit comfortably around the body without being restrictive.
Join carefully if you’re working the bodice in rounds.
Make sure the foundation chain is not twisted.
Step 2: Work the First Round
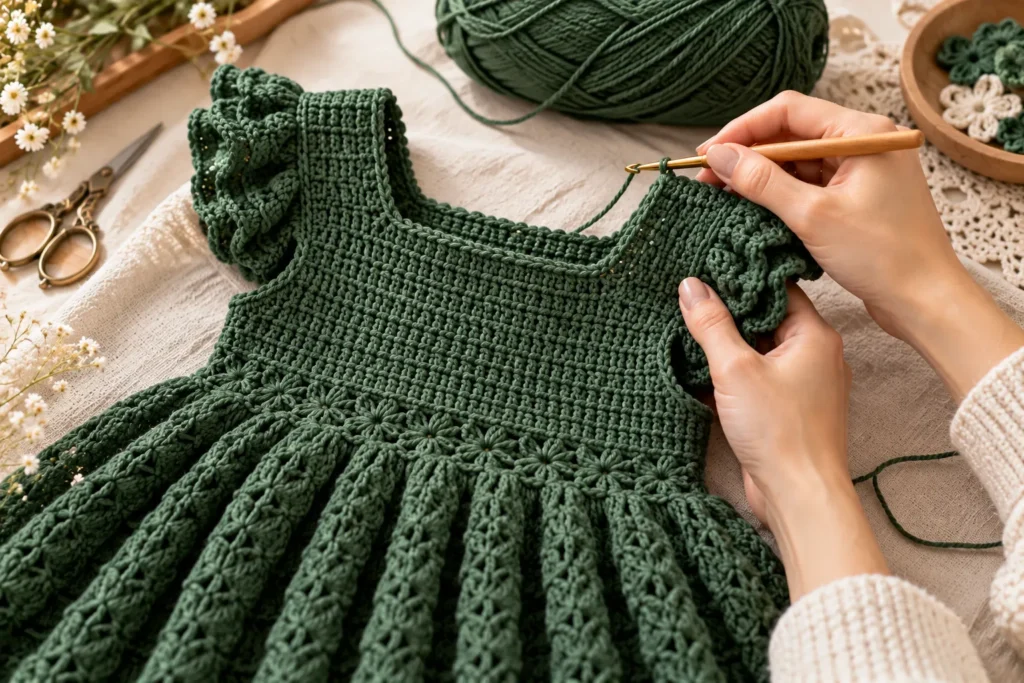
Work your chosen stitch evenly around the foundation chain.
Half double crochet is an excellent option because it creates a smooth fabric with some natural stretch.
At the end of the round, join with a slip stitch if you’re working continuously.
Step 3: Continue the Bodice
Work several rounds evenly.
For a fitted design, periodically check the garment against the child’s measurements.
The bodice should sit comfortably around the chest.
Avoid making it excessively tight.
Children need freedom of movement.
Step 4: Shape the Waist
If you want a more defined waist, gradually reduce the circumference.
You can make small decreases at evenly spaced points.
For example:
hdc 8, hdc2tog, repeat
The exact placement depends on your stitch count.
Don’t over-shape the waist.
The dress should remain comfortable when the child sits, bends, and moves.
Creating a Square or Scoop Neckline
There are several neckline options.
Simple Round Neck
Continue working evenly and finish with a neat border.
This is the easiest option.
Scoop Neck
Create a slightly deeper curved neckline by shaping the front section.
Square Neck
Divide the upper section into:
- Left shoulder
- Neck opening
- Right shoulder
Work each shoulder separately.
A square neckline gives the dress a particularly polished boutique appearance.
Part 2: Creating the Waist
Once the bodice reaches the desired length, establish the waistline.
The waist is where the skirt begins.
A simple transition row can be made using:
dc around
This creates a taller stitch and provides a natural foundation for increasing the skirt.
For additional definition, use a contrasting row.
For example:
Green bodice + cream waist row + green skirt
Part 3: Crochet the Full Skirt
The skirt is where the dress begins to develop its beautiful shape.
Step 1: Begin Increasing
Work double crochet around the waist.
Increase evenly around the round.
The number of increases determines how full the skirt becomes.
For a softly gathered skirt, use moderate increases.
For a dramatic princess-style skirt, add more.
Step 2: Continue the Skirt
Work several rounds without increases.
Then add another increase round.
Repeat until the skirt reaches the desired length.
This produces a gentle A-line silhouette.
Step 3: Create More Volume
If you want an especially full skirt, increase more frequently.
You can also use clusters or shell stitches.
A simple shell variation can create a beautiful decorative texture.
Optional Shell Stitch
Try:
skip 2 stitches, 5 dc in next stitch, skip 2 stitches, sc in next stitch
Repeat around the skirt.
This produces a classic scalloped appearance.
Creating a Full Crochet Skirt
For a more dramatic dress, use a combination of:
- Double crochet
- Increase rounds
- Shell stitches
- Picot edging
This creates a lightweight but voluminous skirt.
Avoid making the skirt excessively heavy.
A very large amount of yarn can pull down on the bodice.
Part 4: Crochet Puff Sleeves
The puff sleeves are the signature feature of this design.
They look complicated, but the construction is fairly straightforward.
Step 1: Create the Armhole
Attach yarn around the armhole.
Work a foundation round of single crochet.
This creates a stable base for the sleeve.
Step 2: Add Volume
Work a round of double crochet.
To create the puff effect, add several increases around the upper sleeve.
The increases create extra fabric that gathers naturally.
Step 3: Build the Sleeve
Continue working several rounds.
Gradually reduce the circumference toward the cuff.
This creates the characteristic:
full shoulder → gathered lower sleeve
shape.
Step 4: Create the Cuff
Finish with several rounds of single crochet.
For a more structured cuff, work through the back loop only.
A small cream border can create a beautiful contrast.
Puff Sleeve Variations
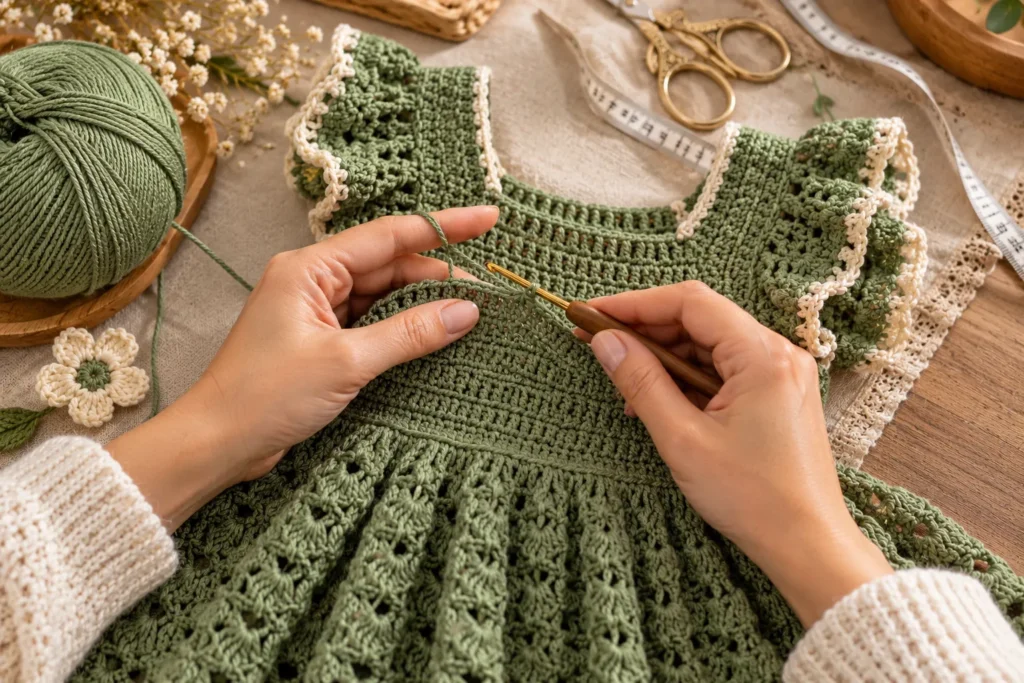
You don’t have to make every puff sleeve identical.
Short Puff Sleeve
End just above the elbow.
Elbow-Length Sleeve
Create a longer puff sleeve that finishes around the elbow.
Long Puff Sleeve
Continue the sleeve toward the wrist and finish with a narrow cuff.
Extra-Voluminous Puff Sleeve
Add more increases near the shoulder.
This creates a dramatic vintage-inspired silhouette.
Creating a Decorative Waist
The waist is a great place to add detail.
Try a narrow crochet belt.
Create a long chain and work a few rows of single crochet.
Thread it around the waist.
However, avoid long loose ties around young children and ensure any closure is secure and age-appropriate.
Another option is a fixed crochet waistband.
This creates the appearance of a belt without loose cords.
Green Color Variations
Green is surprisingly versatile.
Forest Green
Deep and elegant.
Perfect for autumn and winter.
Sage Green
Soft and modern.
Beautiful for spring and everyday wear.
Emerald Green
Rich and festive.
Excellent for special occasions.
Olive Green
Earthy and sophisticated.
Works especially well with cream.
Mint Green
Light and playful.
Perfect for warmer seasons.
Moss Green
Natural and rustic.
Pairs beautifully with brown and oatmeal.
Green and Cream Combination
For a timeless handmade look, use:
Forest green + ivory
Keep the dress predominantly green.
Use ivory for:
- Sleeve cuffs
- Neckline
- Waist
- Skirt border
This creates a polished contrast without overwhelming the design.
Adding Crochet Flowers
Small crochet flowers can transform the dress.
Place them:
- At the waist
- Near one shoulder
- Along the skirt
- Around the neckline
For a refined look, use only a few flowers.
A single cream flower at the waist can be enough.
Adding a Crochet Bow
A small bow is another beautiful option.
Create a rectangular crochet piece.
Fold it at the center.
Wrap yarn around the middle to form the bow shape.
Attach it securely to the dress.
For young children, make sure all decorative elements are firmly secured and regularly inspected.
Skirt Border Ideas
The bottom edge is an opportunity to add personality.
Simple Scallops
Create small rounded scallops around the edge.
Picot Border
Add small picots for a delicate finish.
Cream Contrast Border
One or two rounds of cream yarn can beautifully frame the green skirt.
Shell Border
Use a repeating shell pattern for a more decorative appearance.
Step-by-Step Finishing
Once the dress is complete:
- Weave in all yarn ends.
- Check the neckline.
- Check both armholes.
- Inspect the sleeve symmetry.
- Measure the skirt.
- Check buttons or embellishments.
- Gently wash according to the yarn label.
- Block the dress if appropriate.
- Allow it to dry completely.
Blocking the Crochet Dress
Blocking can dramatically improve the finished appearance.
Lay the dress flat on a clean blocking surface.
Gently arrange:
- Shoulders
- Neckline
- Sleeves
- Waist
- Skirt
- Bottom edge
Don’t stretch the dress aggressively.
The purpose is to even out the stitches and improve the silhouette.
Common Problems and Solutions
The Bodice Is Too Tight
The foundation chain or gauge may be too small.
Use a larger hook or increase the starting stitch count.
The Bodice Is Too Loose
Reduce the starting circumference or use a smaller hook.
The Skirt Is Too Flat
Add more increase rounds.
The Skirt Is Too Heavy
Reduce the amount of fullness or use a lighter yarn.
The Sleeves Don’t Puff
You may need more increases around the upper sleeve.
The Sleeves Are Too Bulky
Reduce the number of increases.
The Dress Looks Uneven
Check your stitch count and make sure increases are distributed consistently.
Making the Dress Longer
To create a midi or ankle-length version, simply continue the skirt.
However, remember that additional length adds weight.
For younger children, a knee-length or calf-length dress is often easier to move around in.
Making a Matching Crochet Set
The green dress can become part of a complete handmade outfit.
Create matching:
- Crochet headband
- Hair bow
- Cardigan
- Mini handbag
- Ballet-style shoes
- Flower accessory
A small cream crochet headband with a green flower would complement the dress beautifully.
Seasonal Styling
Spring
Pair sage or mint green with cream shoes and a lightweight cardigan.
Summer
Use cotton yarn and a sleeveless version.
Autumn
Choose forest or olive green with brown accessories.
Winter
Use a slightly warmer yarn and add a coordinating crochet cardigan.
Photographing the Finished Dress
Green crochet looks particularly beautiful in natural light.
For a premium editorial photograph, use:
- Cream background
- Natural wood
- Soft linen
- Botanical greenery
- Neutral shoes
- Minimal accessories
Avoid overly busy backgrounds.
Let the texture of the crochet remain the focus.
A close-up photograph of the puff sleeve is especially useful because it showcases the construction.
Crochet Dress Gift Idea
A handmade green crochet dress can make an unforgettable birthday or holiday gift.
Fold the dress carefully and pair it with:
- Matching headband
- Small crochet flower
- Handmade card
- Coordinating gift box
For a more luxurious presentation, use cream tissue paper and a simple ribbon.
Care Instructions
Always follow the yarn manufacturer’s washing instructions.
For washable crochet clothing:
- Use gentle detergent
- Avoid harsh chemicals
- Avoid excessive heat
- Reshape while damp
- Dry flat when recommended
- Store completely dry
If the dress contains buttons or decorative elements, inspect them after washing.
Frequently Asked Questions
What yarn is best for a girl’s crochet dress?
Soft cotton, cotton blends, and washable lightweight acrylic are practical choices. Choose yarn that feels comfortable against the skin and isn’t excessively heavy.
Is this dress suitable for beginners?
The individual techniques are beginner-friendly, but constructing a fitted dress requires some experience with measuring, shaping, increases, and decreases.
Can I make the dress in another color?
Absolutely. Sage, cream, lavender, dusty pink, mustard, burgundy, and blue can all work beautifully.
How do I make the puff sleeves bigger?
Increase the number of stitches around the upper sleeve to create additional fullness.
Can I make the sleeves longer?
Yes. Continue working rounds until you reach the desired length, then finish with the cuff.
How do I make the skirt fuller?
Increase more frequently around the waist and throughout the first few skirt rounds.
Can I add pockets?
Yes. Small crochet patch pockets can be added to the front of the skirt.
Make sure they are securely attached.
How can I adjust the dress for a different age?
Take the child’s measurements rather than relying solely on age. Adjust the bodice circumference, armhole size, sleeve dimensions, and skirt length accordingly.
Final Thoughts
This green crochet puff-sleeve dress combines classic crochet techniques with a charming, feminine silhouette. The fitted bodice keeps the design neat, while the gathered skirt and puff sleeves create the playful shape that makes the dress stand out.
The beauty of making the dress yourself is that you can completely personalize it. Choose sage green for a soft modern look, forest green for a rich autumn design, or emerald for a special occasion. Add cream edging, crochet flowers, a bow, or a matching headband to create a coordinated handmade outfit.
Take your time with the measurements and gauge before beginning the bodice. Once the foundation fits correctly, the rest of the dress becomes much easier to customize.
With the right yarn, consistent tension, and careful finishing, this project can become a beautiful handmade wardrobe piece that feels both timeless and completely unique.