
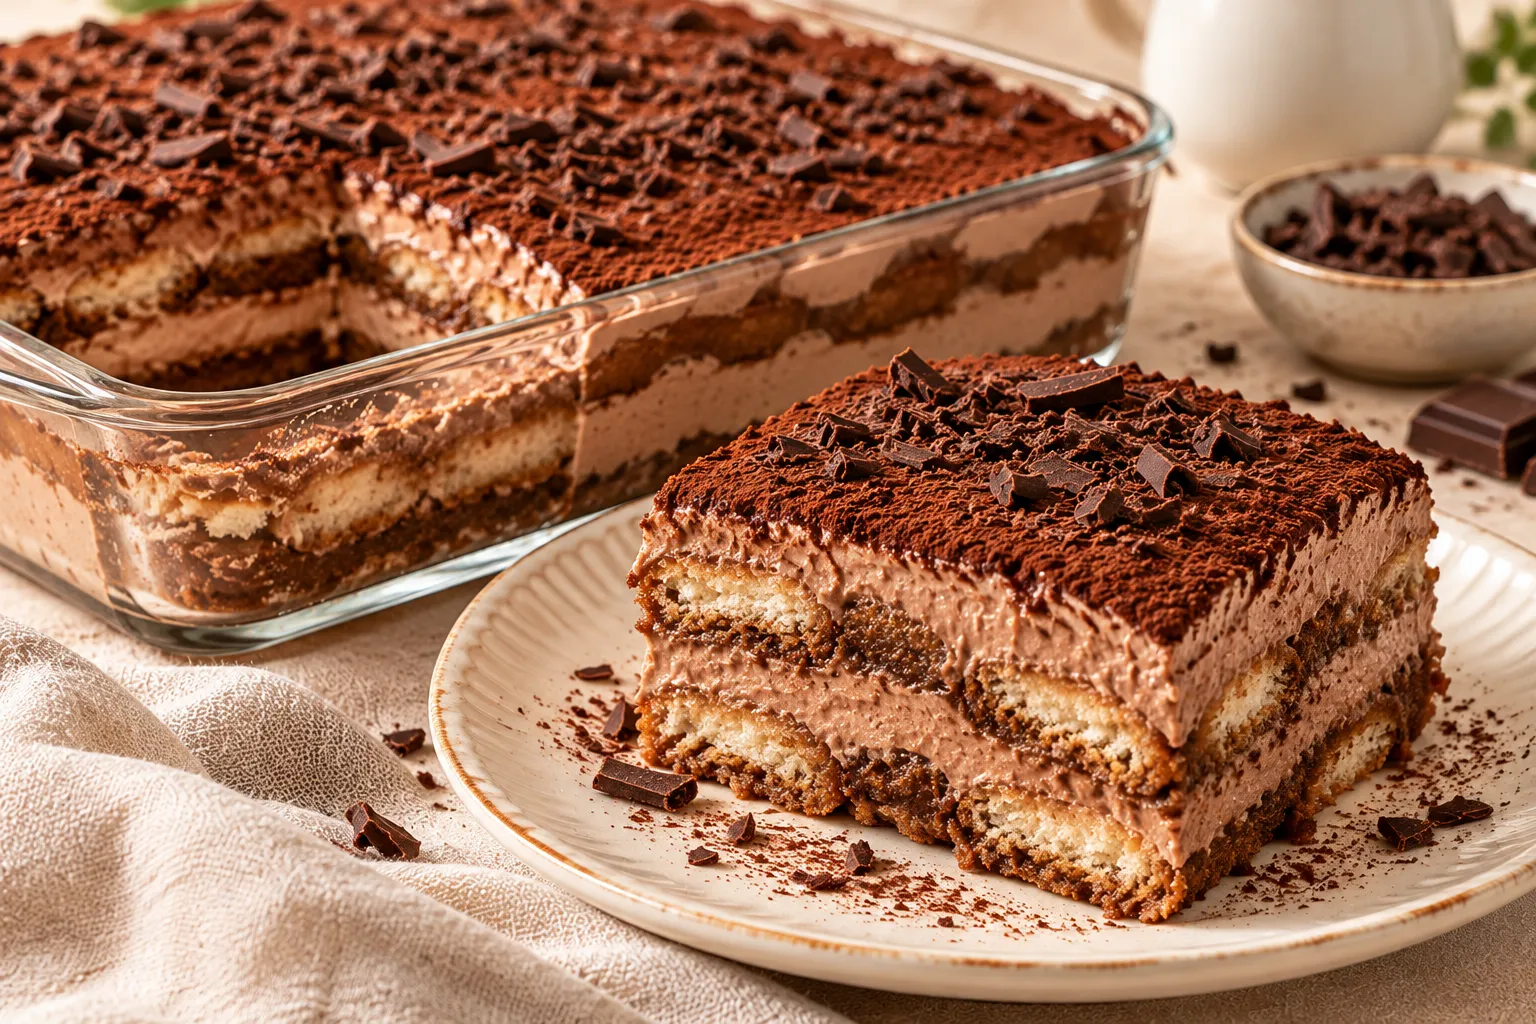
Looking for a rich chocolate dessert that requires minimal effort and no oven? This 3-Ingredient No-Bake Chocolate Tiramisu is the perfect solution. With just three main ingredients, you can create a creamy, chocolatey dessert with soft biscuit layers that melt beautifully in every bite.
Inspired by classic tiramisu, this simplified version swaps the traditional coffee-and-mascarpone preparation for a delicious combination of chocolate cream and coffee-soaked biscuits. The result is an indulgent layered dessert that’s easy enough for a weekday treat yet elegant enough to serve to guests.
The best part is that you don’t need complicated baking techniques, special equipment, or a long list of ingredients. Simply prepare the chocolate cream, layer it with dipped biscuits, and refrigerate until everything becomes soft, creamy, and delicious.
Whether you’re craving a quick chocolate fix or need a make-ahead dessert for a family gathering, this easy no-bake tiramisu is a recipe worth saving.
Why You’ll Love This 3-Ingredient Chocolate Tiramisu
- Only three main ingredients: Chocolate, heavy whipping cream, and ladyfinger biscuits are all you need.
- No oven required: The dessert comes together without baking.
- Rich chocolate flavor: Melted chocolate creates a smooth, decadent cream.
- Soft, creamy layers: Coffee-dipped biscuits soften as the dessert chills.
- Perfect for making ahead: Prepare it several hours before serving for the best texture.
- Easy to customize: Add cocoa powder, chocolate shavings, or a little espresso for extra flavor.
- Beautiful presentation: Serve it in a glass dish or individual dessert cups for an elegant finish.
Ingredients for 3-Ingredient No-Bake Chocolate Tiramisu
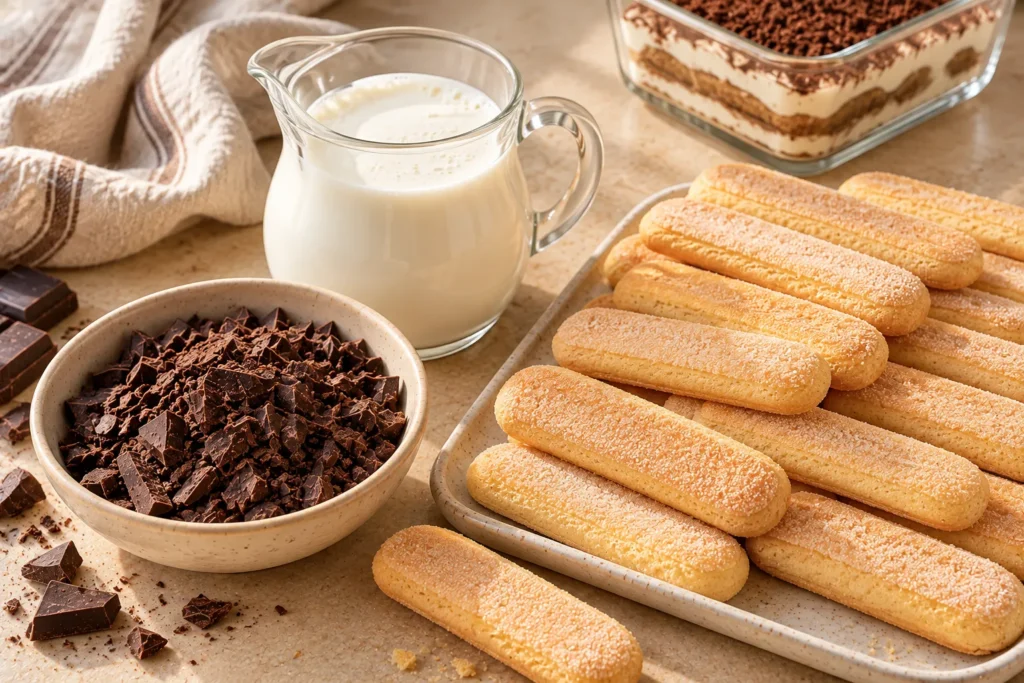
This recipe makes approximately 6 servings in a small rectangular dish or individual dessert glasses.
The Three Main Ingredients
- 200 g dark or semi-sweet chocolate: Choose chocolate that melts smoothly and has a cocoa content of approximately 50–60% for a balanced flavor.
- 400 ml heavy whipping cream: Use cold cream with at least 30–35% fat for a stable, creamy texture.
- 150–200 g ladyfinger biscuits: These form the soft layers traditionally associated with tiramisu.
Optional Ingredient for Dipping
- 150–200 ml cooled strong coffee or espresso
Coffee is optional if you want to keep the recipe to exactly three ingredients. You can briefly dip the ladyfingers in cooled coffee for a more traditional tiramisu flavor, or use milk for a milder, kid-friendly variation.
Important note: The three-ingredient base is made from chocolate, cream, and ladyfingers. Coffee is an optional addition for dipping, not part of the chocolate cream itself.
Equipment You’ll Need
- A heatproof bowl
- A saucepan or microwave for melting chocolate
- An electric hand mixer or stand mixer
- A rubber spatula
- A shallow dish for the coffee, if using
- A small rectangular serving dish or individual dessert glasses
- A refrigerator
How to Make 3-Ingredient No-Bake Chocolate Tiramisu
Step 1: Melt the Chocolate
Finely chop the chocolate and place it in a heatproof bowl.
Melt it in the microwave in 15–20-second intervals, stirring after each interval until smooth. Alternatively, place the bowl over a saucepan of gently simmering water, making sure the bottom of the bowl does not touch the water.
Allow the melted chocolate to cool until it is still fluid but no longer hot. This is important because very hot chocolate can cause the whipped cream to deflate or become grainy when combined.
Step 2: Whip the Heavy Cream
Pour the cold heavy whipping cream into a large mixing bowl.
Using an electric mixer, beat the cream until it reaches medium-stiff peaks. When you lift the beaters, the cream should hold its shape while remaining smooth and creamy.
Avoid whipping for too long. Overwhipped cream can become grainy and difficult to fold into the chocolate.
For the best results, use cold cream and a clean mixing bowl. You can also chill the bowl and beaters for 10–15 minutes before starting.
Step 3: Make the Chocolate Cream
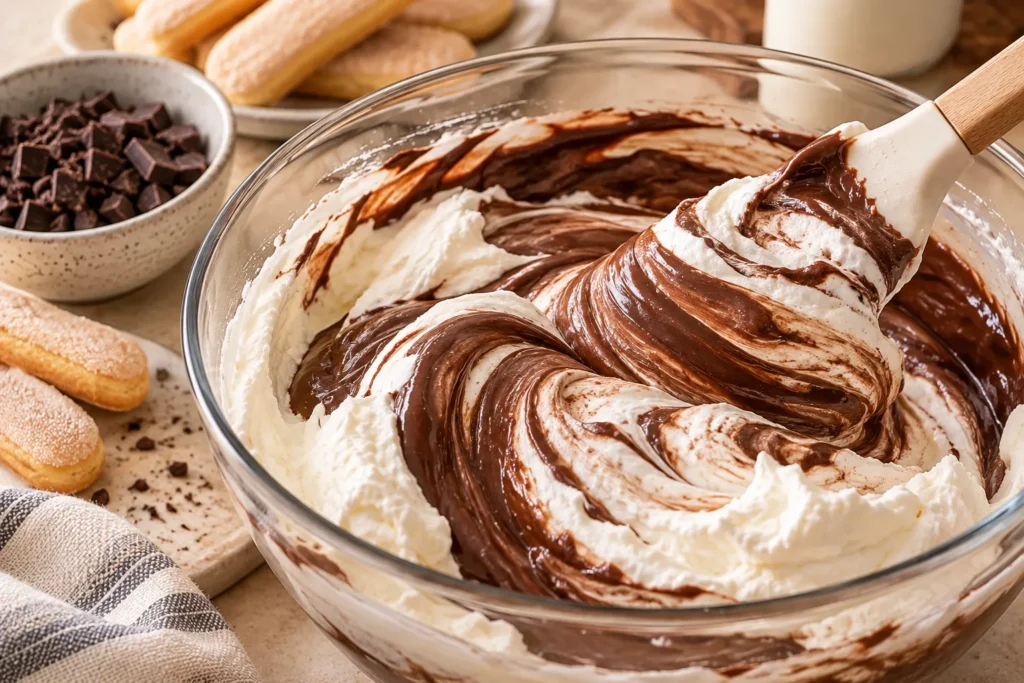
Add a small spoonful of whipped cream to the cooled melted chocolate and stir gently to loosen the mixture.
Next, fold the chocolate mixture into the remaining whipped cream in two or three additions. Use a spatula and gentle movements, lifting the mixture from the bottom of the bowl and folding it over the top.
Continue until the chocolate is evenly incorporated and the cream has a smooth, light chocolate color.
The finished mixture should be thick enough to spread between the biscuit layers. If it appears too loose, refrigerate it briefly before assembling the dessert.
Step 4: Prepare the Ladyfinger Biscuits
If you are using coffee, pour the cooled espresso or strong coffee into a shallow bowl.
Dip each ladyfinger quickly into the coffee, turning it briefly so the surface becomes moist without becoming saturated.
Ladyfingers absorb liquid quickly. Leaving them submerged for too long can make the dessert watery or cause the biscuits to fall apart during assembly.
If you prefer a milder chocolate flavor, dip the biscuits in milk instead. You can also leave them plain, although the finished dessert will have a firmer biscuit texture.
Step 5: Assemble the First Layer
Arrange a single layer of dipped ladyfingers in the bottom of your serving dish. Break a few biscuits into smaller pieces if necessary to fill gaps.
Spread approximately half of the chocolate cream over the biscuits, using a spatula to create an even layer.
Make sure the cream reaches the edges of the dish so the finished dessert has a neat, layered appearance.
Step 6: Add the Second Layer
Arrange another layer of ladyfingers over the chocolate cream.
Spread the remaining chocolate cream over the top, smoothing it gently with a spatula.
For individual servings, alternate the biscuits and chocolate cream in small glasses. Transparent glasses work especially well because they display the contrasting layers.
If you want a decorative finish, reserve a little chocolate cream for piping onto the surface just before serving.
Step 7: Refrigerate Until Set
Cover the dish and refrigerate for at least 4–6 hours. For the best texture, leave it overnight.
During chilling, the biscuits absorb moisture from the cream and soften, creating the tender layers that make tiramisu so appealing.
The chocolate cream also becomes firmer as it chills, making the dessert easier to slice or spoon into portions.
Step 8: Decorate and Serve
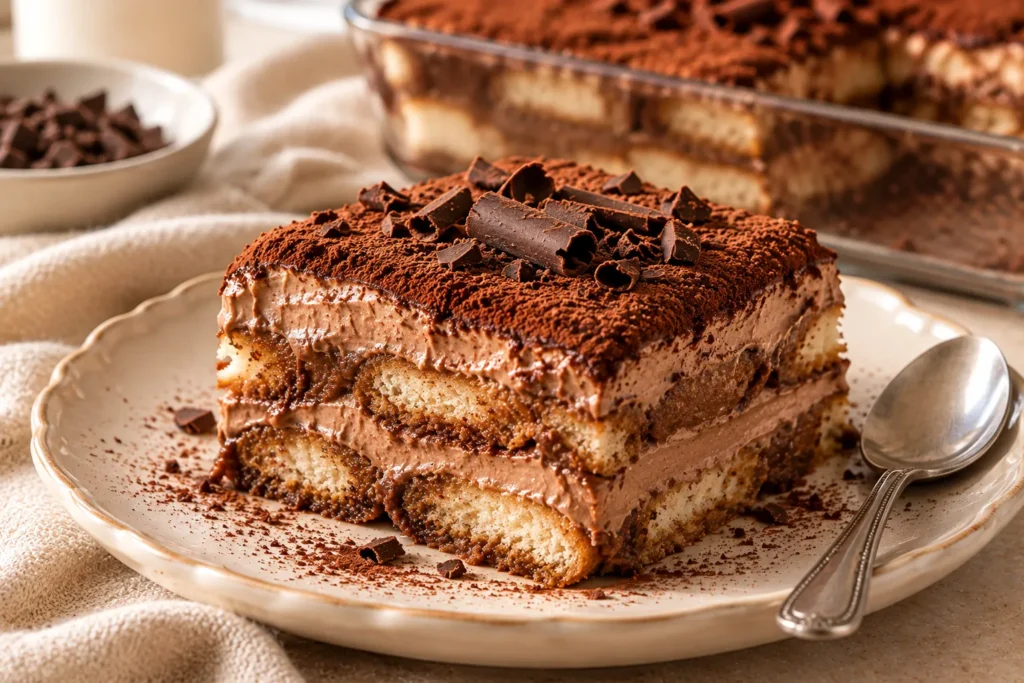
Before serving, you can finish the dessert with a light dusting of cocoa powder, grated chocolate, or chocolate curls.
Although these garnishes are optional, they add a polished appearance and reinforce the chocolate flavor.
Use a sharp knife to cut neat portions if you have prepared the dessert in a rectangular dish. For individual glasses, serve with a small dessert spoon.
Keep the tiramisu refrigerated until just before serving for the best texture and food safety.
Tips for the Best Chocolate Tiramisu
Use Good-Quality Chocolate
Chocolate is the main flavor of this dessert, so its quality makes a noticeable difference. Semi-sweet chocolate gives you a balanced flavor, while darker chocolate creates a more intense and less sweet result.
If you use very dark chocolate, the cream may taste slightly more bitter. Choose a variety that suits your preference.
Let the Chocolate Cool Before Folding
Chocolate that is too hot can melt the whipped cream and create a loose mixture. Let it cool until it is fluid but only slightly warm before combining it with the cream.
If the chocolate becomes too cool and starts to harden, warm it very gently until it becomes smooth again.
Don’t Overwhip the Cream
The cream should hold soft-to-medium-stiff peaks before you fold in the chocolate. Overwhipped cream can create a dense or grainy texture.
Stop mixing as soon as the chocolate is evenly distributed.
Dip the Ladyfingers Quickly
A brief dip is enough to moisten the biscuits. Overly saturated ladyfingers can release excess liquid into the dessert, making the layers soggy.
Allow Enough Chilling Time
Although the ingredients can be assembled quickly, the dessert needs several hours in the refrigerator to develop its texture. Overnight chilling usually produces the most cohesive layers.
Use a Dish That Fits the Biscuits
Choose a dish that allows the ladyfingers to form even layers. A dish that’s too large can produce thin layers, while a smaller dish creates a taller dessert.
Common Mistakes and How to Avoid Them
| Problem | Possible cause | Solution |
|---|---|---|
| Chocolate cream becomes grainy | Chocolate was too hot or the mixture was overmixed | Cool the chocolate and fold gently |
| Cream becomes runny | Cream was insufficiently whipped or melted chocolate was too warm | Whip to medium-stiff peaks and cool the chocolate before combining |
| Ladyfingers become mushy | Biscuits were soaked for too long | Dip quickly in cooled coffee |
| Dessert doesn’t hold its shape | It hasn’t chilled long enough | Refrigerate for at least 4–6 hours |
| Chocolate cream tastes too bitter | Chocolate has a high cocoa percentage | Use semi-sweet chocolate for a milder flavor |
| Layers look uneven | Cream was not spread evenly or biscuits were different sizes | Arrange the biscuits closely and smooth each cream layer |
| Chocolate hardens into small pieces | Melted chocolate was too cool when added to the cream | Ensure it is fluid and slightly warm before folding |
Delicious Variations to Try
Chocolate Coffee Tiramisu
For a more traditional tiramisu-inspired flavor, dip the ladyfingers in cooled espresso or strong coffee. The slight bitterness balances the sweetness and richness of the chocolate cream.
Milk Chocolate Tiramisu
Replace dark chocolate with milk chocolate for a sweeter, gentler flavor. Because milk chocolate is sweeter, the finished dessert may taste richer and less intense.
White Chocolate Tiramisu
Use white chocolate for a different flavor profile. White chocolate behaves differently from dark chocolate, so melt it gently and ensure the cream mixture is well chilled before assembly. The finished dessert will be sweeter and more delicate.
Individual Chocolate Tiramisu Cups
Layer the biscuits and chocolate cream in small glasses or jars. This presentation is ideal for dinner parties because the servings are ready to serve without cutting.
Chocolate Hazelnut Tiramisu
For a variation beyond the three-ingredient base, fold a small amount of chocolate-hazelnut spread into the cream mixture. The result will be sweeter, richer, and slightly nutty.
Chocolate Tiramisu with Cocoa
Dust the finished dessert with unsweetened cocoa powder just before serving. The cocoa adds a gentle bitterness that contrasts beautifully with the creamy chocolate layers.
Berry Chocolate Tiramisu
Add a thin layer of sliced strawberries or raspberries between the cream and biscuits. The fruit brings freshness and acidity to the rich chocolate flavor. Because fruit releases moisture, add it sparingly.
How to Store No-Bake Chocolate Tiramisu
Keep the dessert covered in the refrigerator at 4°C (40°F) or below.
Because it contains dairy cream, it should not remain at room temperature for more than 2 hours, or 1 hour in temperatures above 32°C (90°F).
For the best flavor and texture, enjoy the tiramisu within 2–3 days. Over time, the biscuits will continue to soften and the layers may become less distinct, although the dessert can remain enjoyable.
If you are making it for a party, prepare it the day before and add cocoa powder or chocolate shavings shortly before serving.
Can You Freeze Chocolate Tiramisu?
Freezing is possible, but it may change the texture of the whipped cream after thawing. The cream can become less smooth, and the biscuits may soften further.
For the best results, prepare this dessert fresh and refrigerate it rather than freezing it.
Frequently Asked Questions
Can I really make chocolate tiramisu with only three ingredients?
Yes. The core recipe uses chocolate, heavy whipping cream, and ladyfinger biscuits. Coffee is optional for dipping the biscuits, and toppings such as cocoa powder or chocolate shavings are optional extras.
Does this recipe contain mascarpone?
No. This simplified version uses whipped cream and melted chocolate instead of the traditional mascarpone mixture. It is inspired by tiramisu rather than a classic Italian tiramisu recipe.
Can I make it without coffee?
Absolutely. You can leave the biscuits plain or dip them briefly in milk. The dessert will still have a delicious chocolate flavor.
Why is my chocolate cream not fluffy?
The cream may not have been whipped enough, or the chocolate may have been too hot when added. Whip the cream until it holds its shape and allow the melted chocolate to cool before folding it in.
How long does chocolate tiramisu need to chill?
Allow at least 4–6 hours, although overnight chilling generally gives the best results. The biscuits become softer and the cream firms up as the dessert rests.
Can I use regular biscuits instead of ladyfingers?
Yes. Plain tea biscuits or similar dry biscuits can work, although they will create a different texture. Dip them briefly in coffee or milk and avoid oversaturating them.
Can I prepare this dessert the day before?
Yes. This recipe is ideal for preparing ahead. Assemble the layers, cover the dish, and refrigerate overnight. Add decorative toppings just before serving.
Is this dessert suitable for children?
It can be made without coffee and served in small portions. Choose chocolate with a flavor your family enjoys, and remember that the dessert contains dairy.
How can I make the layers more defined?
Use a dish that fits the biscuits closely, spread the chocolate cream evenly, and allow the dessert to chill thoroughly before serving.
Final Thoughts
This 3-Ingredient No-Bake Chocolate Tiramisu proves that an impressive dessert doesn’t need a complicated recipe. With chocolate, whipped cream, and ladyfinger biscuits, you can create soft layers, rich chocolate flavor, and a creamy texture that feels indulgent with every spoonful.
The secret is to use good-quality chocolate, fold the cream gently, dip the biscuits quickly, and give the dessert enough time to chill. Prepare it ahead for guests or enjoy it as a simple weekend treat.
If you’re looking for an easy chocolate dessert without turning on the oven, this creamy chocolate tiramisu is a delicious recipe to keep on hand.
Add a quick recipe cardClarify the exact dish sizeResolve the three-ingredient wording