
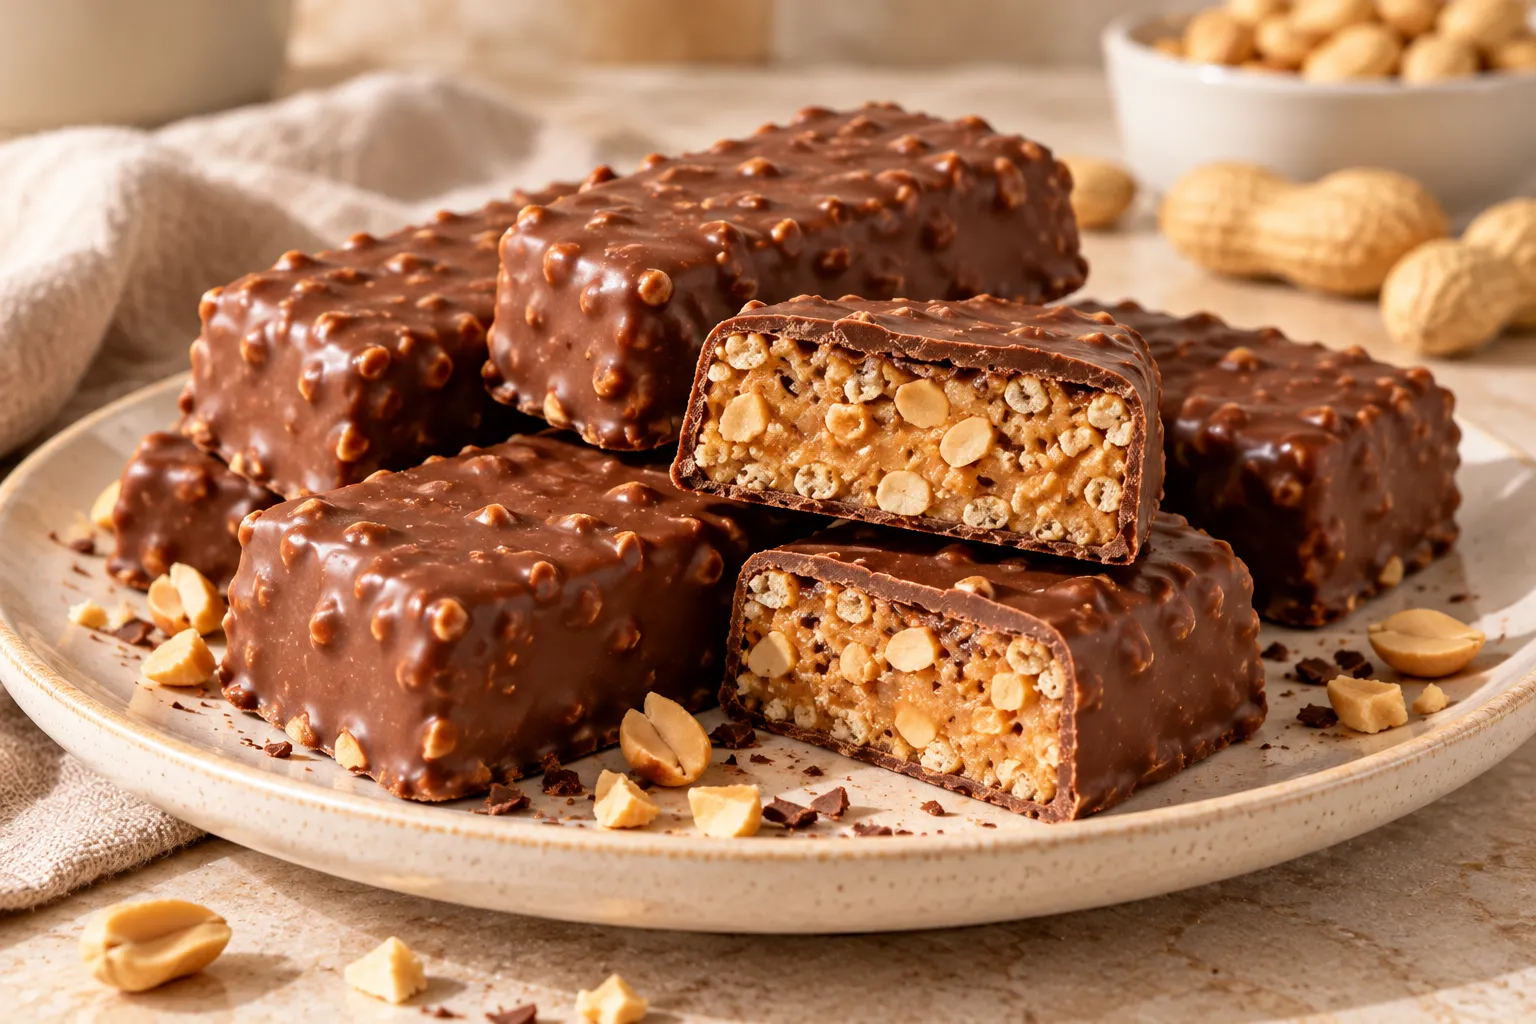
If you love the combination of rich chocolate, creamy peanut butter, and crunchy roasted peanuts, these Homemade Chocolate Peanut Bars are about to become one of your favorite sweet treats. With a smooth chocolate coating, a deliciously creamy peanut butter center, and plenty of satisfying crunch, these bars deliver the perfect balance of textures in every bite.
The best part? You can make them right at home with simple ingredients and no complicated baking techniques. Whether you’re preparing a quick afternoon snack, a homemade treat for your family, or a dessert to share with friends, these chocolate peanut bars are easy to prepare and wonderfully satisfying.
Inspired by the classic combination found in chocolate-covered peanut candy bars, this homemade version brings together sweet, salty, creamy, and crunchy flavors in one irresistible dessert. You can keep them simple or customize the filling with crushed biscuits, crispy rice cereal, or extra roasted peanuts.
If you’re looking for a homemade chocolate treat that looks impressive without requiring hours in the kitchen, these Chocolate Peanut Bars are an excellent choice.
Why You’ll Love These Homemade Chocolate Peanut Bars
Rich chocolate flavor: A generous chocolate coating creates a delicious outer layer that pairs beautifully with the nutty filling.
Creamy peanut butter center: Peanut butter gives the filling a smooth, rich texture and a classic sweet-and-salty flavor.
Satisfying crunch: Roasted peanuts add texture and make every bite more interesting.
Easy homemade recipe: You only need a handful of common ingredients and basic kitchen equipment.
No oven required: The bars set in the refrigerator, making this recipe especially convenient when you don’t want to bake.
Perfect for preparing ahead: Make a batch, chill it until firm, and enjoy homemade treats throughout the week.
Easy to customize: Add crispy rice cereal, crushed biscuits, a little sea salt, or different types of chocolate to create your favorite variation.
Ingredients for Homemade Chocolate Peanut Bars
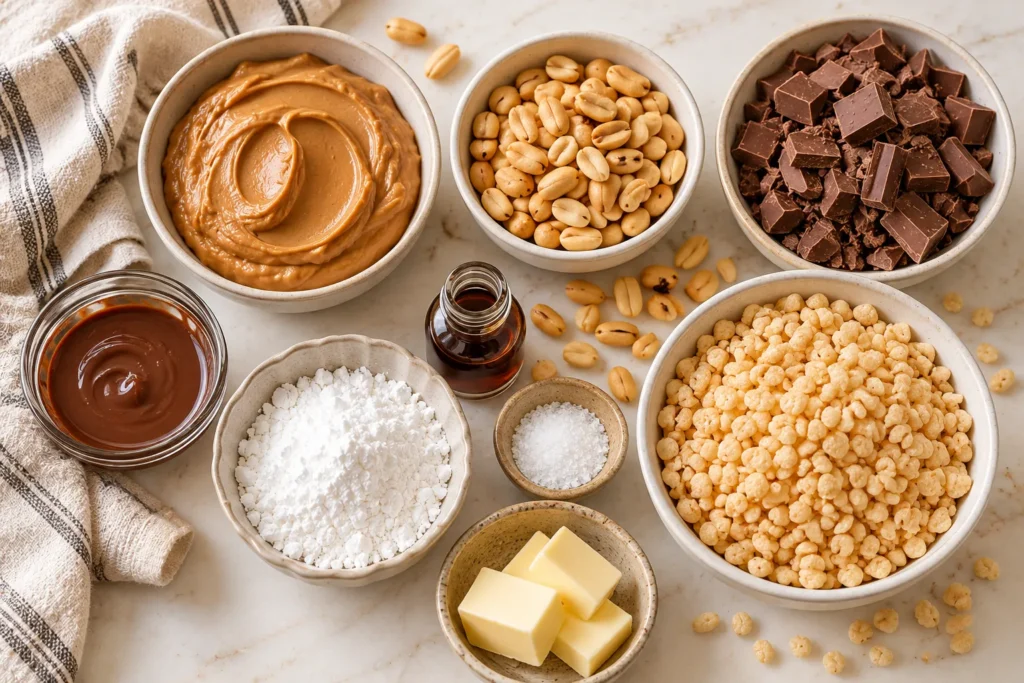
This recipe makes approximately 12–16 bars, depending on how you cut them.
For the Creamy Peanut Butter Filling
- 1 cup (250 g) creamy peanut butter
- 1/4 cup (55 g) unsalted butter, softened
- 1/2 cup (60 g) powdered sugar
- 1 teaspoon vanilla extract
- 1 cup (25–30 g) crispy rice cereal, optional
- 1/2 cup (60–70 g) roasted peanuts, roughly chopped
- A small pinch of salt, optional
For the Chocolate Coating
- 300 g milk chocolate or semisweet chocolate, chopped
- 1 tablespoon (15 ml) neutral vegetable oil or coconut oil, optional
The small amount of oil helps make the chocolate coating smoother and easier to cut once set. It is optional, especially if you’re using chocolate designed for coating.
Optional Decorations
- Extra chopped roasted peanuts
- Melted white chocolate for drizzling
- A small pinch of flaky sea salt
- Crushed roasted peanuts
- A few crispy rice cereal pieces
Ingredient Notes
Peanut butter: Regular creamy peanut butter works best because it produces a smooth filling that is easy to shape. Natural peanut butter can also work, but stir it thoroughly first because the oil separation may make the filling softer.
Chocolate: Milk chocolate creates a sweeter, candy-bar-style flavor. Semisweet chocolate gives a deeper chocolate taste and balances the sweetness of the filling.
Roasted peanuts: Roasted peanuts provide a stronger nutty flavor and a pleasant crunch. Use unsalted peanuts if you want more control over the final saltiness.
Powdered sugar: Powdered sugar helps the peanut butter filling hold its shape. Granulated sugar is not recommended because it can leave the filling gritty.
Crispy rice cereal: This ingredient is optional but highly recommended if you want extra crunch. Fold it in gently at the end to preserve as much texture as possible.
Kitchen Equipment You’ll Need
- A medium mixing bowl
- A small microwave-safe bowl or heatproof bowl
- A rubber spatula
- A whisk or spoon
- A square baking pan or rectangular container
- Parchment paper
- A sharp knife
- A refrigerator
- A microwave or saucepan for melting chocolate
A small rectangular pan works well because it helps create evenly shaped bars. If you prefer individual candy-bar shapes, you can also form the filling by hand and coat each piece separately.
How to Make Homemade Chocolate Peanut Bars
Step 1: Prepare the Pan
Line an 8-by-8-inch square baking pan or a similar-sized rectangular container with parchment paper.
Leave a little parchment overhanging two opposite sides. This creates convenient handles for lifting the chilled filling out of the pan later.
Set the pan aside while you prepare the peanut butter mixture.
Step 2: Mix the Peanut Butter and Butter
Place the peanut butter and softened butter in a medium mixing bowl.
Stir until the mixture is smooth, creamy, and evenly combined. If the peanut butter is very firm, allow it to soften slightly at room temperature before mixing.
Add the vanilla extract and stir again.
The mixture should be thick and creamy without visible streaks of butter.
Step 3: Add the Powdered Sugar
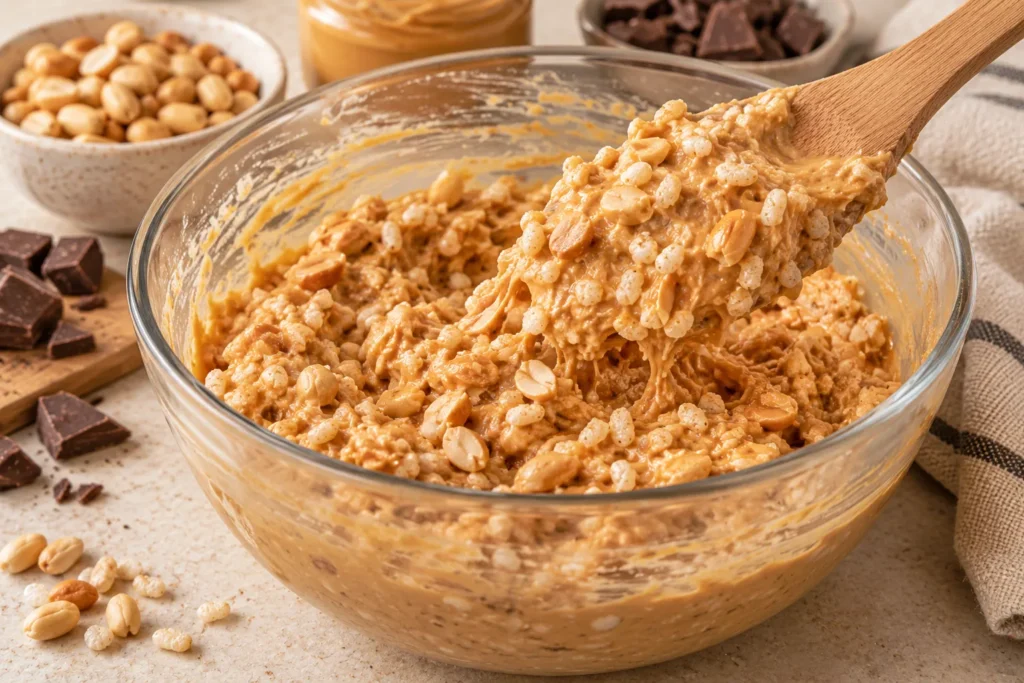
Gradually add the powdered sugar, mixing after each addition.
The filling will become thicker as the sugar is incorporated. Continue mixing until it forms a soft, moldable mixture that holds together when pressed.
If the mixture is too soft to shape, add another tablespoon of powdered sugar. If it seems unusually dry or crumbly, add a small amount of peanut butter.
Avoid adding too much sugar at once, because the filling should remain creamy rather than becoming hard or powdery.
Step 4: Fold in the Peanuts and Crispy Cereal
Add the chopped roasted peanuts and, if using, the crispy rice cereal.
Fold gently with a spatula until the ingredients are evenly distributed.
Try not to crush the cereal too much. The small crisp pieces help create a texture similar to crunchy chocolate peanut candy bars.
Taste a small amount and adjust the salt if necessary. Remember that the chocolate coating will also contribute sweetness.
Step 5: Press the Filling into the Pan
Transfer the peanut butter mixture to the prepared pan.
Press it into an even layer using the back of a spoon or a spatula. Pay particular attention to the corners so that the finished bars have a consistent thickness.
Smooth the surface and cover the pan.
Refrigerate for approximately 45–60 minutes, or until the filling is firm enough to cut cleanly.
If the mixture is still very soft, give it more time in the refrigerator.
Step 6: Cut the Peanut Butter Filling into Bars
Use the parchment paper to lift the chilled filling out of the pan and place it on a cutting board.
With a sharp knife, cut the slab into 12–16 rectangular bars.
For cleaner cuts, wipe the knife between slices. If the filling softens while you’re working, return it to the refrigerator for 10–15 minutes.
The bars should be firm enough to handle without breaking apart.
Step 7: Melt the Chocolate
Place the chopped chocolate in a microwave-safe bowl.
Microwave in 20–30-second intervals, stirring between each interval until the chocolate is mostly melted. Continue stirring until the remaining pieces melt and the mixture becomes smooth.
Alternatively, place the chocolate in a heatproof bowl over a saucepan of gently simmering water. Make sure the bottom of the bowl does not touch the water, and keep steam and water away from the chocolate.
If desired, stir in the vegetable oil or coconut oil to create a smoother coating.
Do not overheat the chocolate. Excessive heat can make it thick, grainy, or difficult to work with.
Step 8: Coat the Bars in Chocolate
Place a chilled peanut butter bar on a fork or dipping tool.
Lower it into the melted chocolate, turning gently until all sides are coated. Lift it out and allow the excess chocolate to drip back into the bowl.
Transfer the coated bar to a parchment-lined tray.
Repeat with the remaining bars. If the chocolate becomes too thick while dipping, warm it briefly and stir until smooth.
For a simpler finish, you can also pour the chocolate over the top of the bars rather than coating every side, although a full coating provides a more classic candy-bar appearance.
Step 9: Add the Decorations
While the chocolate coating is still wet, sprinkle the tops with chopped roasted peanuts or a small pinch of flaky sea salt.
For a decorative finish, drizzle melted white chocolate over the bars once the main chocolate coating has started to set.
Keep the decorations simple so the chocolate coating and peanut filling remain the main focus.
Step 10: Chill Until Firm
Place the coated bars on the parchment-lined tray and refrigerate for approximately 20–30 minutes, or until the chocolate is completely firm.
Once set, transfer the bars to an airtight container.
For the cleanest presentation, allow the chocolate to set fully before stacking the bars. If you need to stack them, separate the layers with parchment paper.
Tips for the Best Chocolate Peanut Bars
Use good-quality chocolate. Chocolate that melts smoothly gives the bars a more attractive coating and better flavor.
Chill the filling before cutting. Firm filling is much easier to slice into neat rectangles.
Keep the peanut butter mixture balanced. Too much powdered sugar can make the filling dry, while too little can leave it too soft.
Use roasted peanuts for extra flavor. Roasting enhances the natural nuttiness and creates a more pronounced flavor.
Do not overheat the chocolate. Melt it gradually and stir frequently to prevent scorching.
Keep water away from melted chocolate. Even a small amount of water can cause melted chocolate to seize and become thick or grainy.
Work with chilled bars. Cold filling is easier to dip and less likely to crumble in the warm chocolate.
Allow excess chocolate to drip off. This creates a cleaner coating and prevents large pools of chocolate from forming around the bars.
Let the coating set completely. Refrigerating the bars until firm helps create a neat finish and makes them easier to store.
Common Mistakes and How to Fix Them
| Problem | Possible Cause | Solution |
|---|---|---|
| Filling is too soft | Peanut butter is very oily or too little powdered sugar was added | Chill longer and add a little powdered sugar if necessary |
| Filling is dry or crumbly | Too much powdered sugar | Mix in a small amount of peanut butter |
| Chocolate becomes grainy | Chocolate overheated or water entered the bowl | Melt gently and keep utensils dry |
| Coating is too thick | Chocolate is too cool or unsuitable for dipping | Warm gently and add a little oil if needed |
| Bars break during dipping | Filling is not cold or firm enough | Chill the bars thoroughly before coating |
| Chocolate coating cracks | Bars were extremely cold or the coating was thick | Let the bars stand briefly before serving and use a thinner coating |
| Bars stick to the pan | Pan was not lined properly | Use parchment paper with overhanging edges |
| Bars are difficult to cut | Filling is too hard or knife is dull | Let the slab soften slightly and use a sharp knife |
Delicious Variations to Try
Crunchy Chocolate Peanut Bars
For a more pronounced crunch, add extra crispy rice cereal and chopped roasted peanuts. Fold them into the filling gently so the cereal stays crisp.
Dark Chocolate Peanut Bars
Replace the milk chocolate coating with dark chocolate. The slightly bitter chocolate balances the sweetness of the peanut butter filling and creates a more intense flavor.
Chocolate Peanut Butter Bars with Sea Salt
Sprinkle a small amount of flaky sea salt over the chocolate coating before it sets. The salt highlights the roasted peanut flavor and balances the sweetness.
Peanut Butter and Biscuit Bars
Replace some of the crispy rice cereal with finely crushed plain biscuits or graham crackers. This creates a slightly denser filling with a pleasant biscuit flavor.
White Chocolate Peanut Bars
Use white chocolate for the coating if you prefer a sweeter, creamier flavor. Because white chocolate is sensitive to heat, melt it slowly and stir frequently.
Extra-Creamy Peanut Butter Bars
For a softer center, omit the crispy cereal and use a smooth peanut butter filling. Keep the bars refrigerated until serving so the filling maintains its shape.
Chocolate Peanut Bars with a Swirl
Before the chocolate coating sets, drizzle a small amount of melted white chocolate or additional peanut butter over the top. Use a toothpick to create a simple swirl pattern.
How to Store Homemade Chocolate Peanut Bars
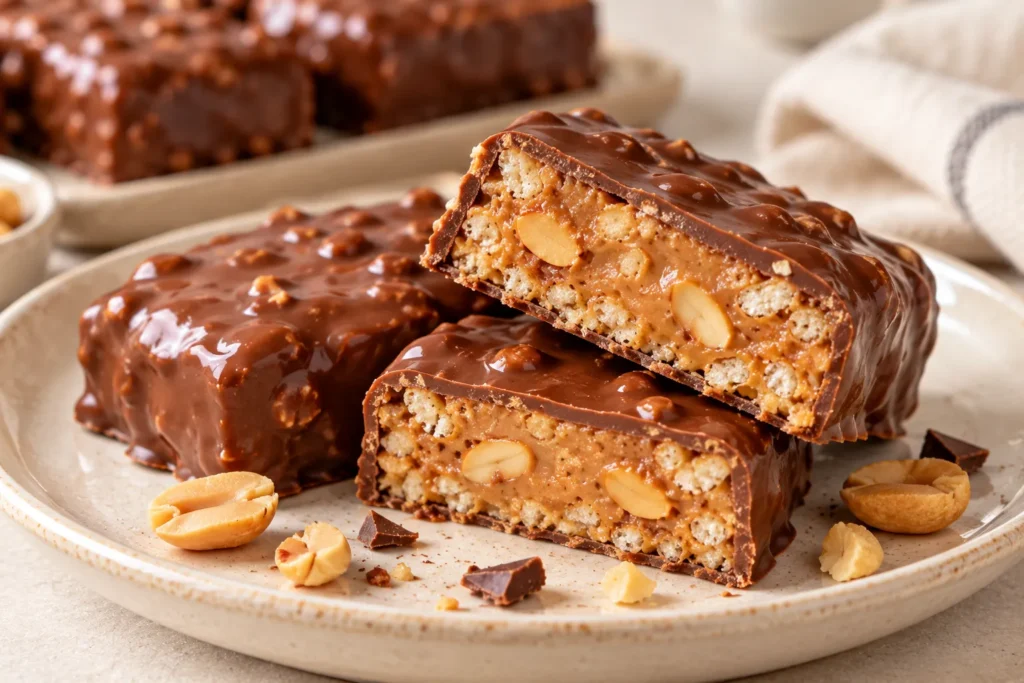
These bars are easy to store, making them convenient for preparing desserts and snacks ahead of time.
In the refrigerator: Store the bars in an airtight container for approximately 1–2 weeks for good quality. Separate layers with parchment paper to prevent sticking.
At room temperature: The bars may soften considerably in a warm kitchen, particularly if the peanut butter filling contains a lot of oil. For the best texture and food safety, follow the storage guidance for your ingredients and keep the bars refrigerated when in doubt.
In the freezer: Place the bars in a single layer on a tray and freeze until firm. Transfer them to a freezer-safe airtight container, separating layers with parchment paper. They can generally be frozen for up to 2–3 months for good quality.
To serve from the freezer: Transfer the desired number of bars to the refrigerator and allow them to thaw gradually. Let them stand briefly at room temperature before serving if you prefer a softer filling.
Avoid repeatedly warming and cooling the entire batch, as temperature changes can affect the chocolate coating and filling texture.
Can You Make Chocolate Peanut Bars Ahead of Time?
Yes. These bars are excellent for make-ahead preparation.
You can prepare the peanut butter filling, chill it, cut it into bars, and coat the pieces in chocolate a day or two before serving. Store the finished bars in a covered container in the refrigerator.
For parties or special occasions, prepare them the day before and add any delicate decorations shortly before serving.
If you are making a large batch, work in small groups when dipping the bars. Keep the remaining pieces chilled while you coat each batch so the filling stays firm.
What to Serve with Chocolate Peanut Bars
These chocolate peanut bars are rich and satisfying, so they pair especially well with simple drinks and fresh accompaniments.
- Coffee: Black coffee or espresso balances the sweet chocolate coating.
- Milk: Cold milk is a classic pairing with chocolate and peanut butter.
- Tea: A cup of black tea works well with the nutty filling.
- Fresh strawberries: Their bright, slightly tart flavor contrasts with the rich chocolate.
- Banana slices: Banana complements peanut butter and creates a familiar dessert combination.
- Vanilla ice cream: Serve a small bar alongside a scoop of vanilla ice cream for a more indulgent dessert.
Because the bars are rich, cutting them into smaller pieces can make them ideal for dessert platters or parties.
Frequently Asked Questions
Can I make chocolate peanut bars without baking?
Yes. This recipe is designed to be prepared without an oven. Mix the peanut butter filling, chill it until firm, coat the bars in melted chocolate, and refrigerate until set.
Can I use natural peanut butter?
Yes, but natural peanut butter often has a looser texture because the oil separates. Stir it thoroughly before measuring, and expect that you may need slightly more powdered sugar or additional chilling time.
Why is my peanut butter filling too soft?
The filling may contain too much oil or may not have chilled long enough. Refrigerate it until firm. If it remains too soft to handle, mix in a little extra powdered sugar before chilling again.
Can I use crunchy peanut butter?
Absolutely. Crunchy peanut butter adds another layer of texture. If you also add chopped peanuts and crispy rice cereal, consider reducing the extra crunchy ingredients slightly to keep the bars easy to cut.
What chocolate is best for coating the bars?
Milk chocolate creates a sweeter candy-bar-style finish, while semisweet or dark chocolate gives a richer, less sweet flavor. Choose a chocolate that melts smoothly and tastes good on its own.
Can I make these bars without crispy rice cereal?
Yes. The cereal is optional. Without it, the filling will be smoother and more similar to a classic peanut butter candy center. You can also replace it with crushed biscuits or simply add extra chopped peanuts.
How do I get a smooth chocolate coating?
Melt the chocolate slowly, stir regularly, and use chilled bars. Allow excess chocolate to drip off before placing each bar on parchment paper. A little neutral oil can help the coating flow more smoothly, although it will not create a professionally tempered chocolate shell.
Why does the chocolate coating crack?
A thick coating, rapid temperature changes, or very cold bars can contribute to cracking. Let the bars stand briefly before serving and avoid dipping them in excessively hot chocolate.
Can I use white chocolate instead?
Yes. White chocolate creates a sweeter finish and pairs well with peanut butter. Melt it gently because it can scorch more easily than many dark chocolates.
Are homemade chocolate peanut bars gluten-free?
They can be, depending on the ingredients. Peanut butter, chocolate, and peanuts are often naturally gluten-free, but crispy rice cereal, biscuits, and packaged products may contain gluten or be subject to cross-contact. Check the labels of every ingredient if gluten avoidance is important.
How long do homemade chocolate peanut bars last?
For the best quality, store them in an airtight container in the refrigerator and enjoy them within approximately 1–2 weeks. They can also be frozen for longer storage.
Final Thoughts
These Homemade Chocolate Peanut Bars combine a creamy peanut butter filling, crunchy roasted peanuts, and a rich chocolate coating to create a delicious homemade treat. They are easy to prepare, require no oven, and can be customized with different chocolates, crispy cereal, biscuits, or a sprinkle of sea salt.
For the best results, chill the filling until firm, melt the chocolate gently, and allow the coating to set completely before storing the bars. A little patience makes it easier to achieve neat shapes and a smooth chocolate finish.
Serve them with coffee, share them with friends, or keep a small batch in the refrigerator for whenever you want something sweet and chocolatey.
Once you try the combination of creamy peanut butter, crunchy peanuts, and chocolate, these homemade bars may become a regular addition to your dessert rotation.
Recipe Card
Recipe: Homemade Chocolate Peanut Bars – Crunchy, Creamy & Irresistible!
Preparation time: 25 minutes
Chilling time: 1 hour 15 minutes to 1 hour 30 minutes
Total time: Approximately 1 hour 45 minutes to 2 hours
Yield: 12–16 bars
Category: Dessert, Candy, No-Bake Treat
Method: No-bake, refrigerator-set
Ingredients
Peanut Butter Filling
- 1 cup (250 g) creamy peanut butter
- 1/4 cup (55 g) unsalted butter, softened
- 1/2 cup (60 g) powdered sugar
- 1 teaspoon vanilla extract
- 1 cup crispy rice cereal, optional
- 1/2 cup (60–70 g) roasted peanuts, chopped
- Pinch of salt, optional
Chocolate Coating
- 300 g milk or semisweet chocolate, chopped
- 1 tablespoon neutral vegetable oil or coconut oil, optional
Instructions
- Line an 8-by-8-inch pan with parchment paper.
- Mix the peanut butter, softened butter, and vanilla until smooth.
- Gradually add the powdered sugar and mix until the filling is thick and moldable.
- Fold in the chopped roasted peanuts, crispy rice cereal, and optional salt.
- Press the mixture evenly into the prepared pan and refrigerate for 45–60 minutes.
- Lift out the firm filling and cut it into 12–16 rectangular bars.
- Melt the chocolate gently in a microwave or over a saucepan of simmering water.
- Stir in the optional oil if desired, then dip each chilled bar into the melted chocolate.
- Place the coated bars on a parchment-lined tray and decorate with extra chopped peanuts or flaky sea salt.
- Refrigerate for 20–30 minutes, or until the chocolate is firm.
- Store the bars in an airtight container in the refrigerator.
Recipe Notes
- Use creamy peanut butter for a smooth filling.
- Chill the bars thoroughly before dipping them in chocolate.
- Keep all water away from melted chocolate.
- Adjust the powdered sugar slightly if your peanut butter is unusually oily.
- Store the finished bars in the refrigerator for the best texture.